
⚡ Quick Answer
To install Fooocus on Windows, download Fooocus_win64_2-5-0.7z from the official GitHub page, extract it to any folder, and double-click run.bat. Fooocus downloads its default AI model automatically the first time it opens — no Python, no command line, and no manual model setup needed. One Windows setting trips up more people than the install itself, covered further down this page.
If you've looked into local AI image generation before, you've probably seen ComfyUI or Automatic1111 mentioned — and probably felt a little overwhelmed by them. Both are powerful, but both expect you to understand things like nodes and samplers before you've even generated your first image.
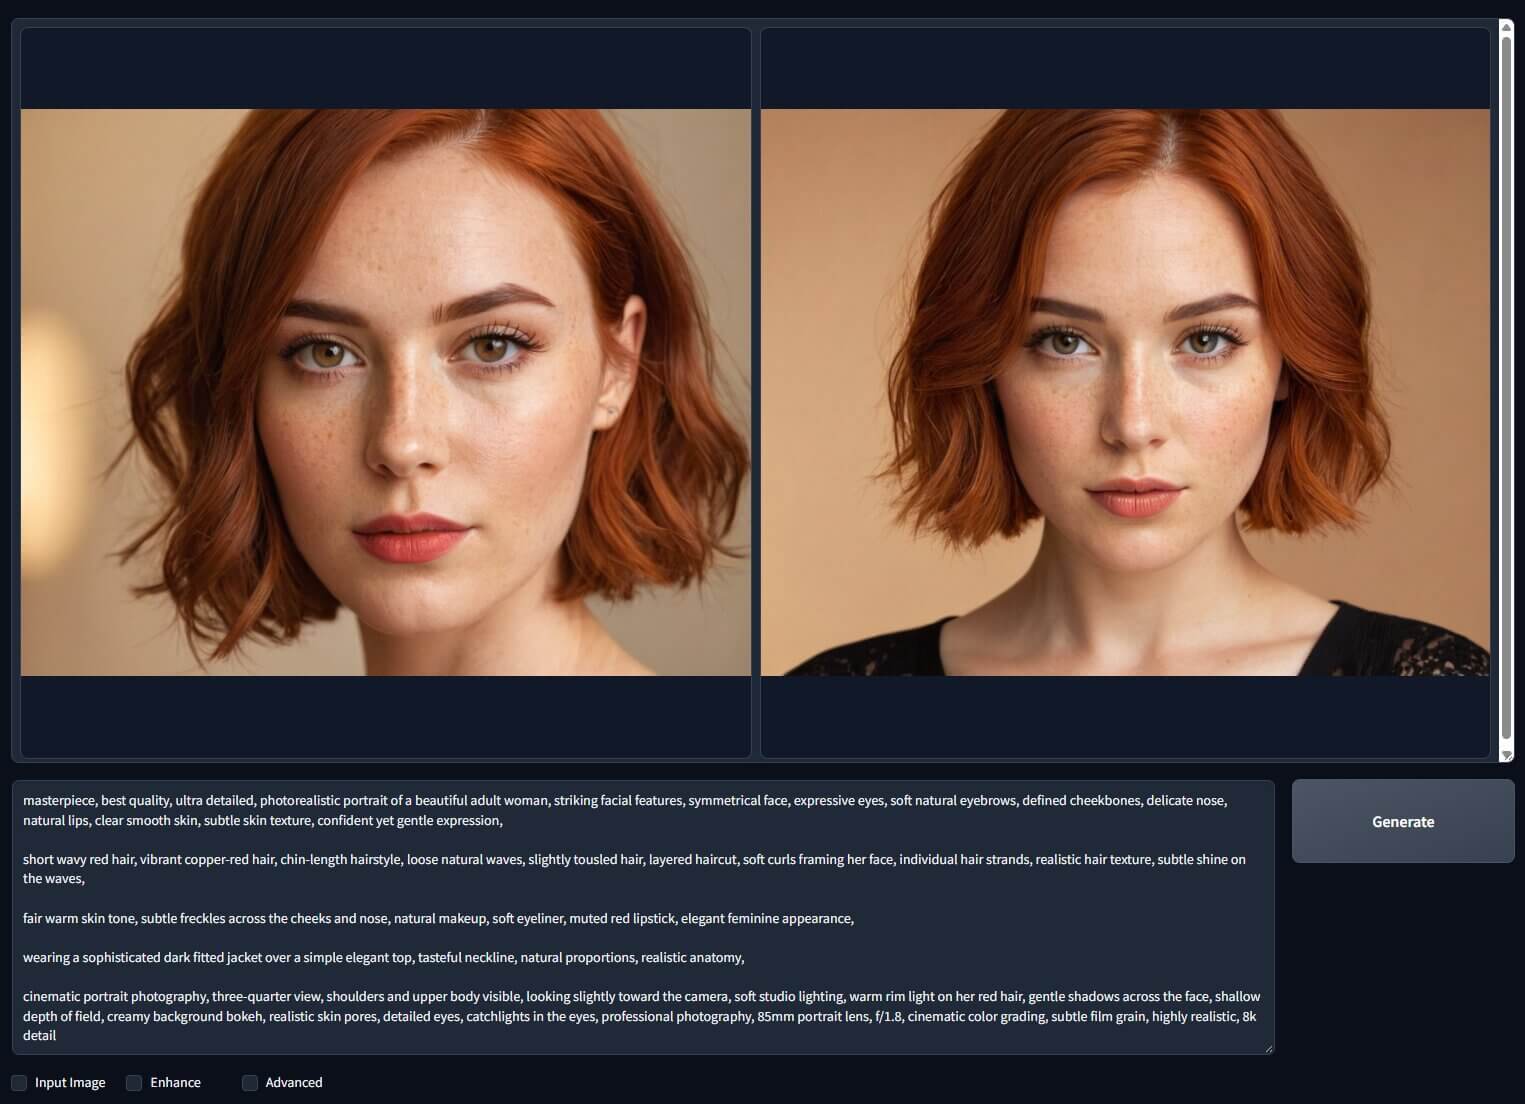
Fooocus skips all of that. You type a description, press a button, and get an image — closer to how Midjourney works, except it runs entirely on your own PC, for free, with nothing uploaded anywhere.
This guide walks through how to install Fooocus on Windows from the official download, step by step, plus the one setting that causes most first-time crashes — and the two exact error messages you're most likely to see if you skip it.
What You Need Before You Install Fooocus on Windows
Fooocus doesn't need much. Here's what actually matters before you start.
Graphics Card and Memory
| Your Setup | Minimum Needed |
|---|---|
| Nvidia GPU (RTX or GTX 900-series and newer) | 4GB VRAM + 8GB system RAM |
| AMD GPU (via DirectML) | 8GB VRAM + 8GB system RAM — about 3x slower than Nvidia |
| No dedicated GPU (CPU only) | 32GB system RAM — expect several minutes per image |
If your GPU is older than a GTX 900-series card, Fooocus won't run on it at all.
The File You Need to Download
As of this guide, the current official Windows release is Fooocus_win64_2-5-0.7z. This is a .7z file, a compressed format similar to a ZIP file. If you're on Windows 10 or an older build of Windows 11, you'll need a free tool called 7-Zipto open it — Windows 11's newer versions (24H2 and later) can open .7z files without any extra software.
You don't need to install Python, Git, or anything else beforehand. The download includes everything Fooocus needs to run.
Only Download Fooocus From the Official GitHub Page
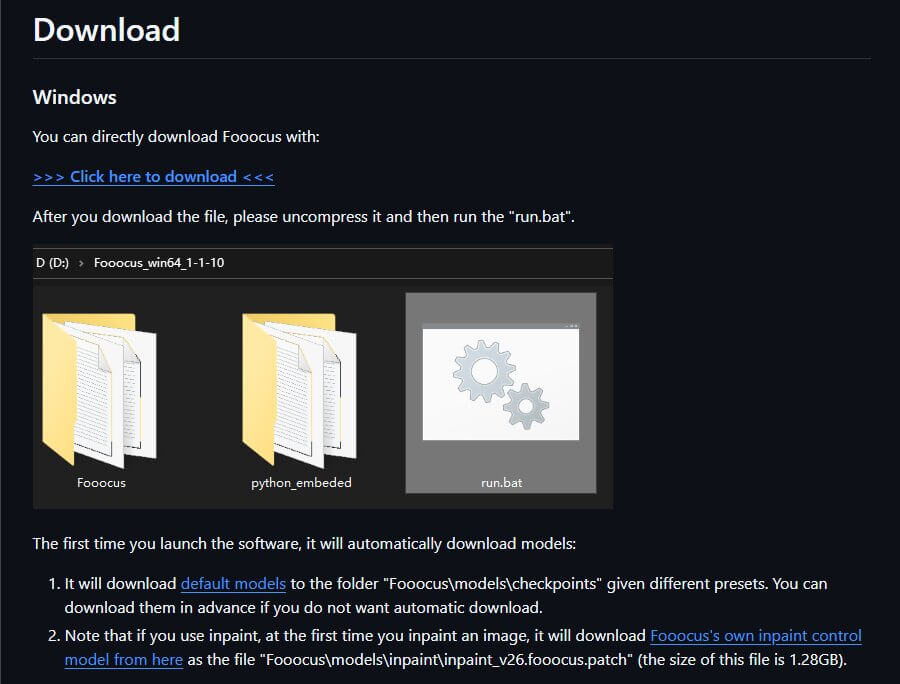
When Fooocus first launches, it will also automatically download its main AI model — called a checkpoint(this is the file that actually controls what your images look like, similar to choosing a specific artist's style). You don't need to find or download this yourself; Fooocus handles it during the install steps below.
Download Fooocus for Windows(Fooocus_win64_2-5-0.7z)How to Install Fooocus on Windows (Step by Step)
Step 1: Download the Fooocus ZIP File
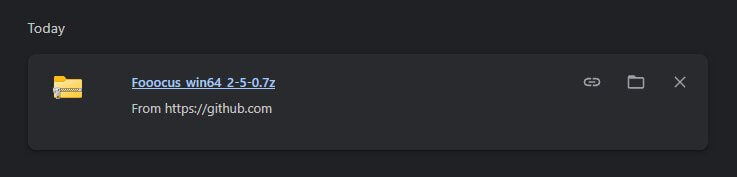
Go to the official Fooocus GitHub page and find the Windows section. Click the "Click here to download" link. This starts downloading Fooocus_win64_2-5-0.7z — the file is a little over 1GB, so on an average connection this takes a few minutes.
Save it somewhere you'll remember, like your Desktop or a dedicated folder such as D:\AI Tools. Avoid saving it inside a folder path that has unusual characters or a language other than English in the name — this has caused extraction problems for some users.
Step 2: Extract the 7z File
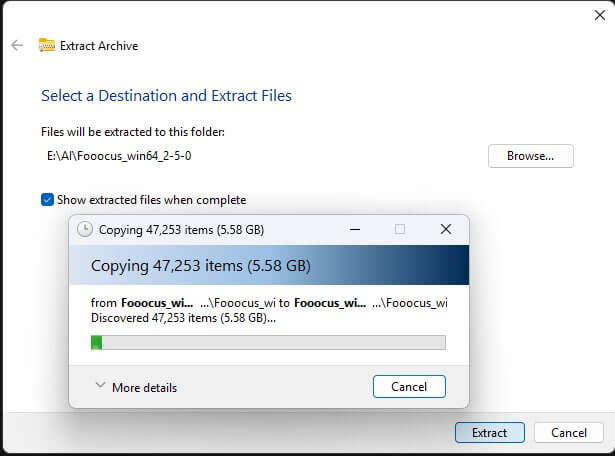
Right-click the downloaded .7z file. If you have 7-Zip installed, you'll see a 7-Zip option in the right-click menu — select Extract Here or Extract to "Fooocus_win64_2-5-0\". If you don't have 7-Zip yet, download it free from 7-zip.org first, then come back and try again.
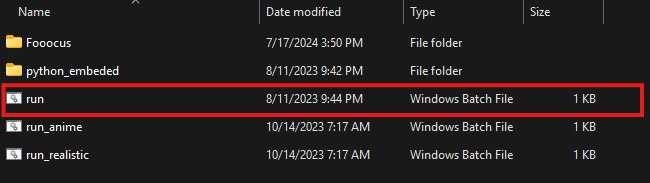
After extraction finishes, you'll have a new folder containing several files, including three that matter most: run.bat, run_anime.bat, and run_realistic.bat.
Step 3: Run run.bat to Launch Fooocus
Open the extracted Fooocus folder and double-click run.bat. This is a batch file — a small script that starts Fooocus for you. A black command-line window will pop up. This is normal; it's just showing you what's happening behind the scenes.
The first time you run it, Fooocus needs to finish setting itself up and download its default model. This can take anywhere from a few minutes to 20+ minutes, depending on your internet speed — the window may look like nothing is happening for stretches at a time. That's expected. Don't close it.
Step 4: Wait for the First-Time Model Download
Once the download finishes, the command-line window will show a local web address, and your default browser will open automatically to http://localhost:7865. This is the Fooocus interface — a simple page with a text box for your prompt and a Generate button.
If your browser doesn't open on its own, just type http://localhost:7865into any browser's address bar yourself.
At this point, Fooocus is fully installed. Type a short description into the prompt box and press Generate to create your first image.
The One Windows Setting Almost Everyone Misses (Virtual Memory)
Here's the part most install guides skip entirely, and it's the reason a lot of first-time Fooocus users hit a crash they don't understand.
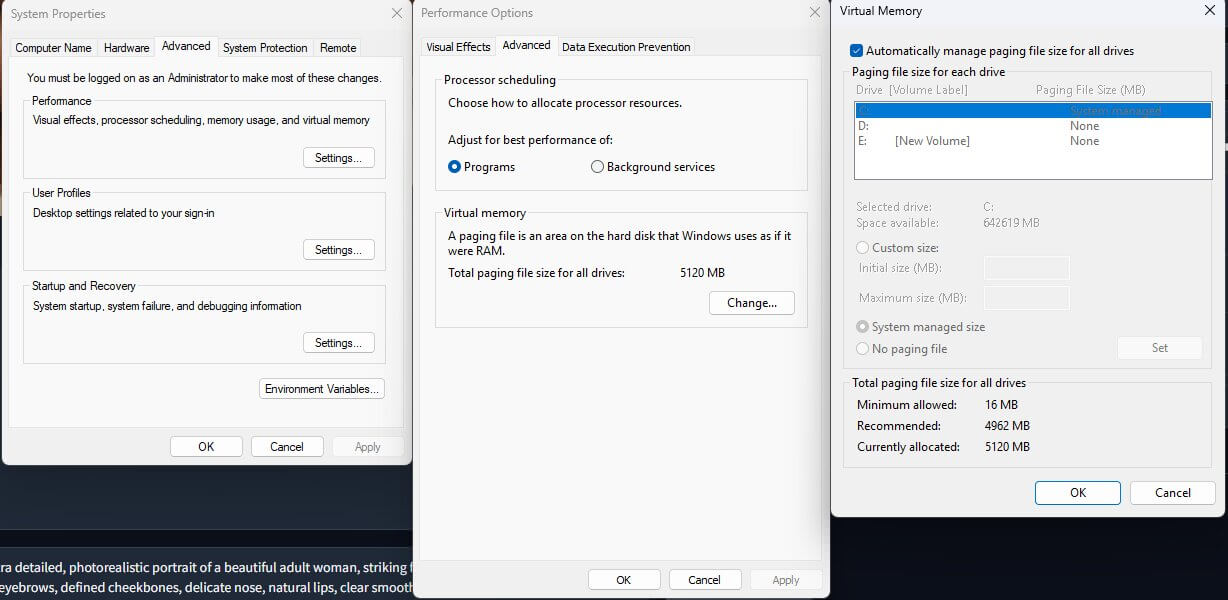
Fooocus relies on a Windows feature called virtual memory(also called system swap) — this is disk space your computer borrows as extra memory when your actual RAM runs low during a big task, like generating an image. Windows usually manages this automatically, but if it's been manually turned off, set too small, or your drive is nearly full, Fooocus can crash the moment it tries to load the model.
You almost never need to change this setting by hand — Windows 10 and 11 handle it correctly by default in the vast majority of cases. But it's worth checking now, before you run into a crash, rather than after:
- Press the Windows key, type "advanced system settings", and open View advanced system settings.
- Under the Advanced tab, click Settings in the Performance section.
- Go to the Advanced tab again, and click Change under Virtual Memory.
- Make sure "Automatically manage paging file size for all drives" is checked.
Troubleshooting: Common Fooocus Windows Install Errors
"RuntimeError: CPUAllocator"
This is almost always caused by the virtual memory issue above — Windows doesn't have enough swap space available to load the model. Go back to the Virtual Memory steps and confirm automatic management is turned on, and free up disk space if you're low. Restart your computer after making any change here, since Windows only applies virtual memory changes after a restart.
"MetadataIncompleteBuffer" or "PytorchStreamReader failed"
This means one of the downloaded model files — a safetensors file (this is the file format Fooocus uses to store its AI models) — got corrupted during download, usually from an interrupted internet connection. Fooocus will usually try to re-download the file automatically the next time you launch it, as long as your internet connection is stable. If it doesn't, delete the corrupted file from the Fooocus\models\checkpoints folder and restart Fooocus to force a fresh download.
Fooocus Suddenly Runs Much Slower Than Before
If Fooocus was working fine and then image generation suddenly got noticeably slower without you changing anything, the cause is usually a recent Nvidia driver update. Some Nvidia drivers numbered 532 and higher have been reported to run up to 10x slower than driver version 531 for Stable Diffusion-based software like Fooocus. If this happens to you, try rolling back to Nvidia driver 531 from Nvidia's official driver download page and see if speed returns to normal.
Frequently Asked Questions
What to Do Next
Once you're comfortable in Fooocus, try ComfyUI next.
Fooocus is the fastest way to start generating images. Once you want more control over your results — custom workflows, ControlNet, LoRA stacking — ComfyUI is the natural next step.
Published: 2026-09-19 · Last updated: 2026-09-19 · Steps verified against the official Fooocus v2.5.0 Windows release.
Join the discussion
Sign in to leave a comment or reply
No comments yet
Be the first to share your thoughts!