
⚡ Quick Answer
The real mistake isn't picking "the wrong tool" between ComfyUI and Fooocus — it's installing one before checking whether it matches the time you actually want to spend today. Fooocus gets you a finished image in about 3 minutes. ComfyUI takes closer to 15–20 minutes just to feel comfortable, but it gives you more control and gets new AI models first. Skip that check, and you'll waste the first 20 minutes either fighting ComfyUI's node graph when you just wanted a quick picture, or hitting Fooocus's ceiling when you needed more control.
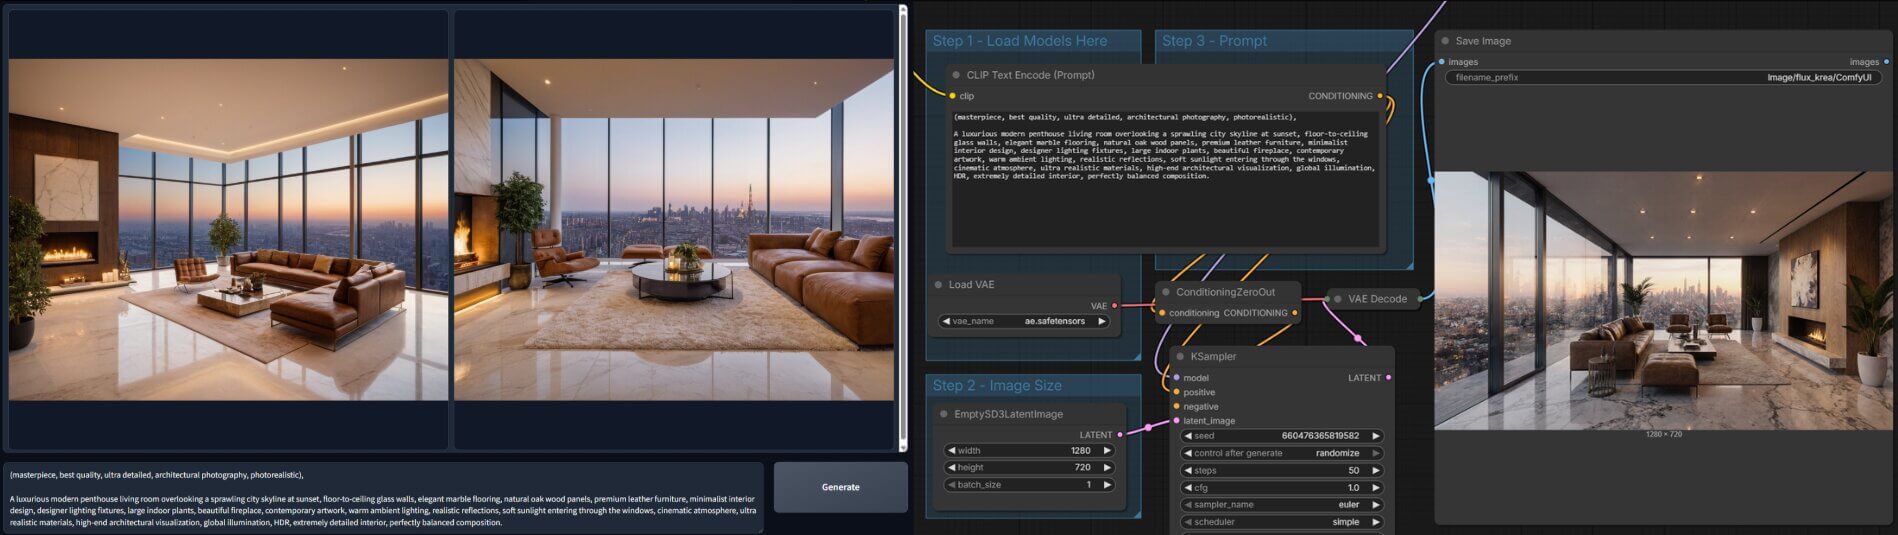
What's the 20-Minute Mistake Beginners Actually Make?
Most people pick between ComfyUI and Fooocus by reading a features list, downloading whichever one sounds more powerful, and getting stuck. That's the mistake — not that either tool is bad, but that the two are built for completely different amounts of patience, and nobody checks which one they actually have before starting.
Someone installs ComfyUI because it's "the professional option." Ten minutes later they're staring at a screen full of connected nodes with no idea what any of them do, and they close it and never come back. Or someone installs Fooocus because it's "for beginners," gets a great image in three minutes, and a week later wants to combine two AI models in one generation — something Fooocus isn't built to do — and has no idea why it won't work.
Both are the same mistake: picking a tool before checking what it's actually for. This article covers what each one does, what each can't do, and a straight answer on which fits the 20 minutes — or the 3 minutes — you have right now.
What Is Fooocus?
Fooocus is a free, open-source interface for generating AI images. You type a prompt, click Generate, and get an image — closer to Midjourney than to a traditional settings-heavy app. It was built by lllyasviel, the same developer behind the ControlNet extension and the Forge interface.
You may also see it written as "Focus AI" online. That's not an official name — just a common misspelling of "Fooocus," which has three o's.
github.com/lllyasviel/Fooocus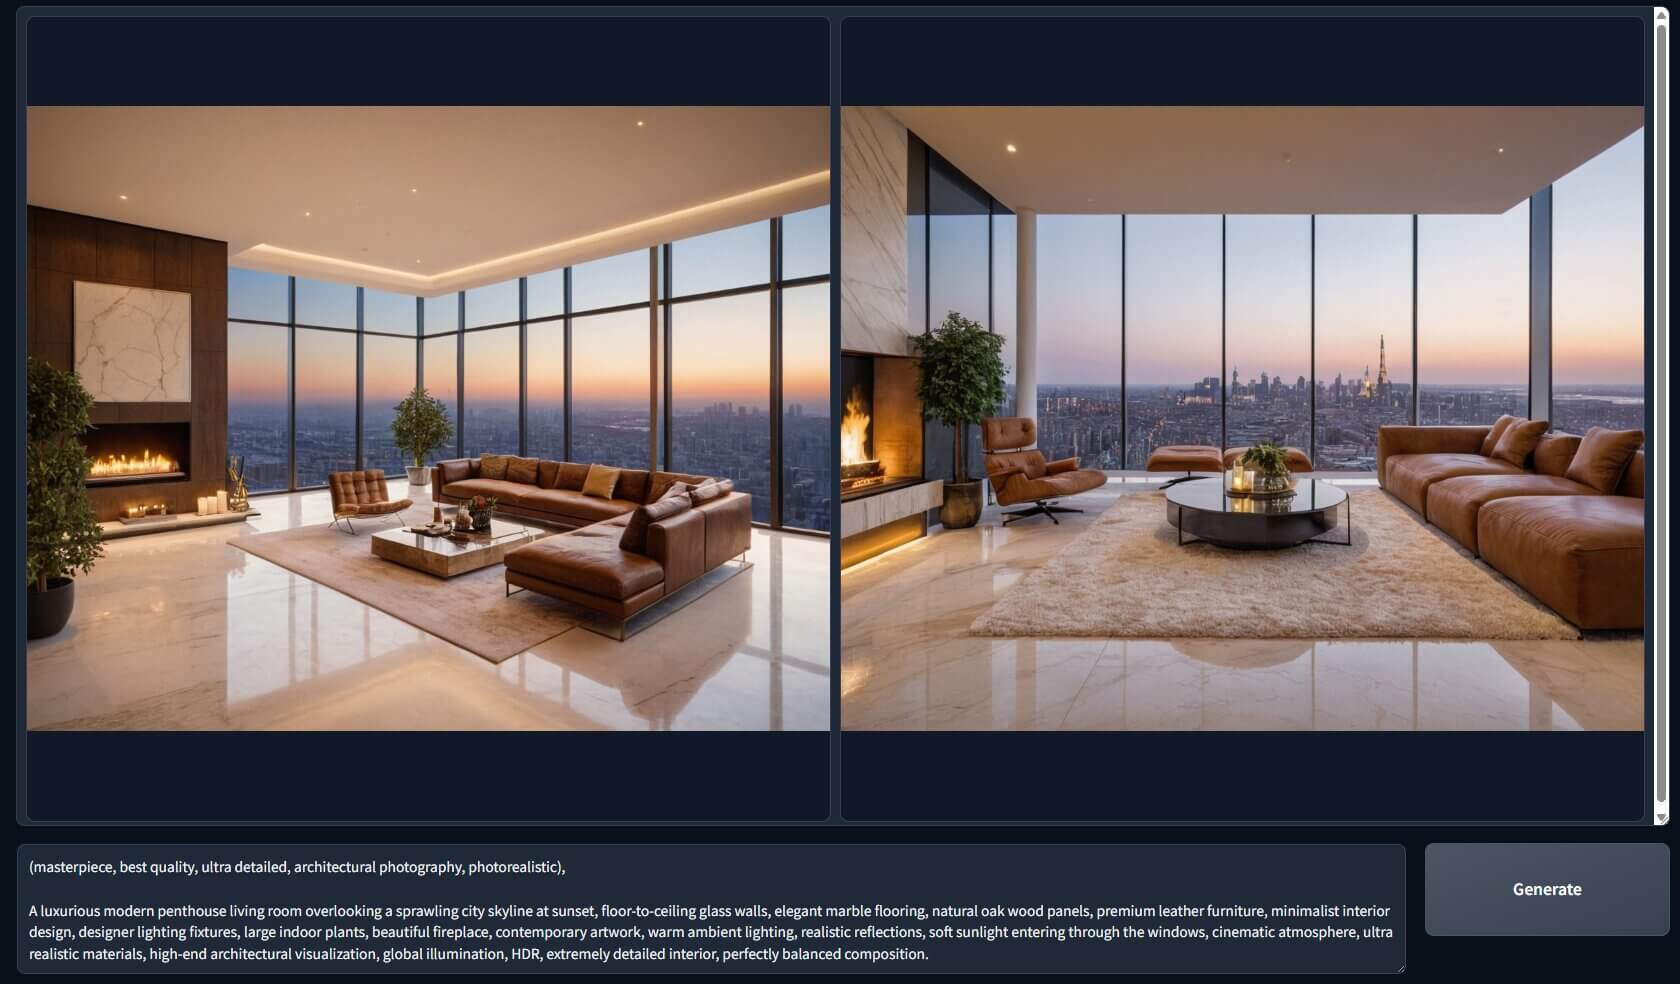
What Is ComfyUI?
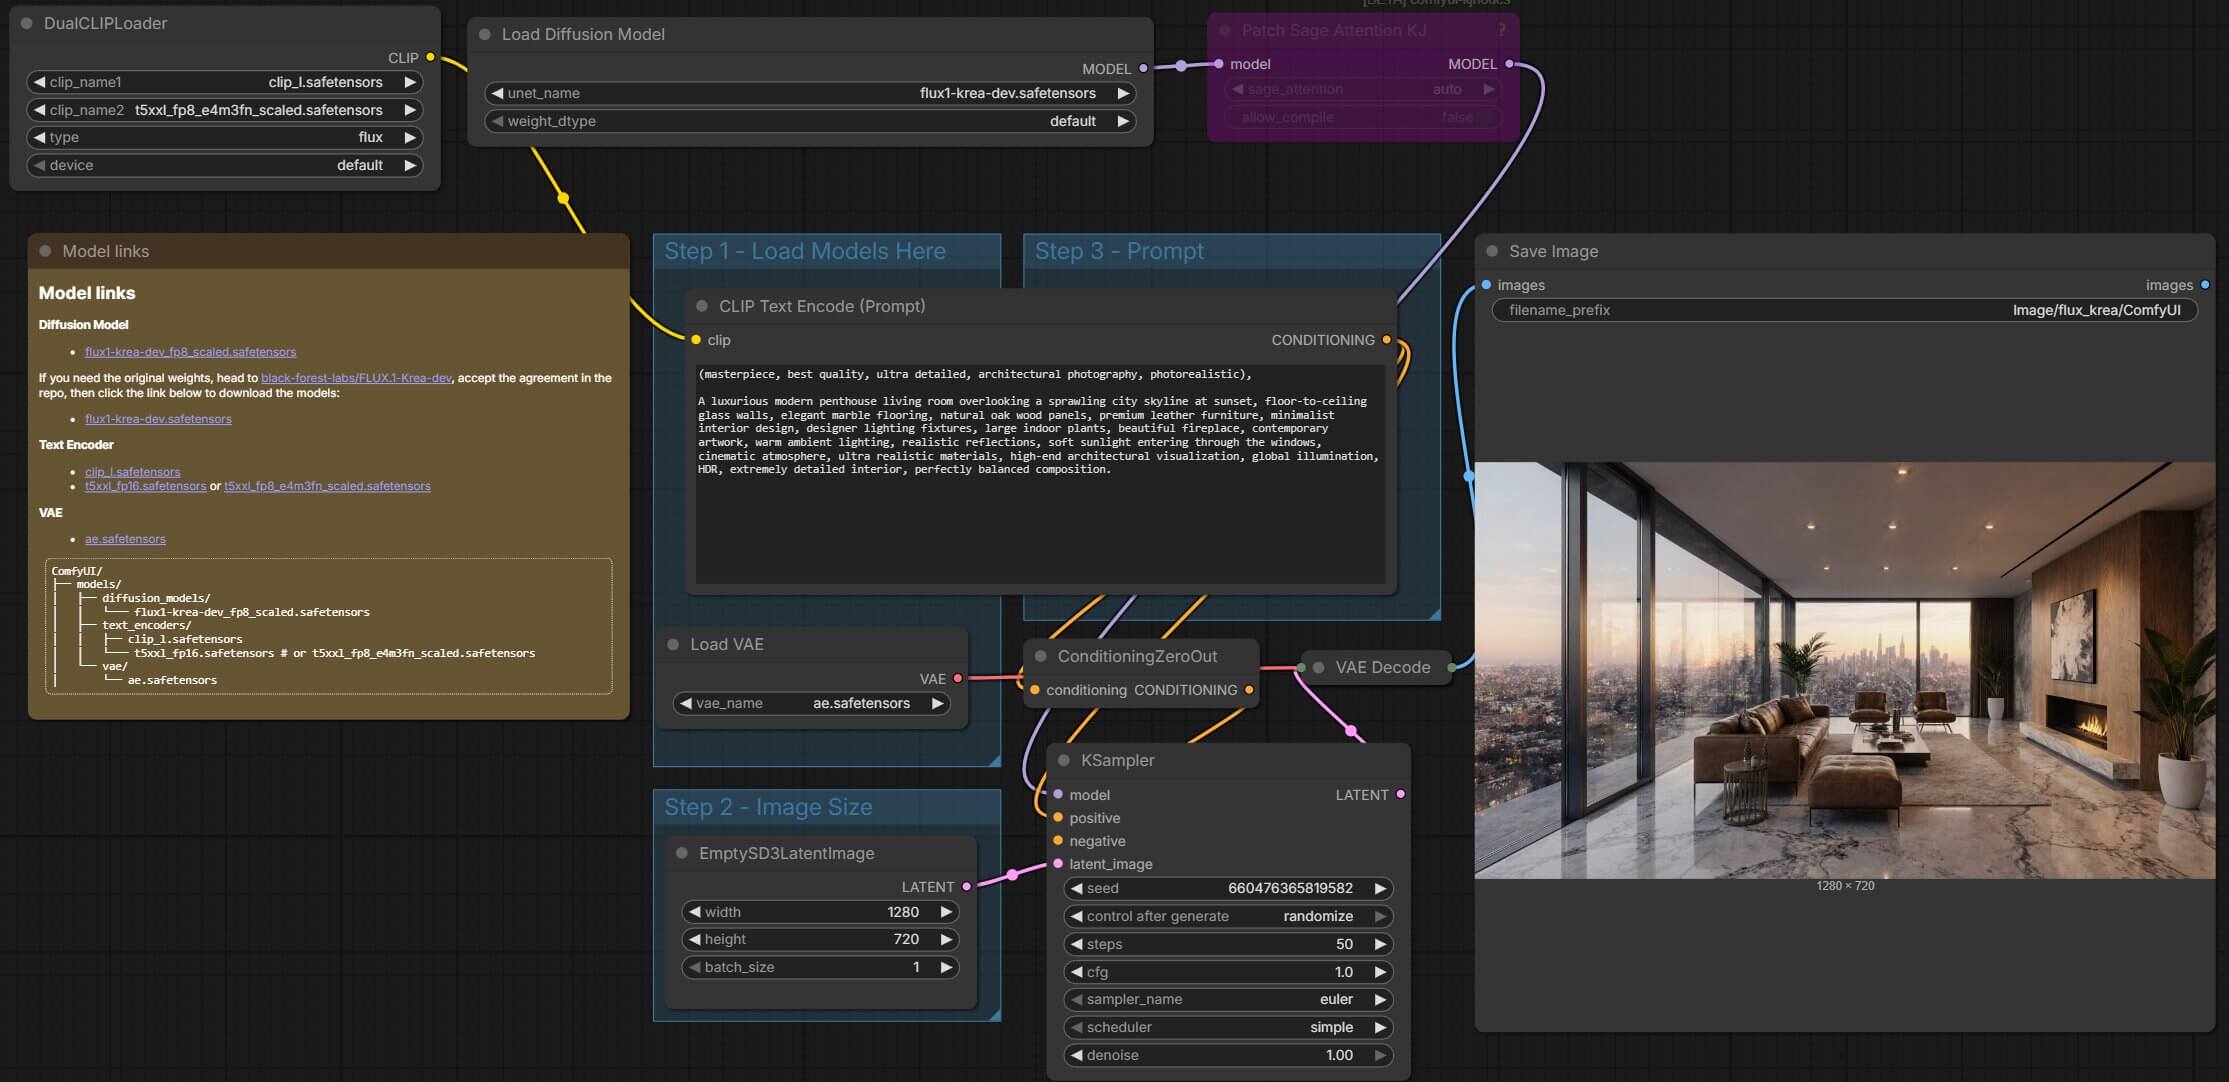
ComfyUI is also free and open-source, but it works differently. Instead of one fixed screen with a prompt box, you build your own image-generation process by connecting small blocks called nodes on a canvas — like wiring together the individual steps that make an image, instead of using one that's already built for you.
Because you can see and change every step, ComfyUI is usually the first place a brand-new AI image model shows up.
How Is ComfyUI Different From Fooocus?
A node (a single block in ComfyUI that does one specific job — for example, loading a model, reading your prompt, or generating the image) is the core idea in ComfyUI. You connect nodes together with wires to build your own pipeline, step by step.
Fooocus skips all of this. It comes with one fixed pipeline already built for you. You only touch the prompt box and a handful of settings around it — no wiring, no separate steps to connect.
Both tools let you add LoRAs (small extra files that change a model's art style or teach it a specific subject) on top of your main model. ComfyUI gives you more visible control over exactly where and how each LoRA plugs in; Fooocus handles it automatically in the background.
This is also why ComfyUI tends to get new models first. When a model like FLUX, Qwen Image, or Krea 2 launches, someone builds a new node for it — they don't have to rebuild an entire fixed interface around it. Fooocus's own GitHub page points users toward ComfyUI or Forge specifically for newer models like FLUX, rather than trying to add full support inside Fooocus itself.
What Can Fooocus Do That ComfyUI Can't (Easily)?
Fooocus has a handful of features built directly into its interface that take real setup work to replicate in ComfyUI.
Image Number slider
Generate up to 32 images from one prompt in a single batch, no extra setup.
Describe tab
Upload an image and Fooocus writes a prompt based on what it sees — useful when you want a similar look but don't know how to describe it yourself.
Style presets
Built-in looks (anime, photographic, cinematic, and others) applied with one click.
Built-in inpainting and outpainting
Works out of the box with no extra nodes.
ComfyUI can do versions of all of this too — inpainting (painting over part of an existing image to regenerate just that area) and outpainting (extending an image beyond its original edges) included — but none of it is one click. Each needs its own nodes connected correctly first.
What Can ComfyUI Do That Fooocus Can't?
Full resolution and aspect ratio control
Set any width and height you want, not just preset ratios.
Multi-step pipelines
Chain a base model into a refiner, an upscaler, and a face-fix pass in one run.
Video and animation workflows
Fooocus doesn't support these at all.
Shareable workflows
Save your entire setup as a JSON file and send it to someone else, who can load your exact pipeline in seconds.
ControlNet stacking
Combine multiple pose, depth, or edge controls in the same generation.
Both of the last two rely on the same idea: workflows (your entire node setup, saved as a single file) and ControlNet (guiding a generation using a reference — a pose, a depth map, an outline). If your goal is a quick, good-looking image, Fooocus gets you there faster. If your goal is a specific, repeatable result you'll want to reuse or share, ComfyUI is built for it.
Can You Move a Workflow Between Fooocus and ComfyUI?
No — don't assume you can, because this trips people up more than almost anything else here. ComfyUI saves your entire node setup as a readable .json workflow file, and that file only makes sense to ComfyUI. Fooocus doesn't use the same format, so a setup built in one tool won't open or run in the other.
This matters for the 20-minute decision too. If you start in Fooocus and later decide you need ComfyUI's control, you won't be able to import your Fooocus setup — you'll be starting your node graph from scratch. That's not a reason to avoid Fooocus; it's just something to know going in, so it doesn't feel like wasted effort later.
Which One Matches Your 20 Minutes?
Two ways to look at the decision: how each tool trades off ease of use against control, and how long it actually takes to get your first image.
Both tools can technically run using your computer's processor instead of a graphics card, through a special setting. This isn't practical for regular use — a single image can take close to an hour.
Want More Than Default Fooocus, But Still Simple?
RuinedFooocus is a community-built version of Fooocus that adds support for FLUX and SD3 models, plus a model-merging tool — same simple, prompt-first interface as the original. The trade-off: it's built on an older Fooocus codebase, so it's missing some newer official features like automatic masking.
No GPU? Here's the No-Install Option
Fooocus ships an official Google Colab notebook (fooocus_colab.ipynb in its GitHub repo) that runs the full interface on a free cloud GPU through your browser. No local install, no graphics card required.
What Do You Need Before You Install Either One?
| Fooocus | ComfyUI | |
|---|---|---|
| Minimum VRAM | 4 GB | 4 GB |
| Comfortable VRAM (SDXL/FLUX) | 8 GB or more | 8 GB or more |
| Minimum system RAM | 8 GB | 8 GB (16 GB+ recommended) |
| OS support | Windows, Mac, Linux | Windows, Mac, Linux |
| No GPU at all | Official Google Colab notebook | Cloud-hosted options exist, less beginner-friendly |
| Where to download | Official GitHub Releases page | Official GitHub, or the ComfyUI Desktop app |
VRAM (short for Video RAM — the memory built into your graphics card, separate from your computer's regular RAM) is the number that decides whether either tool will run at all.
How Do You Install Fooocus and ComfyUI?
Installing Fooocus
- Go to
github.com/lllyasviel/Fooocusand download the latest Windows release from the Releases page. As of this update the most recent tagged release is v2.5.5 — Fooocus is in limited long-term support, meaning it only receives bug fixes now, not new features. Check the Releases page for anything newer before you download. - Extract the folder anywhere on your drive, then double-click run.bat inside it. A terminal window opens and downloads the default model on first launch — this can take several minutes depending on your internet connection.
- Once it finishes, your browser opens automatically to the Fooocus interface. You'll see a prompt box at the top and a Generate button on the right.
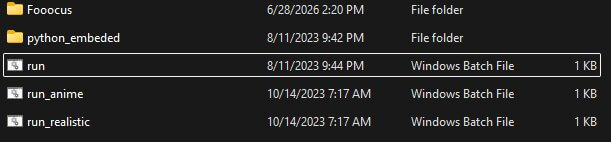
git clone and run python launch.py from a terminal instead.Installing ComfyUI
- Download the ComfyUI Desktop app from the official ComfyUI GitHub — this is the easiest path for beginners, since it skips manual Python setup entirely. ComfyUI is under active, frequent development, so check the Releases page for the current version before installing.
- Run the installer and follow the prompts. It downloads ComfyUI and a default model automatically.
- Once installed, ComfyUI opens to an empty canvas with a basic text-to-image workflow already loaded.
For the full step-by-step, including the manual install method, see the complete ComfyUI install guide.
What Are the Most Common Fooocus and ComfyUI Errors — and How Do You Fix Them?
Fooocus Closes Immediately After Launching
Cause: Your GPU doesn't have enough VRAM for the default settings, or your GPU drivers are outdated.
- Update your GPU drivers from NVIDIA's or AMD's official site.
- Check the Fooocus README on GitHub for the current low-VRAM launch flag and add it to your launch command if your card has less than 6 GB.
- Relaunch
run.bat.
Fooocus Generation Takes Forever (or Never Finishes)
Cause: Fooocus didn't detect your GPU and is running on CPU instead.
- Confirm your NVIDIA drivers are installed and up to date.
- Check that
run.batdoesn't include an--always-cpuflag — this forces CPU mode, which can take close to an hour per image. - Remove that flag if present, save the file, and relaunch.
ComfyUI Shows a Red "Missing Node" Error
Cause: A workflow you downloaded uses a custom node (an extra node someone built and shared, not part of ComfyUI by default) you haven't installed.
- Open ComfyUI Manager from the top menu.
- Click Install Missing Custom Nodes.
- Restart ComfyUI completely.
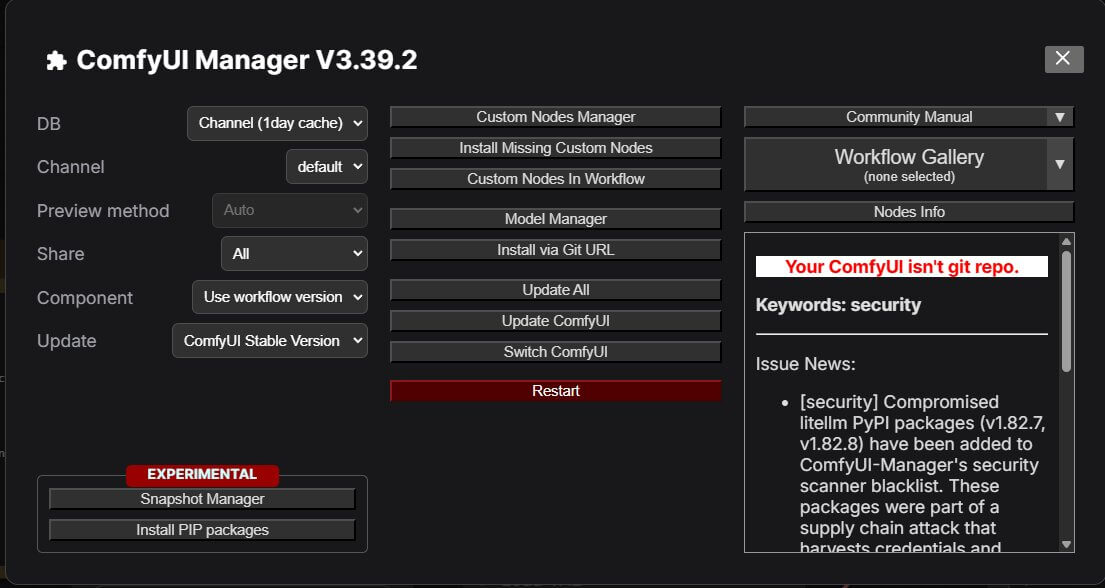
See the full guide to fixing missing node errors if nodes still don't appear after this.
What About Automatic1111 in 2026?
Automatic1111 was the original Stable Diffusion web interface, and for a long time it was the default recommendation alongside ComfyUI. That's changed.
Development on the original project has slowed sharply, and it doesn't have native support for newer models like FLUX. Most of its own community has switched to Forge, a maintained fork with the same tab-based interface but better performance and FLUX support, or moved to ComfyUI directly.
If you're choosing between ComfyUI, Fooocus, and Automatic1111 today, Automatic1111 isn't the one to start with. If you already have it installed and it still works for SD 1.5 or SDXL projects, there's no urgent need to switch — just don't build new projects around it.
Frequently Asked Questions
What to Do in the Next 20 Minutes
Picked one? Here's where to go next.
If you have 3 minutes, download Fooocus and generate your first image before deciding whether to move to ComfyUI later. If you have the full 20, start with the complete ComfyUI install guide instead.
Published: 2026-06-28 · Last updated: 2026-09-21
Join the discussion
Sign in to leave a comment or reply
No comments yet
Be the first to share your thoughts!