

Introduction
If you have just installed ComfyUI and want to manage custom nodes without touching the command line every time, ComfyUI Manager is the first extension you should add. It is the package manager that ComfyUI lacks out of the box — letting you find, install, update, and remove nodes and models directly from the interface.
This guide walks you through the full setup: installing the Manager, adding a useful system-monitoring extension called Crystools, and configuring ComfyUI to share your existing model library with AUTOMATIC1111 so you do not need duplicate downloads.
What Is ComfyUI Manager and Why Install It?
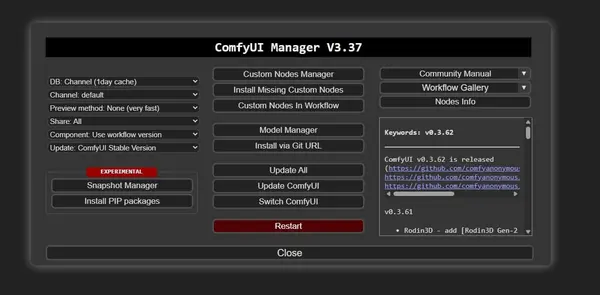
ComfyUI Manager is a powerful extension for ComfyUI that helps manage your custom nodes and models more easily. With ComfyUI Manager, users can effortlessly install missing nodes, update components, and download model files — all in one place.
Main Features of ComfyUI Manager
Install Missing Custom Nodes
Automatically find and install any nodes missing from your workflow with one click.
Custom Node Management
Easily search for, install, update, and remove custom nodes without using the terminal.
ComfyUI Updates
Update the main ComfyUI software or all installed custom nodes simultaneously.
Model Management
Download and organize checkpoints, LoRA models, and other model files directly from the UI.
How to Install ComfyUI Manager
Follow these four steps to install ComfyUI Manager on your PC. You will need Git installed — if you do not have it, the link is in Step 3.
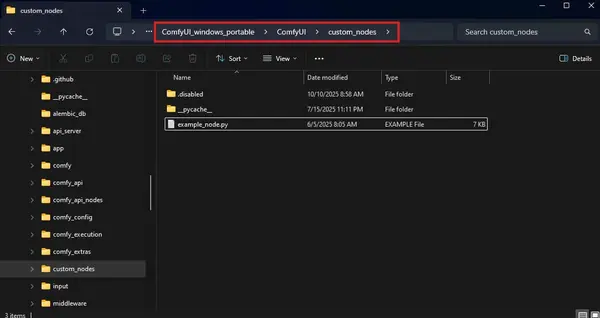
Navigate to the Custom Nodes Folder
Open your ComfyUI installation folder and go into the custom_nodes subfolder.
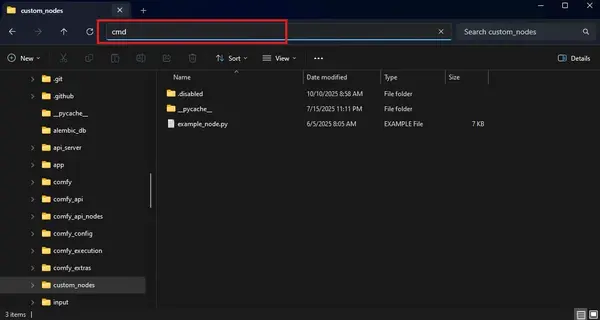
Open Command Prompt from the Folder
Click the address bar of the folder window, type cmd, and press Enter. This opens a terminal already pointed at the correct directory.
Clone the ComfyUI Manager Repository
Paste the command below into the terminal and press Enter. Git will download the Manager into a new folder inside custom_nodes.
git clone https://github.com/ltdrdata/ComfyUI-Manager comfyui-manager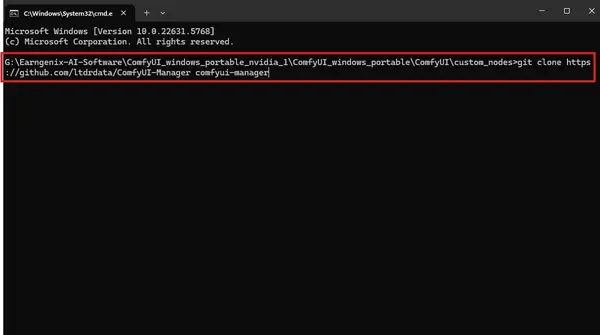
Restart ComfyUI
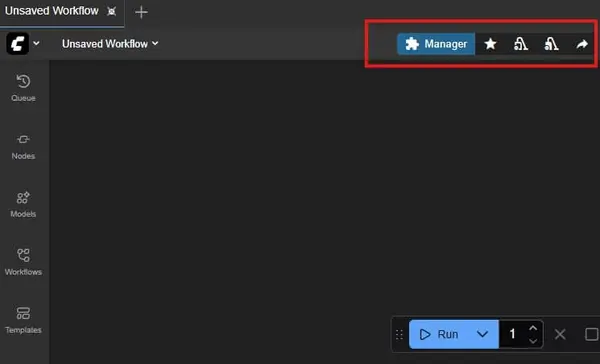
Close and reopen ComfyUI. The Manager button will appear at the top of the ComfyUI interface once it restarts successfully.
Installing Useful Extensions: ComfyUI-Crystools
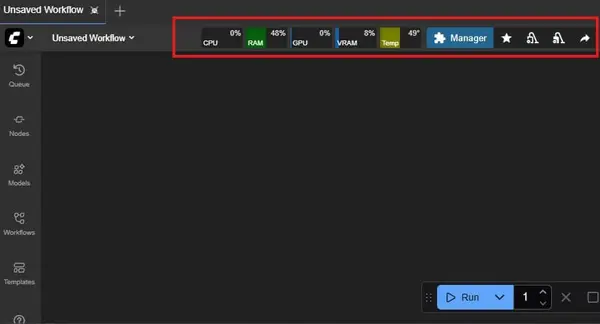
ComfyUI-Crystools is a helpful extension that shows real-time information about your system's resource usage, including CPU, RAM, GPU, VRAM, and temperature. It also displays progress bars and time elapsed for each generation — very useful for monitoring slow runs or spotting hardware bottlenecks.
How to Install ComfyUI-Crystools with ComfyUI Manager
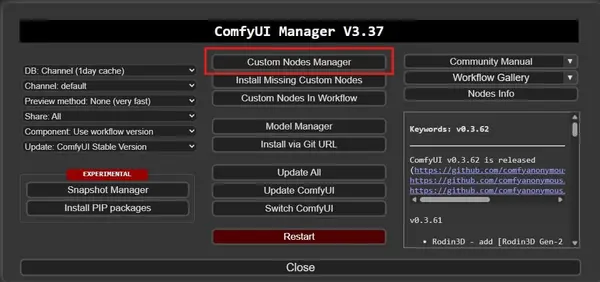
Open ComfyUI Manager from the top menu
Click the Manager button that appeared after your earlier installation.
Click on "Custom Node Manager"
This opens the searchable list of all available community extensions.
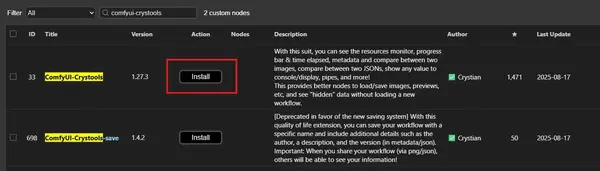
Search for "ComfyUI-Crystools"
Type the name in the search bar and the extension will appear in the results.
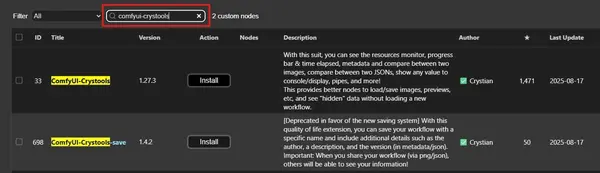
Click Install next to the extension
The Manager will download and install Crystools automatically.
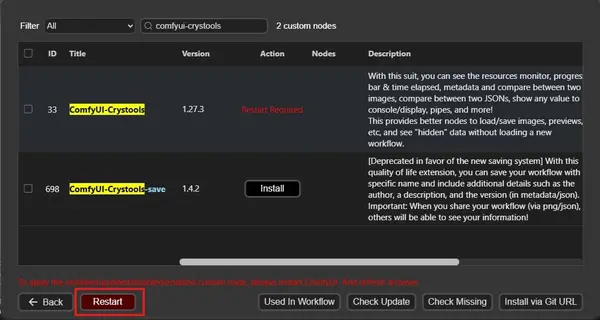
Restart ComfyUI to activate the extension
Use the Restart button inside the Manager, or close and reopen ComfyUI manually.
After restarting, a monitoring bar will appear at the top of your screen showing live CPU, RAM, GPU, VRAM usage and generation progress.
Sharing Models between AUTOMATIC1111 and ComfyUI
To save hard drive space, it is good practice to share model files between AUTOMATIC1111 and ComfyUI. This lets both tools use the same checkpoints, LoRA models, and textual inversions — no duplicate downloads, easier management.
D:\ai\stable-diffusion-webui). Have that ready before you start.Steps to Link AUTOMATIC1111 Models to ComfyUI
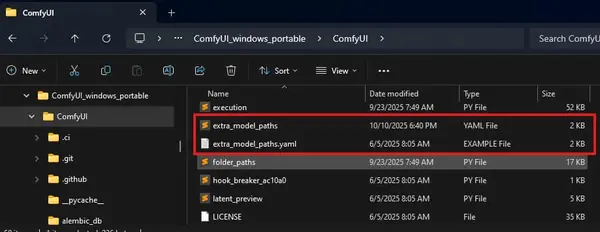
Navigate to the ComfyUI portable folder
Open your ComfyUI_windows_portable folder, then go into the ComfyUI subfolder.
ComfyUI_windows_portable > ComfyUICopy and rename the example config file
Find the file named extra_model_paths.yaml.example. Copy it and rename the copy to extra_model_paths.yaml (remove the .example part).
Open extra_model_paths.yaml in a text editor
Right-click the file and open it with Notepad, VS Code, or any text editor.
Replace the base_path with your A1111 folder path
Find the line below and replace the placeholder with the actual path to your AUTOMATIC1111 installation.
Find this line:
base_path: path/to/stable-diffusion-webui/Replace it with your actual path, for example:
base_path: D:\ai\stable-diffusion-webui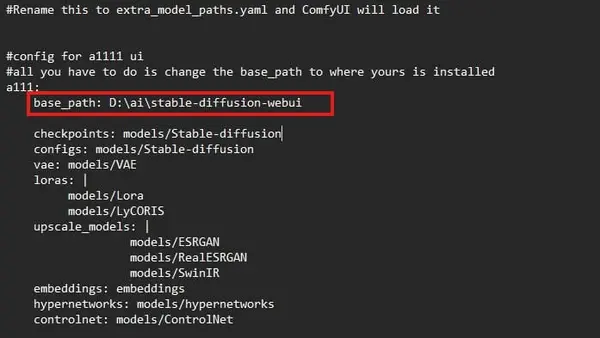
Save the file and restart ComfyUI
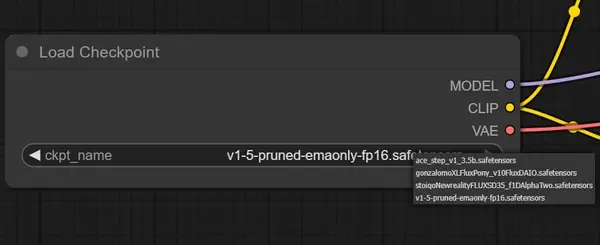
After saving, restart ComfyUI. All your AUTOMATIC1111 checkpoints, LoRA models, and textual inversions will now appear in ComfyUI's model dropdowns.
Frequently Asked Questions
Conclusion
ComfyUI Manager makes the ComfyUI setup process much easier by handling custom nodes and models in just a few clicks. Adding extensions like ComfyUI-Crystools lets you monitor your system in real time so you always know what your hardware is doing. And sharing models between AUTOMATIC1111 and ComfyUI saves disk space and keeps your workflow library in one place.
Once these three things are set up, you have a solid foundation for building and running any ComfyUI workflow. From here, you can explore LoRA models, custom workflows, upscaling pipelines, and more — all manageable directly through the Manager.
Join the discussion
Sign in to leave a comment or reply
No comments yet
Be the first to share your thoughts!