

What is Low Rank Adaptation (LoRA)?
LoRA stands for Low Rank Adaptation. Think of it like a lightweight patch you layer on top of a base model. The base model (Stable Diffusion, FLUX, SDXL, etc.) does the heavy lifting. The LoRA nudges it in a specific direction.
For example: if your base model generates awkward-looking hands, a hand-fix LoRA subtly pushes every generation toward anatomically correct results — same model, better output, no extra prompting effort.
LoRA files are small (typically 5–150 MB) compared to full models (4–20 GB). They download fast, swap instantly, and combine easily. This is why they have become one of the most-used tools in the ComfyUI ecosystem.
Why Use LoRA in ComfyUI — The Benefits
LoRAs solve problems that prompting alone cannot reliably fix. Here are the main benefits:
Consistent style
Lock in an art style — pencil sketch, watercolor, anime — and reproduce it consistently without rewriting your prompt every time.
Consistent character
A character LoRA remembers a specific person's face, outfit, and proportions so every generation matches.
Fix common problems
Dedicated LoRAs improve hands, faces, anatomy, or lighting — areas where base models frequently struggle.
Faster generation
Turbo/lightning LoRAs produce quality results in 4–10 steps instead of 30–40, cutting generation time significantly.
Consistent style — Use a LoRA to keep the same art style across multiple images.


Consistent character — same character, different poses


Hand fix LoRA — anatomy improvement


Realistic vs anime style LoRAs


Faster generation (turbo LoRA — 4 steps)


How to Use LoRA in ComfyUI
Using LoRA in ComfyUI involves three steps: download the file from a trusted source, place it in the correct folder, and load it with a LoRA node in your workflow.
Step 1 — Download from a trusted source
Only use reliable platforms:
- Civitai — the largest community hub. Filter by base model to find compatible files.
- Hugging Face — research-grade models and high-quality community LoRAs.
- ModelScope — useful for certain style and character LoRAs.
Accepted formats: .safetensors, .pt, .pth. Avoid unknown formats.
Step 2 — Place the file in the correct folder
ComfyUI/models/lorasAfter placing the file, refresh the LoRA list so ComfyUI can see it. The full steps for that are just below.
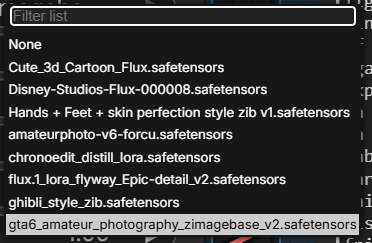
How to Refresh the LoRA List Without Restarting ComfyUI
A new LoRA file will not show up in the lora_name dropdown automatically. ComfyUI only scans the models/loras folder on startup, so you need to tell it to look again. There are three ways to do this, fastest first:
- Click the refresh icon — the small circular arrow next to the lora_name dropdown on the Load LoRA node. This re-scans the folder in place, with no reload needed.
- Hard-refresh the browser tab —
Ctrl+Shift+R(Windows/Linux) orCmd+Shift+R(Mac). Use this if the refresh icon doesn't pick up the new file. - Restart the ComfyUI server — the last resort. Close and reopen ComfyUI completely. This always works but loses your current queue.
Step 3 — Add a Load LoRA node to your workflow
Right-click the canvas and search for Load LoRA. Connect it between your checkpoint loader and your KSampler — the LoRA node takes MODEL and CLIP as input, and outputs modified versions of both.
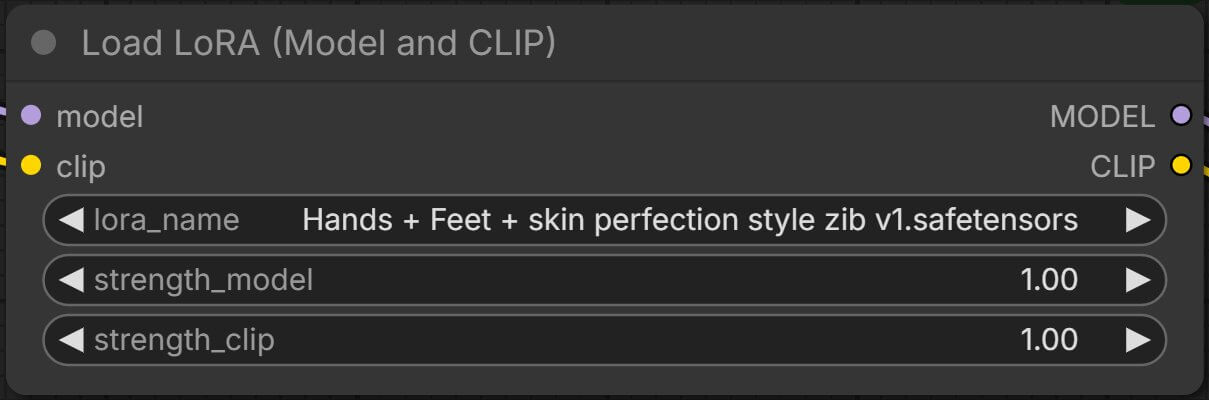
Step 4 — Verify the LoRA is working
Run a test prompt and compare output with and without the LoRA active. If you see no difference, check that the LoRA is compatible with your base model.
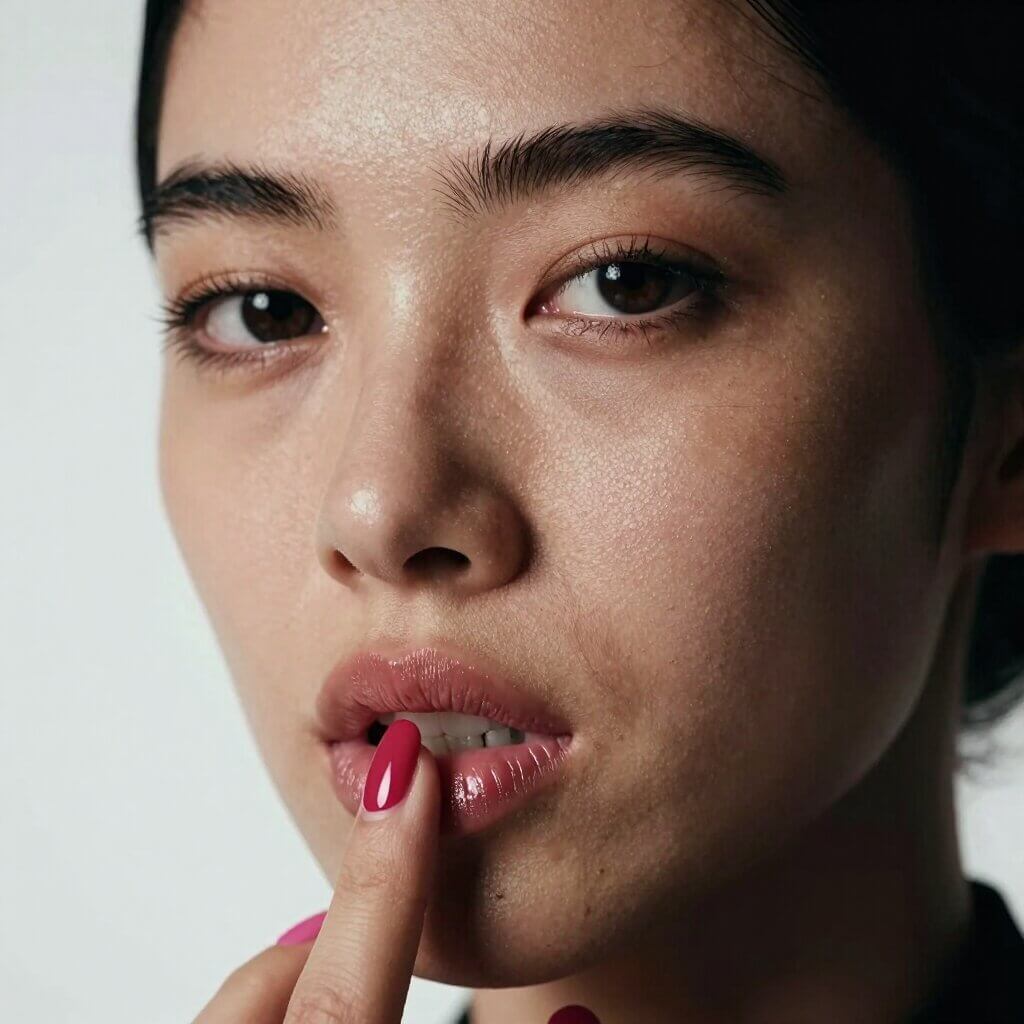
Applying LoRA in Your ComfyUI Workflows
There are two main approaches: a single LoRA for one focused change, or multiple stacked LoRAs for combined effects.
Single LoRA — the simplest approach
Use one LoRA when you want a single focused change: a specific art style, a character look, or an improvement like better hands. Start with a weight of 0.5 and adjust from there.
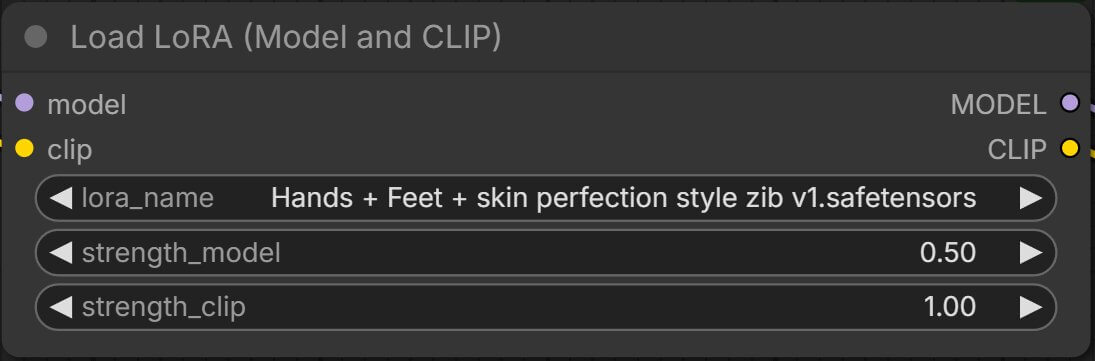
Multiple LoRAs — LoRA stacking
Chain multiple Load LoRA nodes together. The output of one becomes the input of the next. This lets you combine effects — for example, a photography style LoRA plus a hand fix LoRA.
Download Multi-LoRA Workflow
Managing LoRAs with the ComfyUI-Lora-Manager Extension
The built-in lora_name dropdown works fine with a handful of files, but once your models/loras folder has 50 or more LoRAs, scrolling through plain filenames to find the right one gets slow. ComfyUI-Lora-Manager is a free extension that replaces that dropdown with a visual library — previews, trigger words, and saved combinations included.
- A visual grid of every LoRA and checkpoint with a preview thumbnail, instead of a plain filename list.
- A Trigger Word Toggle node that shows each LoRA's trigger words automatically and lets you turn them on or off with one click, so you don't have to look them up separately.
- Automatic preview images, descriptions, and trigger words pulled from Civitai using a free API key — this part is optional, but it's the fastest way to fill in your whole library at once.
- LoRA Recipes — save a full combination of LoRAs and their exact weights that worked well, then reload that exact combination into your workflow in one click on a future project.
- A personal notes field on every model card, so you can jot down the strength or use case that worked best for that LoRA.
Install it through ComfyUI Manager
Open Manager → Custom Node Manager, search for lora-manager, click Install, then restart ComfyUI completely.
Open it from the menu bar
After restarting, a new button appears in ComfyUI's menu bar. Click it to open LoRA Manager's visual library in a new tab and start browsing your LoRAs.
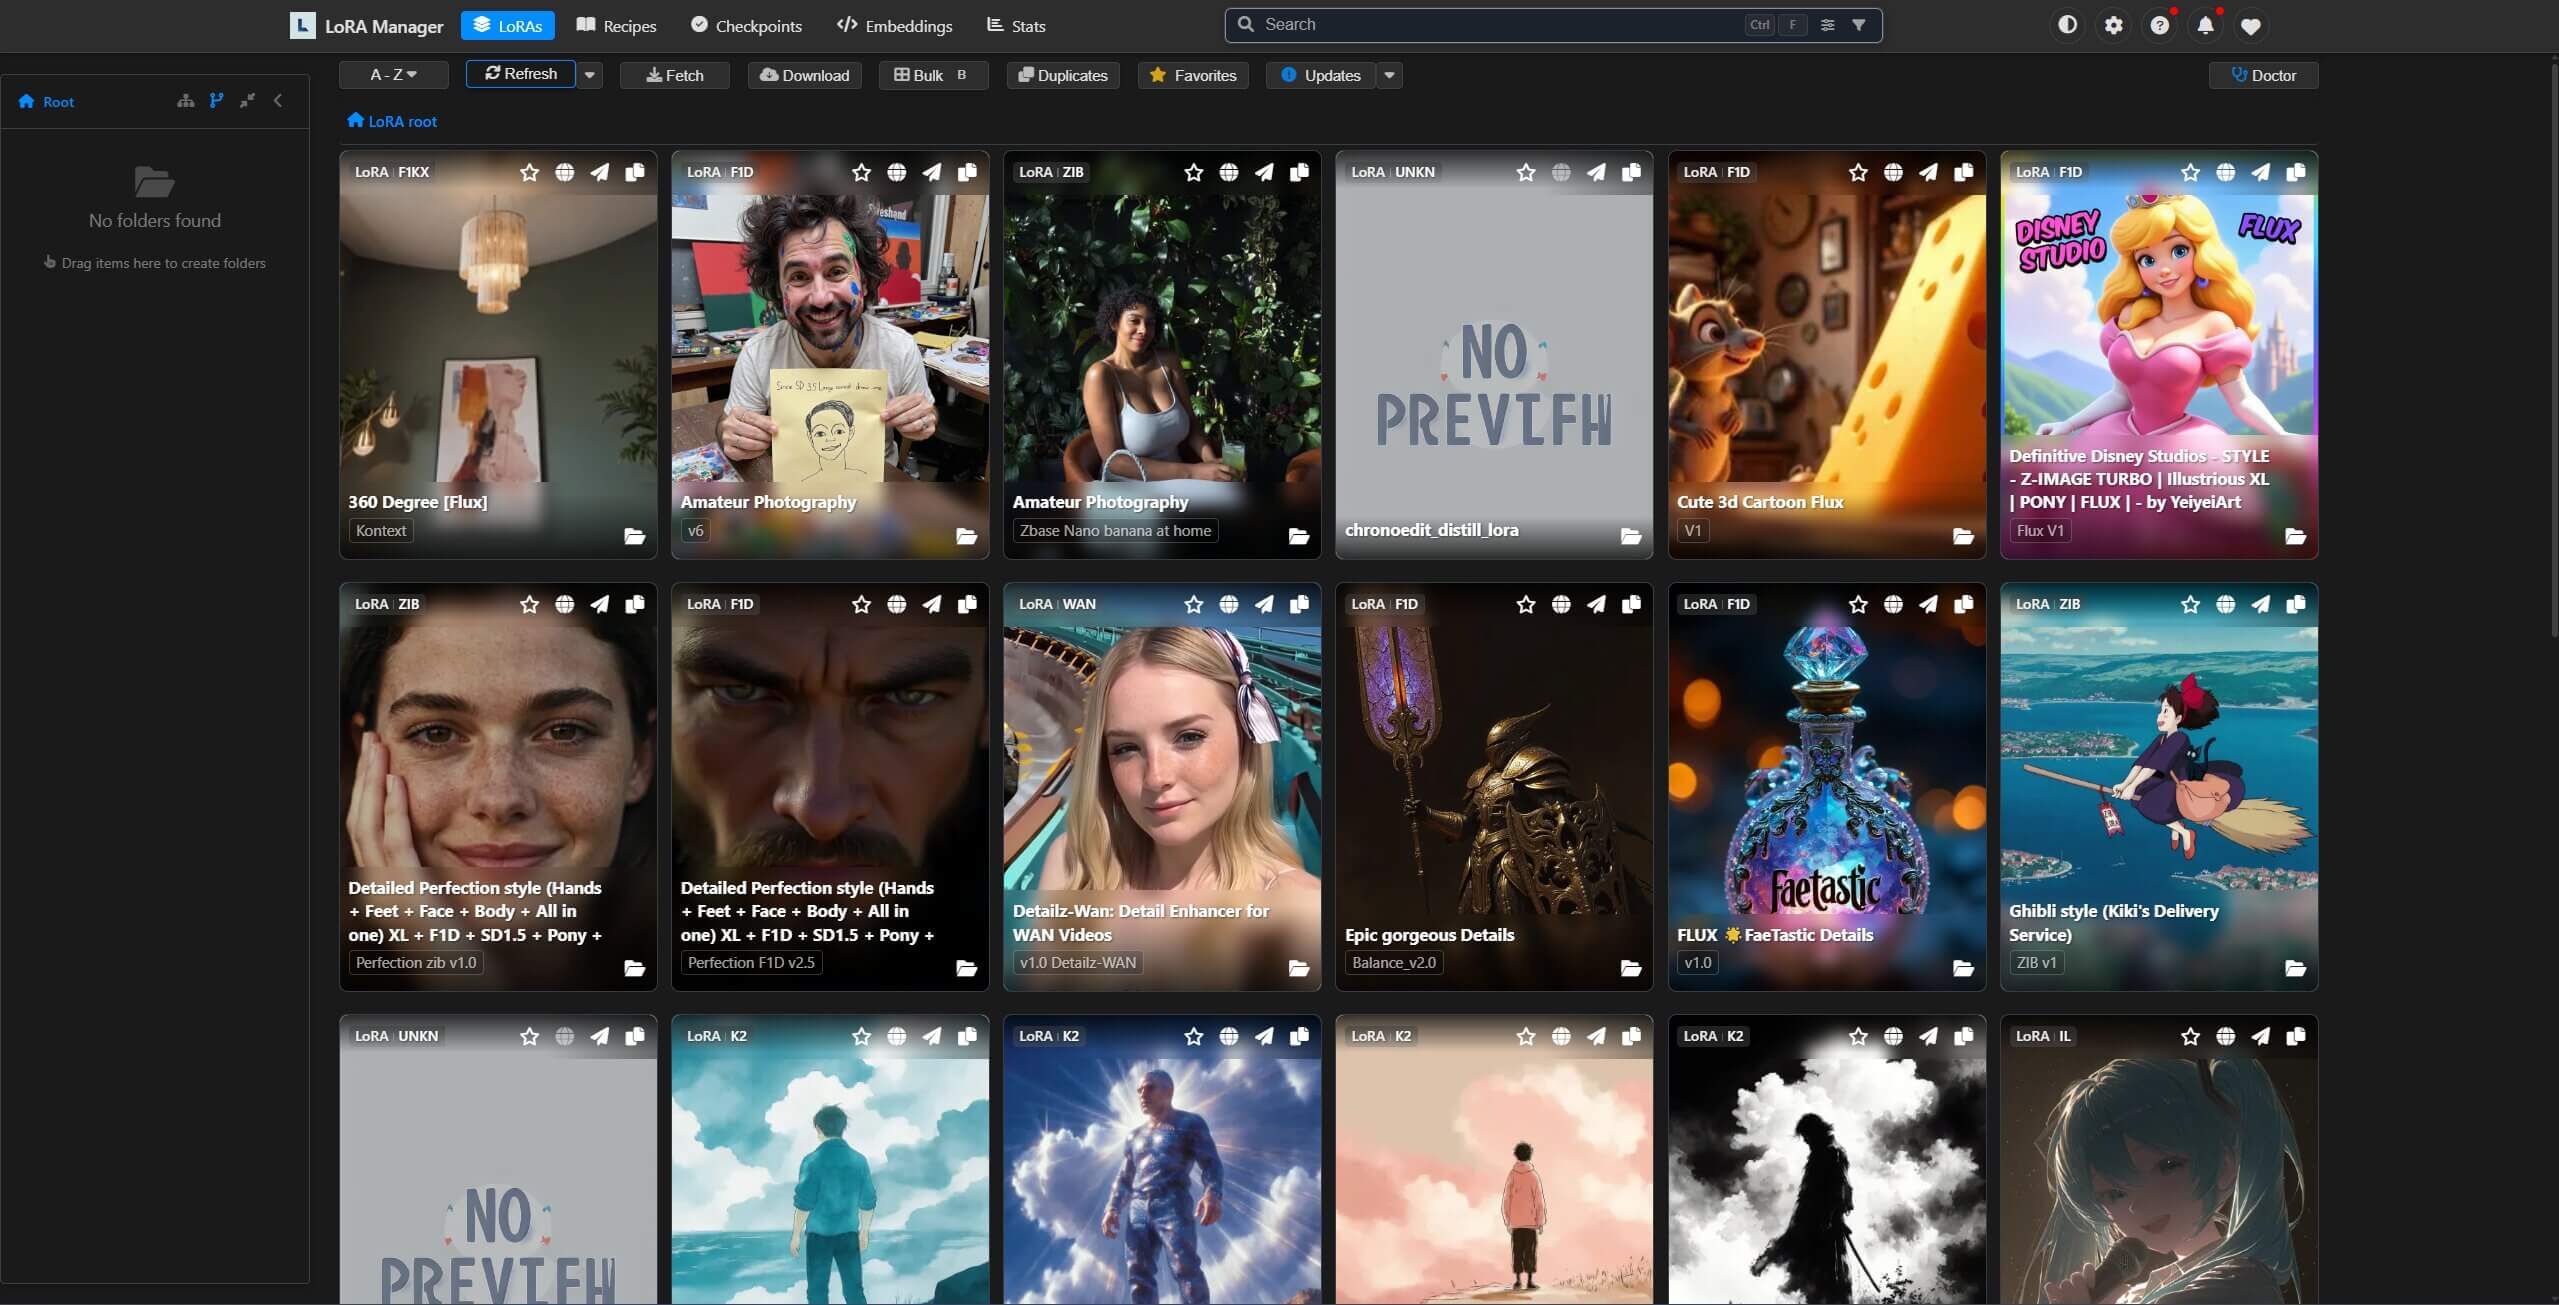
Source and full documentation: willmiao/ComfyUI-Lora-Manager on GitHub.
Settings, Weights, and Tuning
The weight (strength) slider is the most important setting on a LoRA node. It controls how strongly the LoRA influences output — from a subtle nudge to a complete style takeover.
LoRA weight reference
| Weight range | Effect | When to use |
|---|---|---|
0.1 – 0.3 | Subtle influence | Stacking multiple LoRAs or blending gently |
0.4 – 0.6 | Balanced — recommended start | Single LoRA, testing new files |
0.7 – 0.9 | Strong style / character lock | Character LoRAs, strong stylistic effect |
1.0+ | Overpowering — use carefully | Only if LoRA is designed for full strength |
When to increase or decrease
- Increase weight when the LoRA effect is too subtle and you cannot see a difference from baseline.
- Decrease weight if the image shows artifacts, over-saturation, or broken composition.
- When stacking multiple LoRAs, lower each individual weight so they blend rather than compete.
- Adjust in 0.1 steps so you can see exactly what each change does.
Model strength vs clip strength
The ComfyUI LoRA node has two sliders: model strength and clip strength. Set them to the same value in most cases. If you want the visual style to appear without affecting how prompts are interpreted, you can lower clip strength independently.
On FLUX-based LoRAs specifically, clip strength often has little or no visible effect. FLUX conditions primarily through its T5 text encoder rather than CLIP, so nearly all of the LoRA's effect comes through model strength alone. If turning clip strength up or down does nothing on a FLUX LoRA, that's expected — not a bug.
Why LoRA Is Not Working — Common Causes and Fixes
If your LoRA has no effect, or is causing errors, one of these is almost always the cause:
Model mismatch — LoRA is not compatible with the base model
Fix: Check the LoRA page on Civitai or Hugging Face and confirm which base model it was trained on. A FLUX LoRA will not work on SDXL or SD 1.5.
Wrong file location or unsupported format
Fix: The file must be in ComfyUI/models/loras and must be a .safetensors, .pt, or .pth file. After adding the file, refresh your browser so ComfyUI picks it up.
New LoRA file doesn't appear in the dropdown
Fix: Click the refresh icon next to the lora_name field first. If it still doesn't show up, hard-refresh the browser with Ctrl+Shift+R, then restart ComfyUI as a last resort. See the refresh steps above for the full breakdown.
Weight too high or too low
Fix: If nothing is changing, increase toward 0.7–0.8. If the image looks distorted, drop below 0.5. Always start at 0.5 for a new LoRA.
LoRA node not correctly connected in the workflow
Fix: The LoRA node must receive MODEL and CLIP from the checkpoint loader, and its outputs must connect forward to the KSampler and conditioning nodes. Any missing connection means the LoRA does nothing.
Frequently Asked Questions
Join the discussion
Sign in to leave a comment or reply
No comments yet
Be the first to share your thoughts!