Install ComfyUI on Windows: Desktop vs. Portable (The One Most Beginners Pick Wrong)
ComfyUI installs on Windows two official ways — a Desktop app or a Portable build. This guide covers both in full and settles which one you actually want.
By Earngenix Team·Published Jan 2025·Updated Sep 2026·9 min read
Tested on ComfyUI [version] · [GPU model, VRAM] — add before publishing
Install ComfyUI on Windows: Desktop vs. Portable
Quick answer: ComfyUI installs on Windows one of two official ways — the Desktop app (an installer, recommended for most people) or the Portable build (a .7z file you extract and run, more manual but more flexible). Most beginners should start with the Desktop app. Both methods are covered fully below, along with the mix-up that sends a lot of first-time users to the wrong download.
If you searched "how to install ComfyUI" and landed on two completely different downloads — one that looks like a normal installer, and one that's a compressed file you have to unzip yourself — you're not missing anything. ComfyUI genuinely ships two official ways to install it on Windows, and picking between them (or grabbing the wrong file entirely) is the single most common thing beginners get stuck on before they've even opened the program.
This guide walks through both methods in full, tells you which one to pick, and gets you to your first generated image.
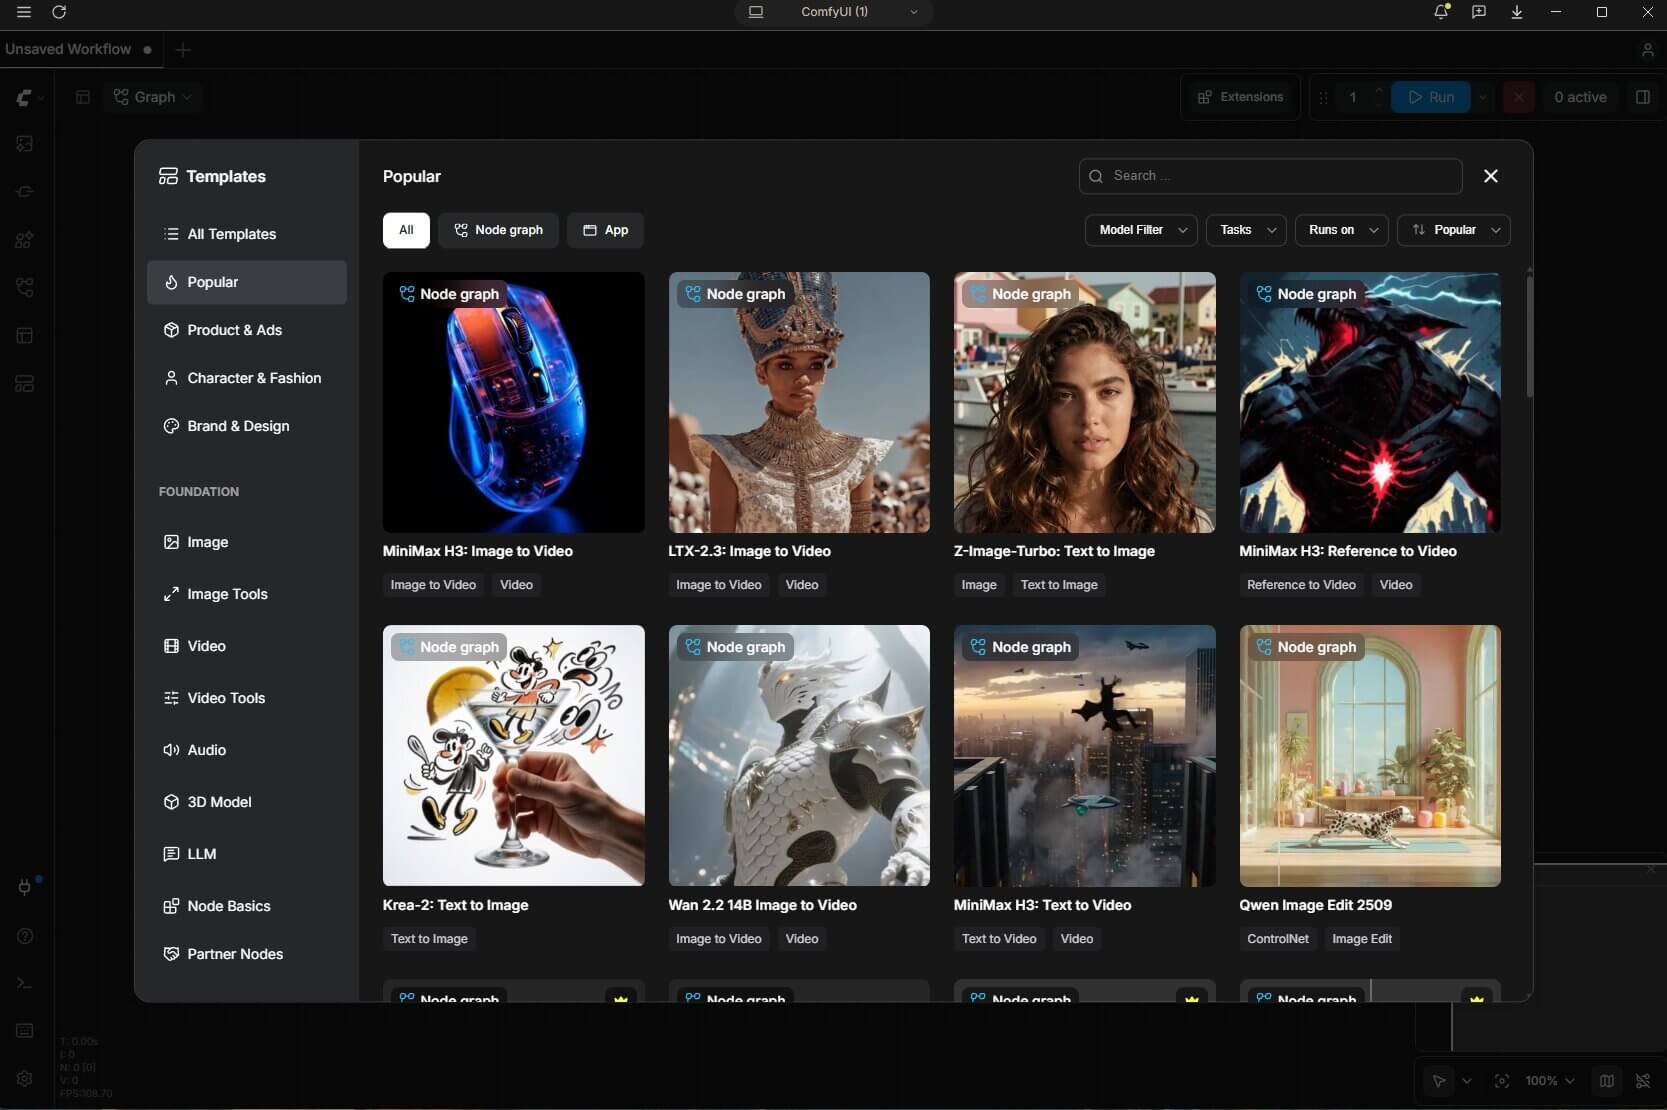
ComfyUI is a free, open-source program that lets you generate AI images (and video, audio, and more) on your own computer. Instead of typing a prompt into a simple box like some other AI tools, ComfyUI shows you a node-based interface — a node is a small rectangular block that does one job, like loading a model or generating an image, and you connect nodes together with wires to build a process called a workflow.
ComfyUI's node-based interface — connect nodes to build AI image generation workflows.
Running it locally on Windows (instead of a cloud version) means no subscription fees, no usage limits, and your images never leave your computer. The trade-off is that you need to install it yourself first — which is what this guide covers.
What You Need Before You Install ComfyUI on Windows
Before downloading anything, check your PC against these numbers. Getting this wrong is the second most common reason beginners get stuck (the first is picking the wrong install method, covered next).
Requirement
Minimum
Recommended
Operating System
Windows 10
Windows 11
GPU
NVIDIA GPU, 4GB VRAM
RTX 3060 or newer, 8GB+ VRAM
System RAM
8GB
16GB or more
Free Disk Space
15–20GB (app only)
30GB+ (models add up fast)
Browser
Any modern browser
Google Chrome
VRAM is the dedicated memory on your graphics card — it's what actually holds the AI model while it's generating an image, and running out of it is the single most common crash beginners hit. If your GPU is older or has less VRAM than the minimum, ComfyUI can still often run — just slower, and possibly limited to smaller images. It's fine to install it and see how it performs before deciding whether to upgrade anything.
💡 Tip: AMD and Intel GPU owners: both are supported, but you'll need a slightly different download in the Portable section below — that's covered when we get there.
ComfyUI Desktop App vs. Portable: Which Should You Install?
Here's the decision this guide's title is about, and it's worth two minutes before you download anything.
Recommended for most users
Desktop App
A normal Windows installer — download one file, run it, click through a setup wizard.
Sets up everything it needs automatically, including Python.
ComfyUI's own official documentation now recommends this for most first-time users.
More control, more manual steps
Portable Build
A .7z file you extract yourself into a folder — no installer, nothing added to your Windows Programs list.
You can move or delete the whole folder any time.
Useful once you're comfortable installing custom nodes (community-made add-ons that add new blocks to the node interface) or running multiple separate copies of ComfyUI.
⚠️ Warning: Here's the part most beginners get wrong: if you search around for "ComfyUI portable download," you will find more than one result. The official portable build comes directly from ComfyUI's own GitHub page. There are also several popular community-modified portable builds — some genuinely useful, but built for more advanced users, since they come pre-loaded with dozens of extra custom nodes and dependencies you didn't ask for. If you're installing ComfyUI for the first time, you want the official build, covered step by step below — not a community remix.
Bottom line: if you're not sure which to pick, install the Desktop app. Use Portable if you specifically want a no-installer, fully self-contained setup.
How to Install ComfyUI Desktop App on Windows
1
Download the Desktop App
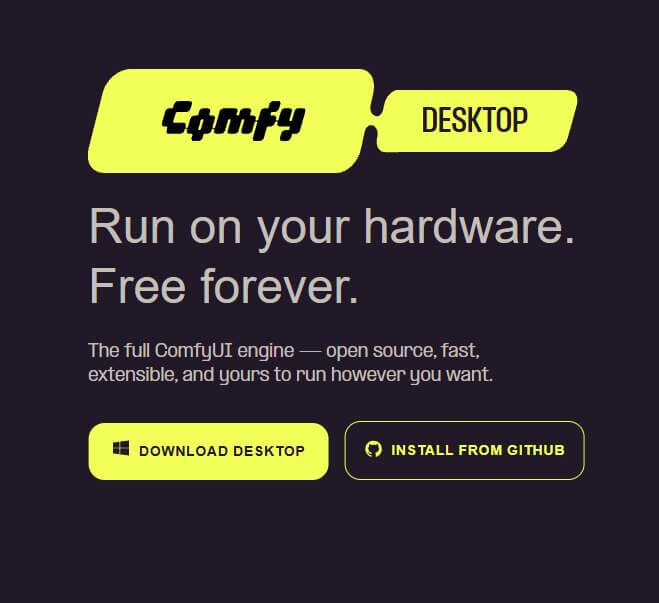
Go to comfy.org/download. This is ComfyUI's official download page. Click the Windows download button — you'll get a single installer file (around 100–200MB; the larger AI model files come later, so this first download is small and quick).
Go to comfy.org/download and click the Windows button.
2
Run the Installer
Find the file you just downloaded (usually in your Downloads folder) and double-click it. Windows may show a blue "Windows protected your PC" warning — this happens with any new installer that isn't yet widely recognized by Windows, not because anything is wrong. Click More info, then Run anyway.
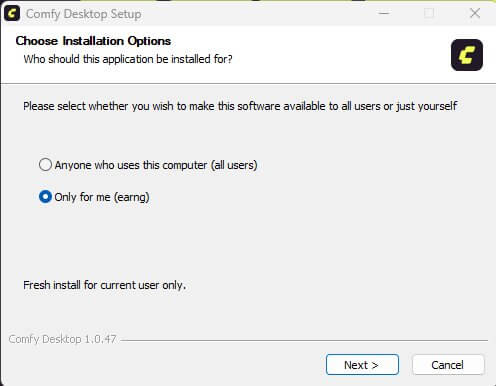
You'll then see the ComfyUI setup wizard open in its own window.
The setup wizard opens once you allow the installer through.
3
Choose Your Install Location
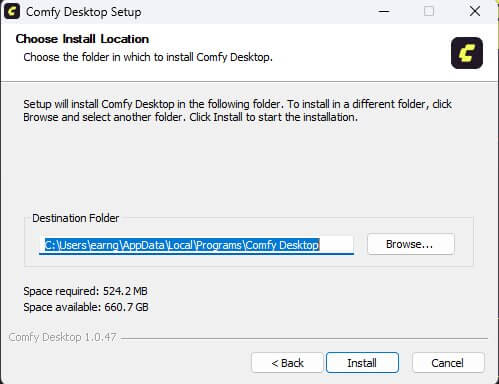
The wizard will ask where to install ComfyUI and, separately, where to store your models and generated images. Models can be very large (multiple gigabytes each), so if your main drive (usually C:) is low on space, pick a folder on a drive with more room for this second location. If you're not sure, the defaults are fine to start with.
Click Next, then Install.
Choose where ComfyUI and your models will live.
4
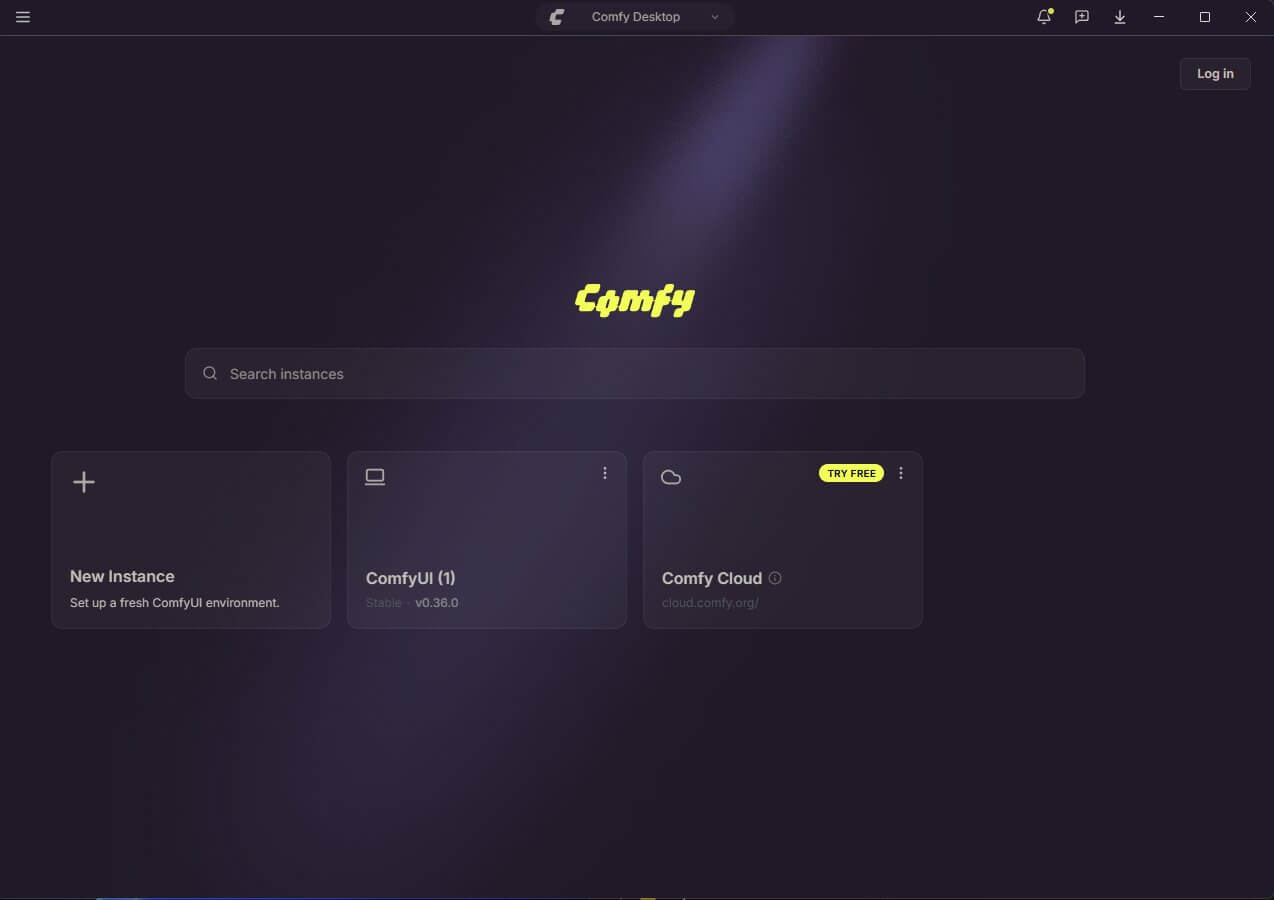
Choose How to Run ComfyUI: Cloud or Local
Next, the setup wizard asks how you want to run ComfyUI: Cloud or Local (New Instance). Cloud runs ComfyUI on remote hardware; Local runs it entirely on your own PC using the GPU you checked earlier.
For this guide, click New Instance (Local), then click Continue.
Choose New Instance (Local), then continue.
5
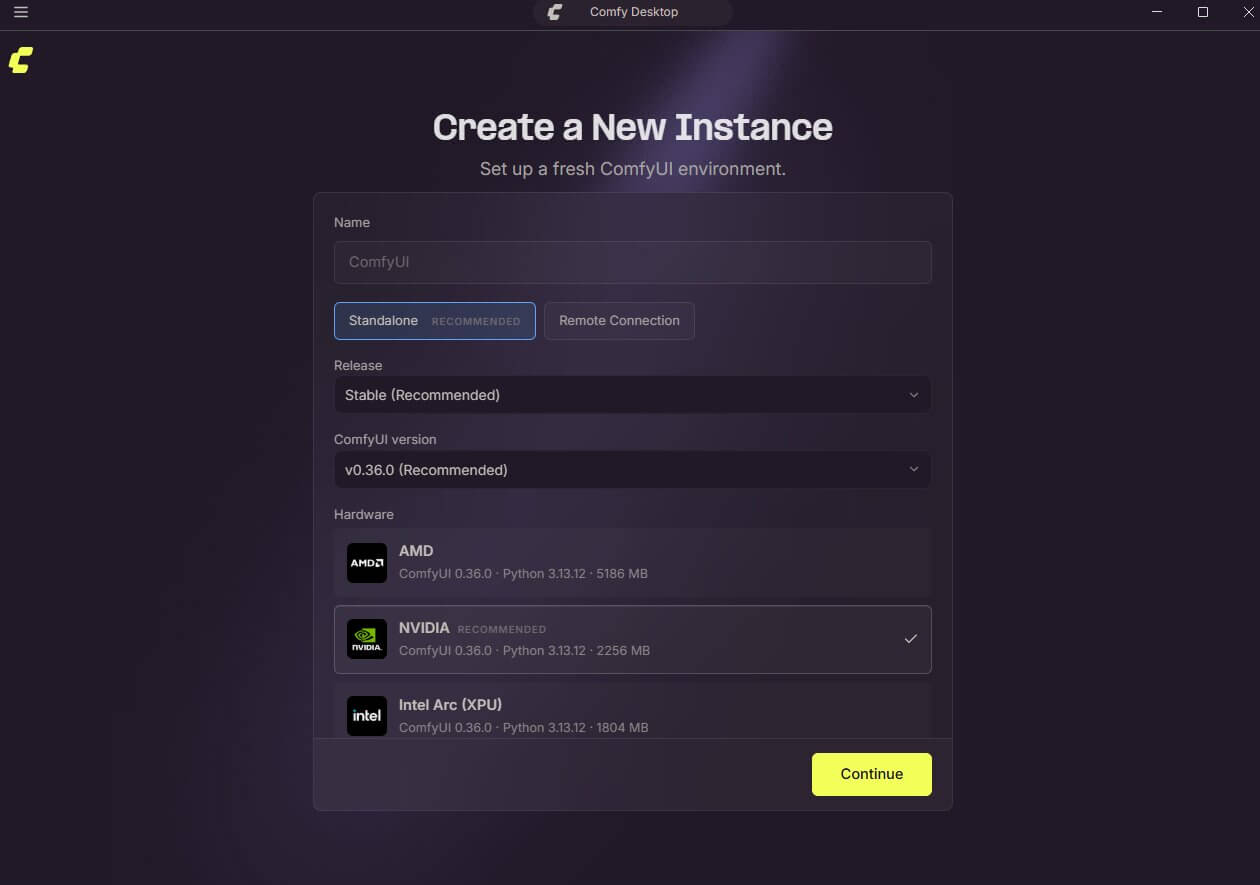
Create a New Instance
You'll now be asked to set up your new local instance. Give it a name — anything you'll recognize later, especially useful if you end up running more than one instance down the line — then click Continue.
Name your new instance and continue.
6
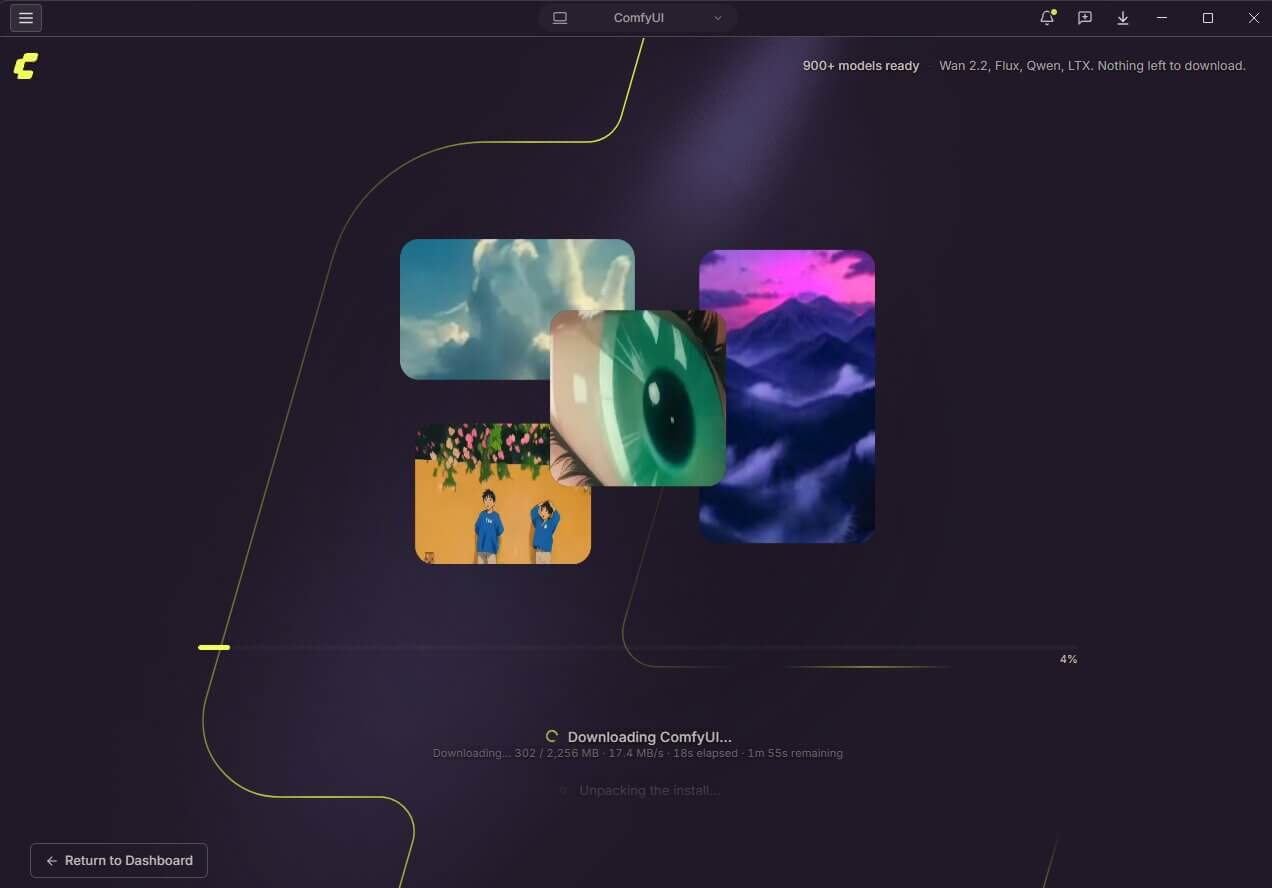
Installation Begins
The main installation now starts. ComfyUI downloads and sets up everything your new instance needs — this can take a few minutes depending on your internet connection, so it's fine to leave it running in the background.
Installation in progress — this can take a few minutes.
7
First Launch
Once installation finishes, ComfyUI Desktop opens automatically. The first time it opens, it needs a moment to finish setting up in the background — you'll see a loading screen before the actual interface appears. When it's ready, you'll see a dark screen with a grid of connected boxes (this is the node interface mentioned earlier) already loaded with a default workflow.
ComfyUI Desktop, ready to use, on first open.
💡 Tip: That's the Desktop app installed. You can skip the Portable section below and jump straight to Load the Z-Image Turbo Workflow and Generate Your First Image.
How to Install ComfyUI Portable on Windows
If you chose Portable instead, here's the full process.
1
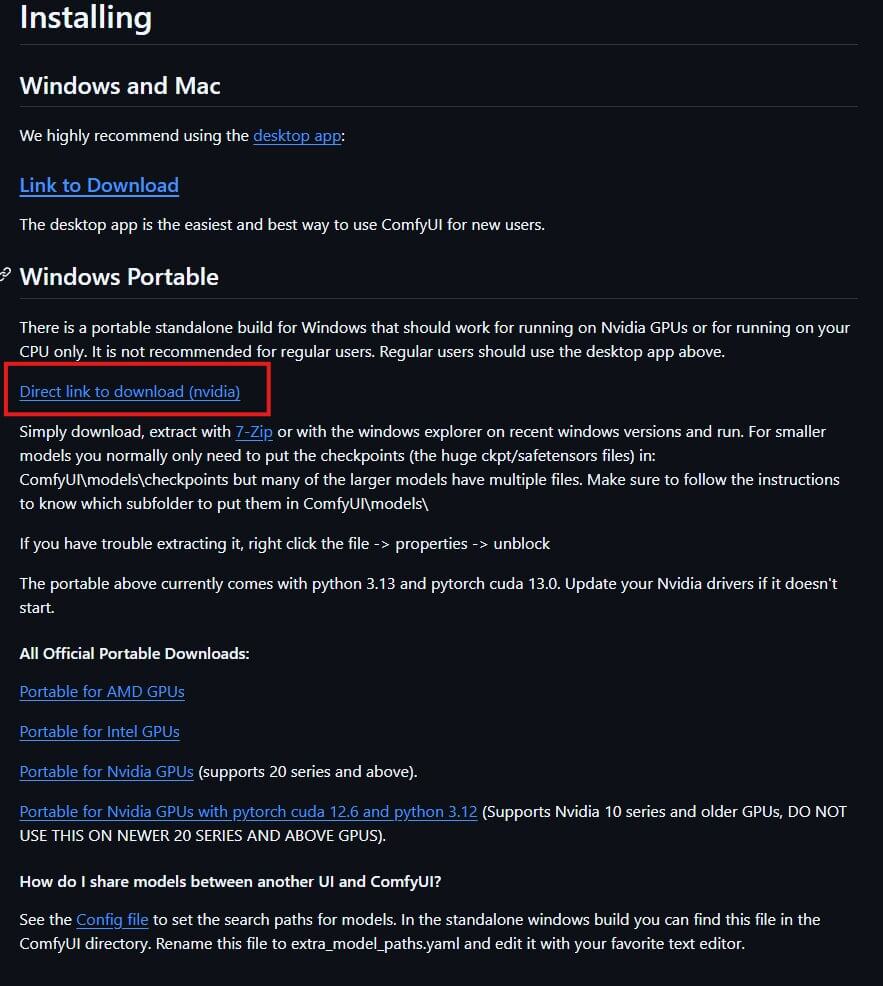
Download the Correct Build for Your GPU
Go to the official ComfyUI GitHub releases page. There are several different portable files — downloading the wrong one for your GPU is the most common Portable-specific mistake, so check this table before clicking anything:
Your GPU
File to Download
NVIDIA, RTX 20-series or newer
ComfyUI_windows_portable_nvidia.7z
NVIDIA, GTX 10-series or older
ComfyUI_windows_portable_nvidia_cu126.7z
AMD
ComfyUI_windows_portable_amd.7z
Intel
ComfyUI_windows_portable_intel.7z
This file is large — roughly 2GB — because it bundles Python and all of ComfyUI's dependencies inside it, so you won't need to install anything separately afterward.
Pick the file matching your GPU from the official releases page.
2
Extract the File
You'll need 7-Zip to open a .7z file (recent versions of Windows can also do this natively — right-click the file and check for an "Extract All" option first). If you don't have 7-Zip, it's a free download from 7-zip.org.
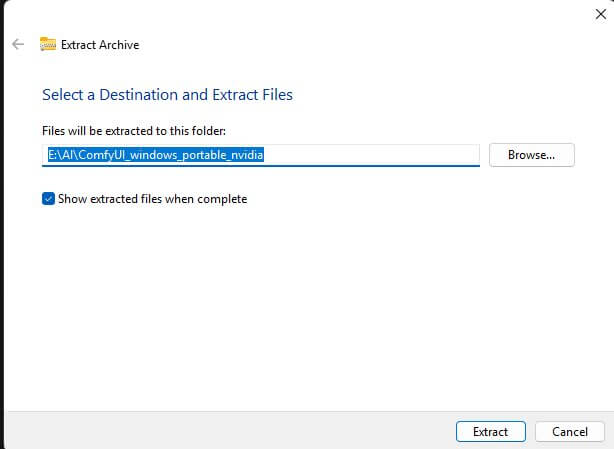
Right-click the downloaded file, choose Extract Here (or Extract All), and pick a folder with enough free space — ideally not your main C: drive if it's already tight on room.
⚠️ Warning: If extraction fails or the file won't open: right-click the original .7z file, choose Properties, and look for an Unblock checkbox near the bottom of the window. Windows sometimes flags downloaded files this way as a security precaution — checking Unblock and trying again fixes it almost every time.
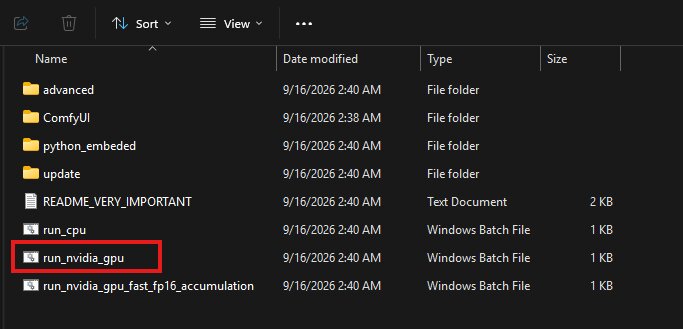
The extracted folder — look for the .bat file matching your GPU.
3
Run ComfyUI
Open the extracted folder. You'll see several .bat files — these are shortcuts that start ComfyUI with different settings. Double-click the one matching your GPU (for most NVIDIA users, that's run_nvidia_gpu.bat).
A black command-window will open and show ComfyUI starting up — this can take a minute or two the first time. What you should see when it's ready: a line reading To see the GUI go to: http://127.0.0.1:8188, and your default browser should open that address automatically, showing the same node interface described above.
ComfyUI is ready once you see this line in the console.
Load the Z-Image Turbo Workflow and Generate Your First Image
Whichever install method you used, this part is the same. Instead of building a workflow from scratch, the fastest way to your first image is to load one of ComfyUI's ready-made workflow templates.
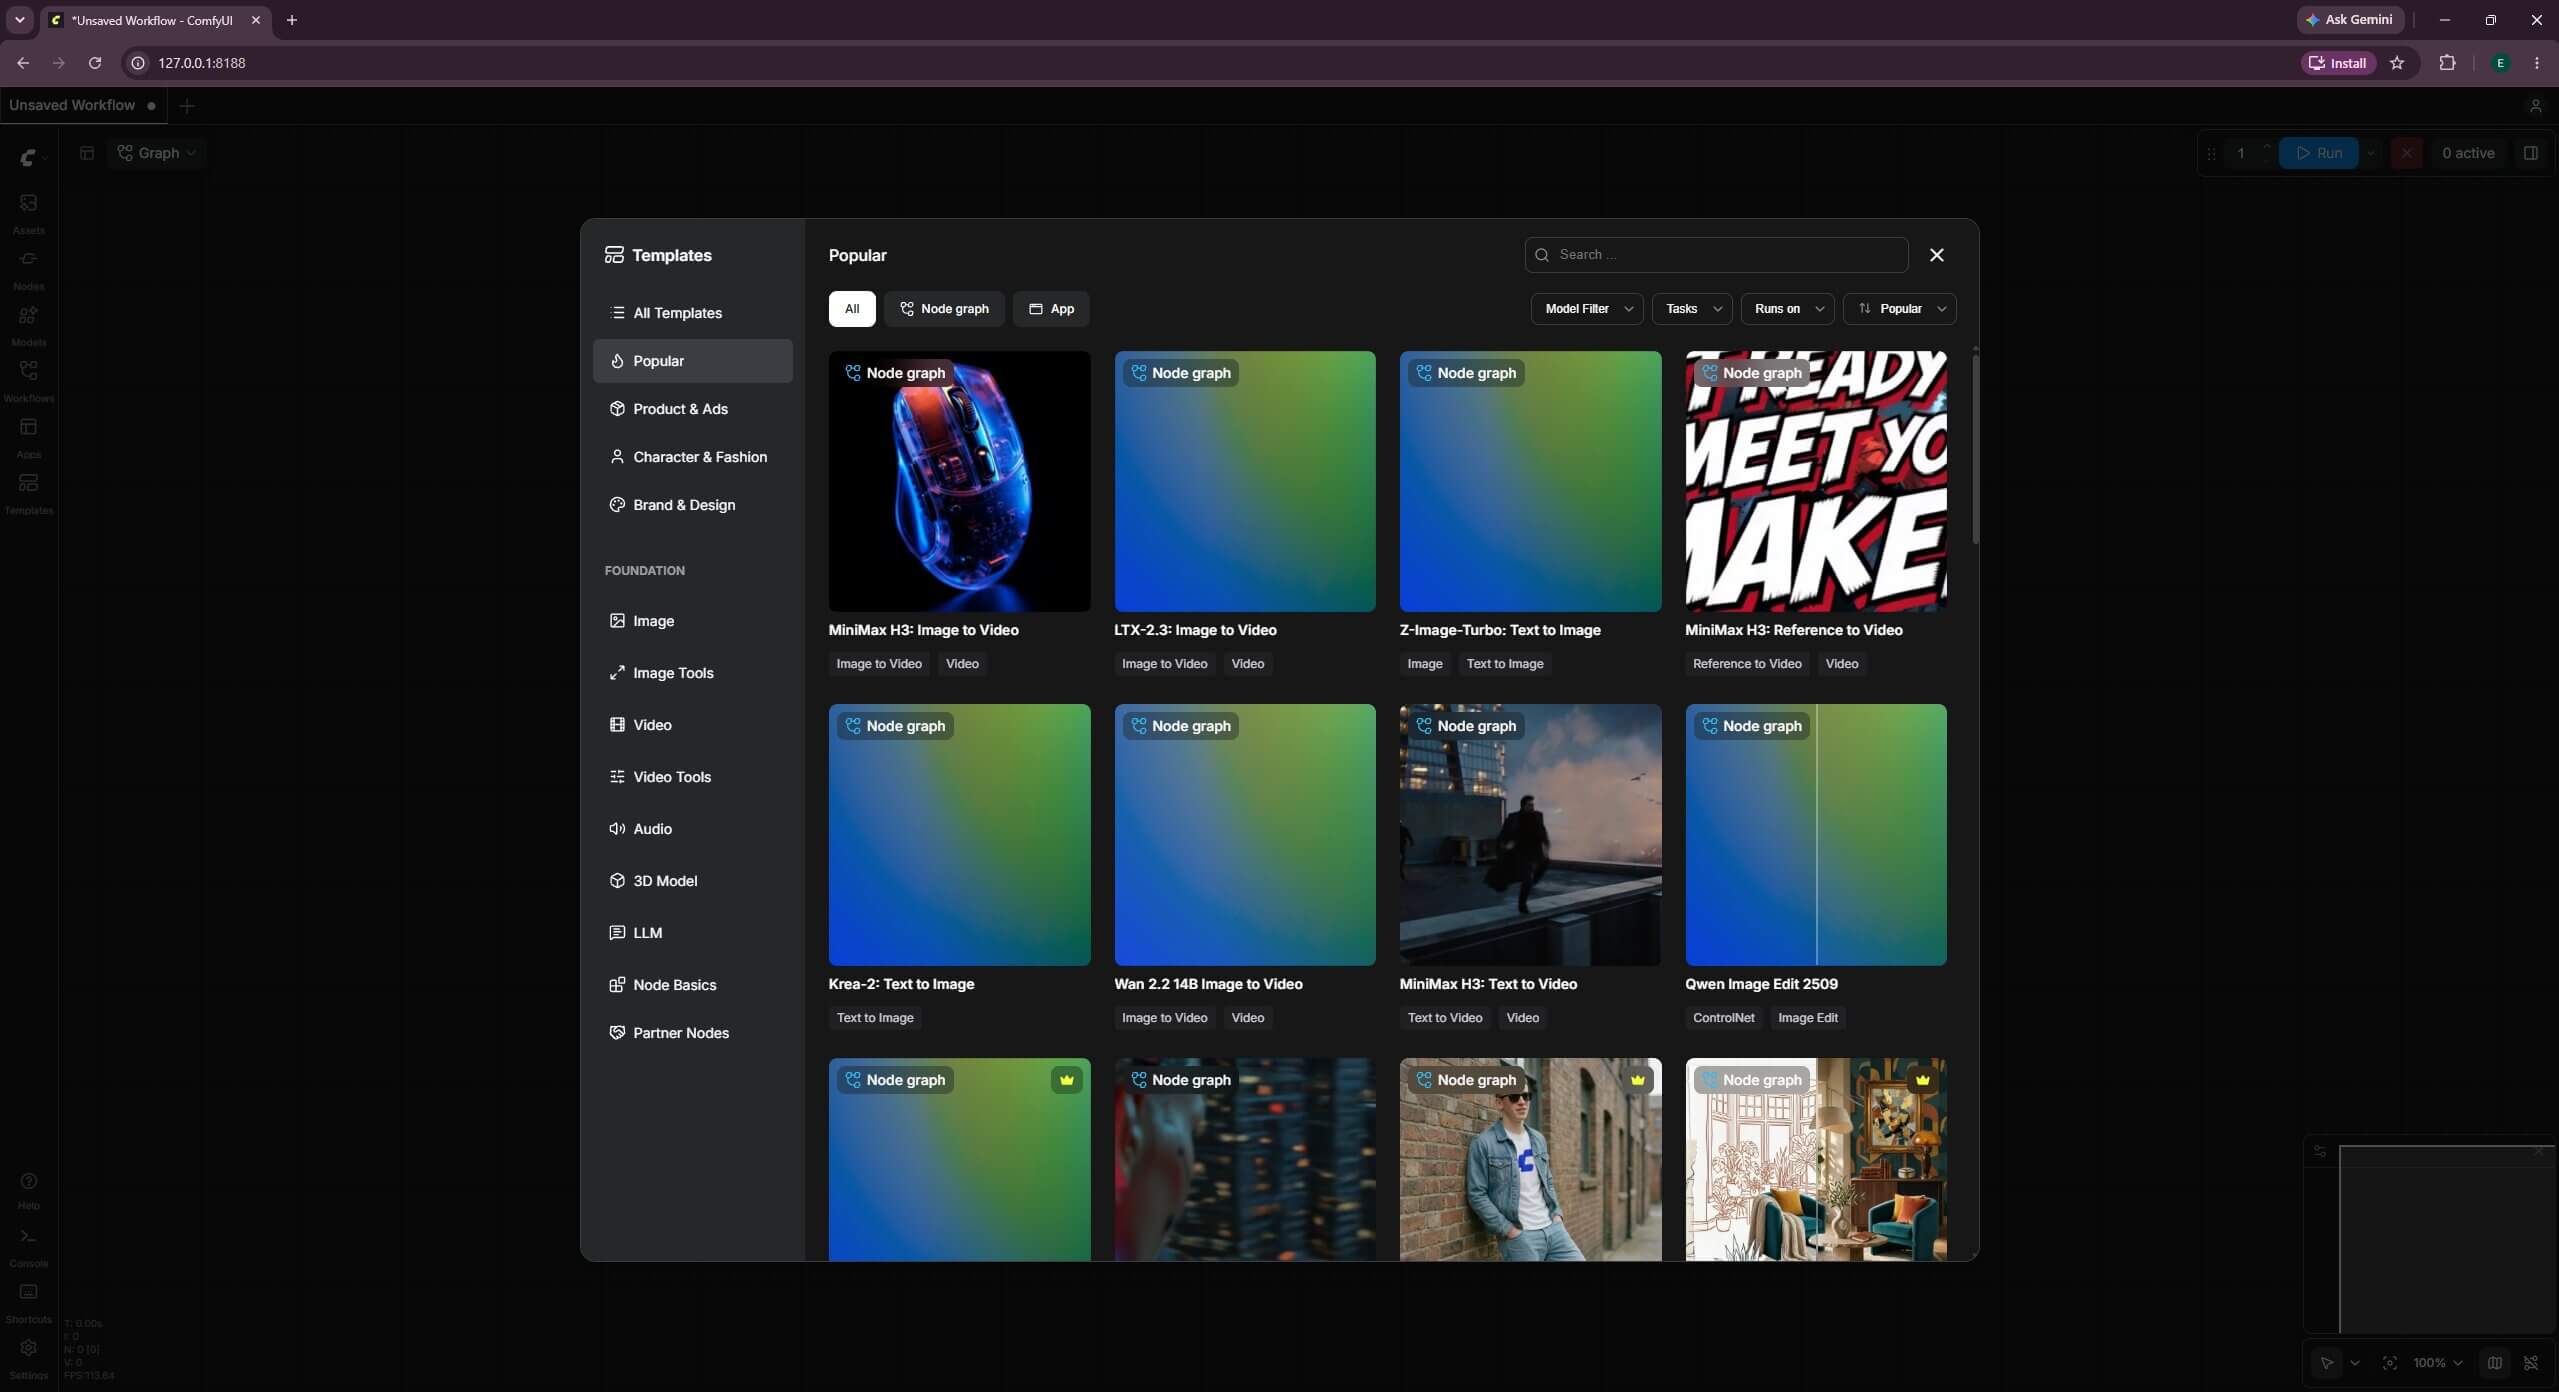
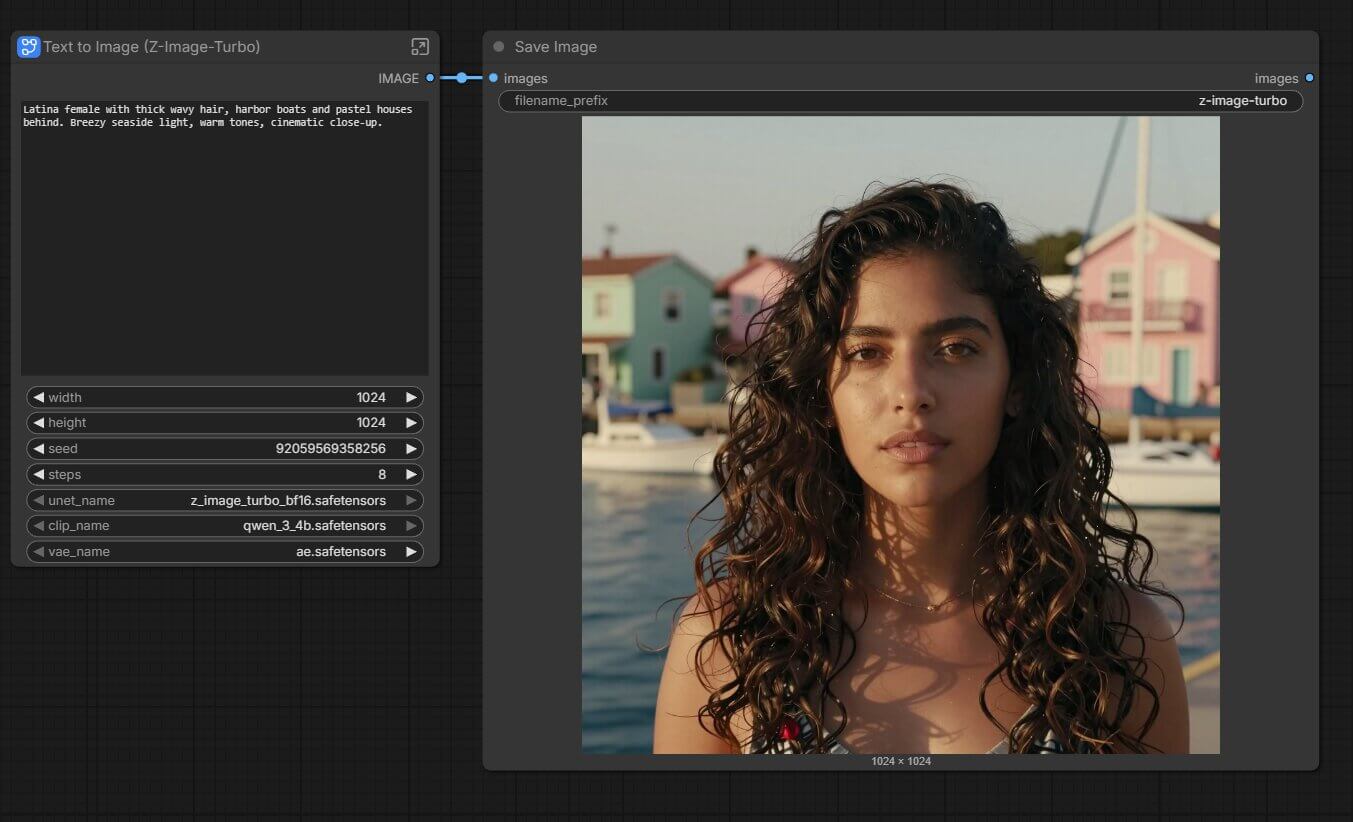
From the ComfyUI workspace, open the workflow templates panel and click on the Z-Image Turbo workflow. It loads directly onto your workspace as a ready-to-run node setup.
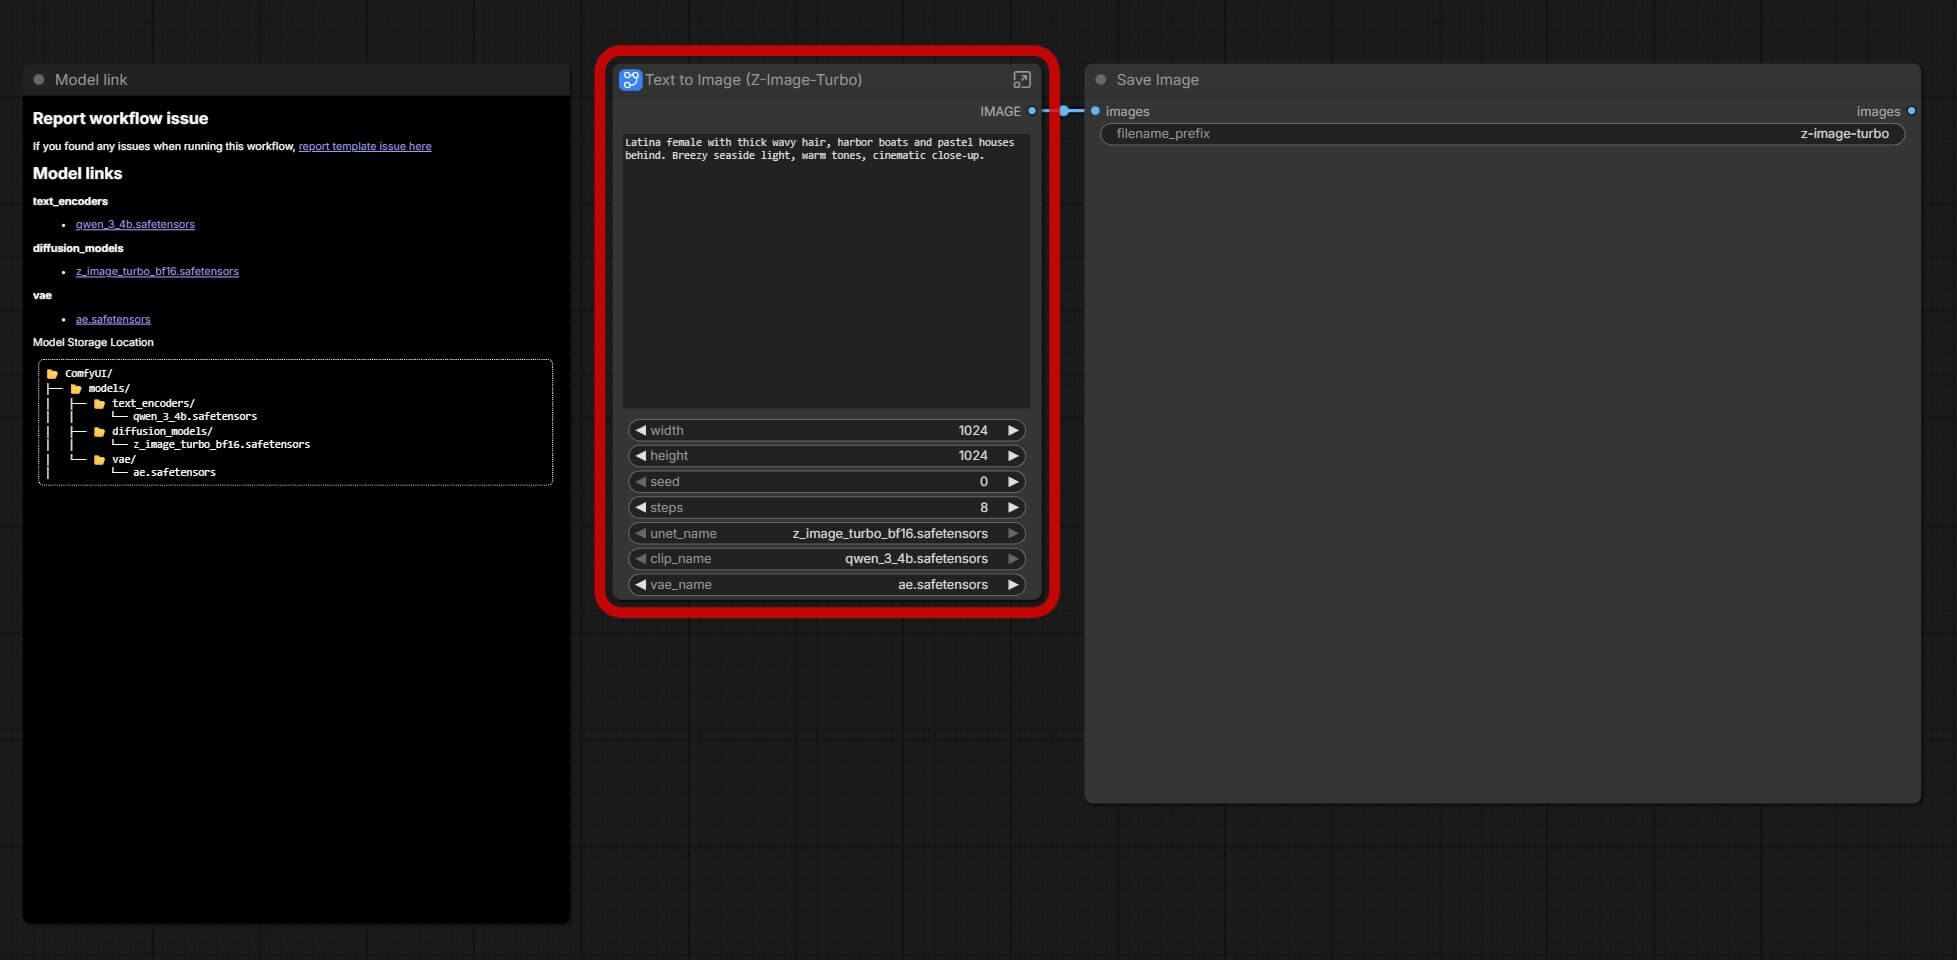
The Z-Image Turbo workflow, loaded and ready on the canvas.
This workflow doesn't come with its models built in yet. Inside the template, you'll find a Models link section — click each model listed there and its download starts automatically.
Once all three files are sitting in their correct folders, refresh your browser and click the Run button in the top-right corner. Your first image generation will start.
Your first AI-generated image, straight out of a fresh ComfyUI install.
Congratulations — ComfyUI is fully installed and working. If you want to understand what all the boxes on screen actually do, our ComfyUI interface overview walks through it in detail.
Troubleshooting: Common ComfyUI Windows Install Errors
"127.0.0.1:8188" Won't Load in Your Browser
What causes it: ComfyUI hasn't finished starting yet, or it's still loading in the background. This address only works while ComfyUI is actively running.
Fix: Check the console/terminal window (Portable) or the Desktop app itself for the 'Starting server' message before trying to load the page. If it's been more than 2–3 minutes with no progress, close it and reopen it.
ComfyUI Portable Won't Extract
What causes it: Windows sometimes blocks downloaded compressed files as a security measure.
Fix: Right-click the .7z file → Properties → check Unblock, near the bottom of the window → click OK → try extracting again.
ComfyUI Desktop Can't Find Your GPU
What causes it: Outdated graphics drivers, most commonly.
Fix: Update your NVIDIA (or AMD/Intel) drivers directly from the manufacturer's website, then restart your PC and reopen ComfyUI.
The Page Loads But Shows Nothing / No Workflow Appears
What causes it: Sometimes the default workflow doesn't load automatically on first launch.
Fix: Look for a Load Default option in the menu (usually bottom-right corner) and click it.
Frequently Asked Questions
Yes. Both the Desktop app and the Portable build are completely free, with no subscription or usage limits. You only need your own hardware to run it.
At minimum, an NVIDIA GPU with 4GB VRAM, 8GB of system RAM, and 15–20GB of free disk space. For a smoother experience, 8GB+ VRAM (an RTX 3060 or newer), 16GB+ RAM, and 30GB+ of storage is recommended, since model files add up quickly.
The Desktop app, for almost everyone. It installs like a normal Windows program and handles setup automatically. Portable is better once you specifically want a no-installer, fully self-contained setup you can move between drives.
No. Both the Desktop app and the Portable build come with everything they need built in, including Python — you don't need to install anything separately beforehand.
v1-5-pruned-emaonly-fp16.safetensors is a solid starting point — it's small, generates quickly, and gives you a working setup you can experiment with before downloading larger, more advanced models.
No. ComfyUI-Easy-Install is a popular third-party tool built by a community developer — it's not made or maintained by the official ComfyUI team. It can be a convenient shortcut for some users, but for your first install, the official Desktop app or Portable build covered above is the safer, more supported starting point.
What to Do Next
Now that ComfyUI is running, install ComfyUI Manager — it's the easiest way to add new custom nodes and models without doing it manually. For a full roadmap of what to learn next, see our ComfyUI roadmap.