

What ChronoEdit Can Do
Physics-based editing: boy shoots a basketball — the ball goes in perfectly

Style transfer: portrait transformed into a trendy fashion look with red hair and sunglasses
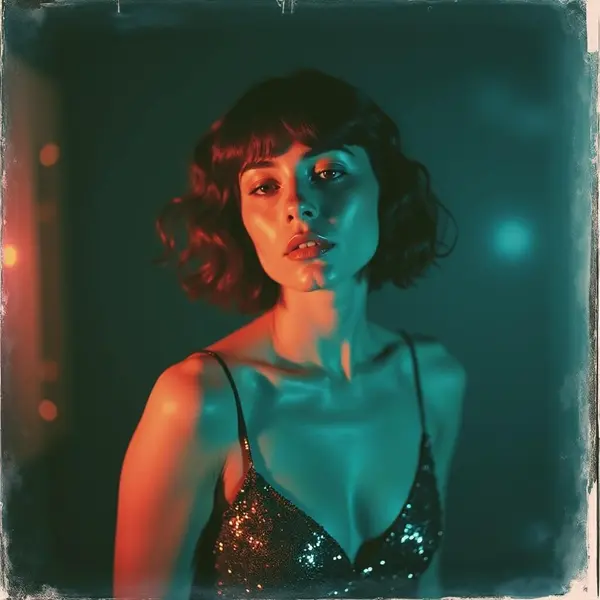
Character consistency: same character transformed into a Japanese PVC figure style


Introduction to ChronoEdit
ChronoEdit is an advanced image editing model designed to work with ComfyUI. It allows you to modify, enhance, and transform images using smart AI-driven transformation techniques — from physics-aware edits to full style transfers — while maintaining subject consistency across changes.
Unlike simple prompt-based editors, ChronoEdit understands spatial relationships and real-world physics, making it ideal for edits where objects need to move realistically or characters need to be transformed while preserving their identity.
Prerequisites: Prepare ComfyUI
Before starting, make sure ComfyUI is updated to the latest version to ensure compatibility with ChronoEdit's nodes.
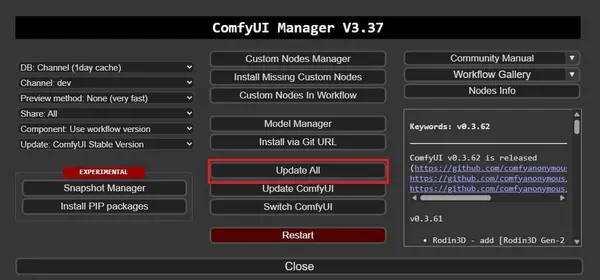
Open ComfyUI Manager
Click the Manager button at the top of the ComfyUI interface.
Click "Update All"
This updates ComfyUI's core files and all installed custom nodes. Required for ChronoEdit to work smoothly.
Download Workflow
Download the ready-made ChronoEdit workflow JSON file and drag it into your ComfyUI workspace to load it instantly.
Download Required ChronoEdit Models
All models below are required for ChronoEdit to work. Download each file and place it in the correct folder inside your ComfyUI installation — the table shows both the download link and the exact destination folder.
| Type | File | Folder | Download |
|---|---|---|---|
| Diffusion Model (FP8) | chrono_edit_14B_fp8_e4m3fn.safetensors | models/diffusion_models/ | ⬇ Get |
| Diffusion Model (FP16) | chrono_edit_14B_fp16.safetensors | models/diffusion_models/ | ⬇ Get |
| Diffusion Model (GGUF) | ChronoEdit-14B-Q8_0.gguf | models/unet/ | ⬇ Get |
| LoRA | chronoedit_distill_lora.safetensors | models/loras/ | ⬇ Get |
| Text Encoder | umt5_xxl_fp8_e4m3fn_scaled.safetensors | models/text_encoders/ | ⬇ Get |
| CLIP Vision | clip_vision_h.safetensors | models/clip_vision/ | ⬇ Get |
| VAE | wan_2.1_vae.safetensors | models/vae/ | ⬇ Get |
Folder Structure
Your ComfyUI models directory should look like this after placing all files:
ComfyUI/
└── models/
    ├── diffusion_models/
    │   └── chrono_edit_14B_fp8_e4m3fn.safetensors
    ├── unet/
    │   └── ChronoEdit-14B-Q8_0.gguf
    ├── loras/
    │   └── chronoedit_distill_lora.safetensors
    ├── text_encoders/
    │   └── umt5_xxl_fp8_e4m3fn_scaled.safetensors
    ├── clip_vision/
    │   └── clip_vision_h.safetensors
    └── vae/
└── wan_2.1_vae.safetensorsStep-by-Step: ChronoEdit ComfyUI Workflow Setup
Update ComfyUI
Open ComfyUI Manager → click Update All to update all nodes and core files.
Load the workflow
Drag and drop the ChronoEdit JSON file into the ComfyUI workspace to load it.
Install missing nodes
If red nodes appear, go to Manager → "Install Missing Custom Nodes" and install everything listed. Restart ComfyUI after.
Select models in each node
In the workflow, choose the correct model file in each loader node — diffusion model, CLIP Vision, VAE, LoRA, and text encoder.
Load your image
Use the Load Image node to import the image you want to edit.
Write your prompt
Add your edit instructions in the prompt node. ChronoEdit works best with focused, single-task prompts.
(Optional) Disable SageAttention
If you have not installed SageAttention or encounter errors, disable the patch sage attention node — the workflow still works without it.
Click "Queue Prompt" to run
ComfyUI will process your image through the ChronoEdit pipeline and output the result.
chronoedit_distill_lora), set steps: 20, CFG: 3.0, and shift: 5.0 for best results without the distillation LoRA.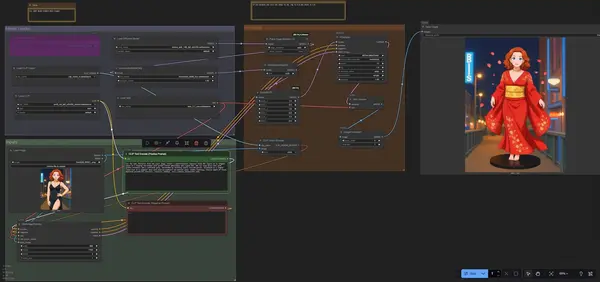
Example Run: Edit an Image with ChronoEdit
Here is a complete example. Load the input image in the Load Image node, use the prompt below, and run the workflow.
Example Prompt — PVC Figure Style Transfer
Use the same character from the input image. Create a photorealistic Japanese anime PVC figure of an elegant woman in a flowing red kimono with golden floral embroidery and a gold obi. She has long black hair with golden ornaments and a confident gaze, surrounded by drifting cherry blossom petals. Displayed on a simple round base on a computer desk with blurred keyboard and monitor glow. Studio lighting, shallow depth of field, detailed painted PVC textures, realistic shadows, and a premium collectible look.
Result: same character transformed into a photorealistic Japanese PVC scale figure
More Example Prompts and Results
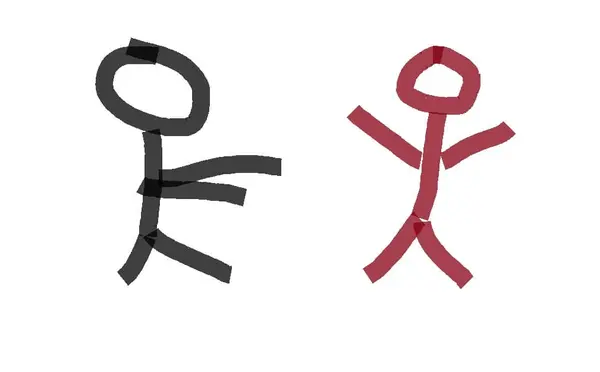
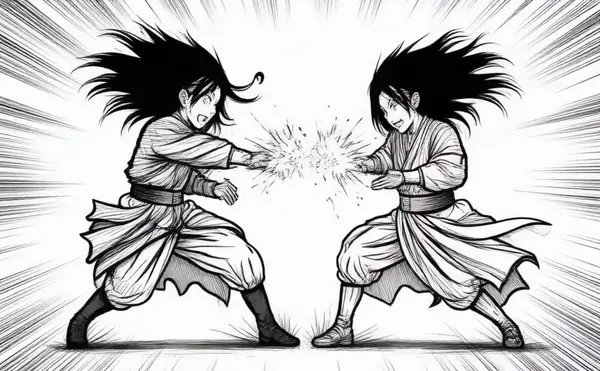
Sketch → Anime Fight Scene
Prompt
Convert the sketch into a black-and-white Japanese anime fight scene. Show two warriors mid-battle with intense poses, motion lines, and dramatic manga-style inking. Use bold lines, strong contrast, and expressive shading with cross-hatching and ink splashes. Emphasize action, emotion, and energy — flying hair, torn clothes, and glowing eyes. The scene should look like a cinematic manga panel full of impact and tension.
Physics-Based Edit: Boy Shoots Basketball
Prompt
A young boy throws a basketball toward the hoop, and the ball goes in perfectly.
Fashion Style Transfer: Red Hair & Sunglasses
Prompt
Add stylish sunglasses to the girl and change her hair color to a vibrant, fashionable red. Replace the background with a stylish fashion-themed setting — like a modern studio or runway backdrop with soft lighting and elegant tones. Keep her facial features and pose the same, with glossy natural red hair and well-fitted, modern sunglasses.
Tips and Troubleshooting
Missing node errors (red nodes in workflow)
Fix: Go to ComfyUI Manager → "Install Missing Custom Nodes". Install everything listed, then restart ComfyUI. All nodes should turn green.
Model not loading or not appearing in dropdown
Fix: Double-check file names and folder locations in the models/ directory. Refresh your browser after placing new files so ComfyUI picks them up.
SageAttention errors
Fix: Disable the patch sage attention node in the workflow. ChronoEdit will still function without it — SageAttention only speeds things up if it is correctly installed.
Poor quality results or unexpected outputs
Fix: Focus each prompt on a single main change. Complex multi-step prompts reduce quality. If not using the LoRA, set steps: 20, CFG: 3.0, and shift: 5.0.
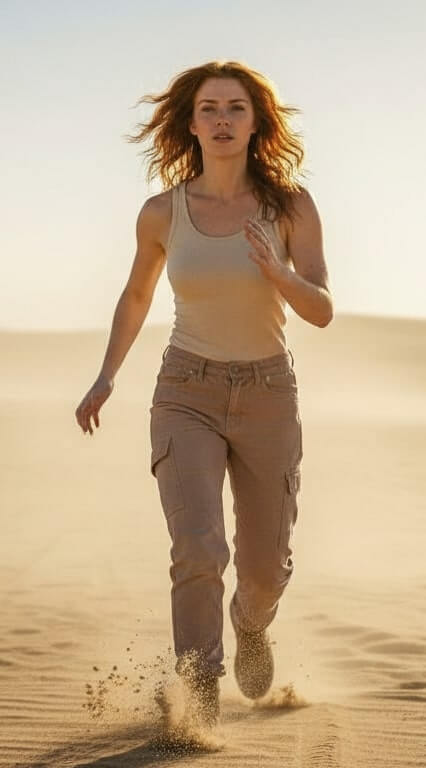
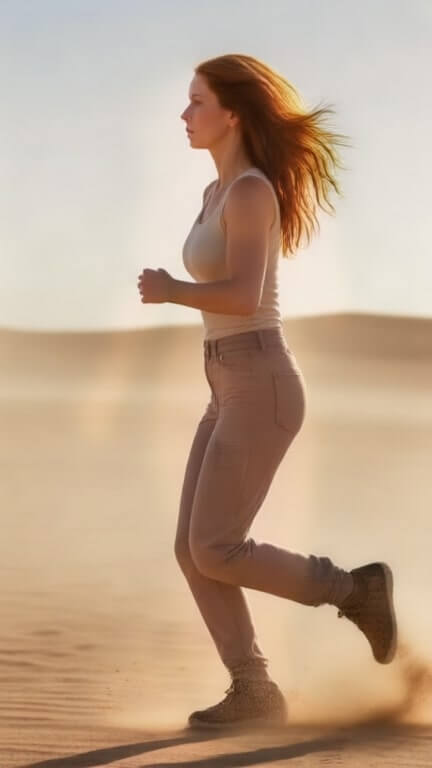
One-task prompts work best. Here is a good example — changing only the camera angle of a running girl:
Focused single-task prompt
Change the running girl to a full side view, showing her running from left to right. Keep the same outfit, lighting, and background style, just adjust the camera angle to capture her in full profile as she runs.
Frequently Asked Questions
Join the discussion
Sign in to leave a comment or reply
No comments yet
Be the first to share your thoughts!