

Introduction to the ComfyUI Interface
Getting started with ComfyUI is much easier once you understand the layout. The interface is built around a node-based canvas where you connect nodes to build workflows — but the menus, panels, and controls around that canvas are just as important to know.
This guide walks through every main section of the ComfyUI interface step by step: the top menu bar, the left side panel, the bottom toolbar, the run and queue controls, and the canvas navigation tools.
ComfyUI Interface Overview
The ComfyUI interface (v0.2.0+) is divided into six main areas. The diagram below shows how they are arranged. Each area is explained in detail in the sections that follow.
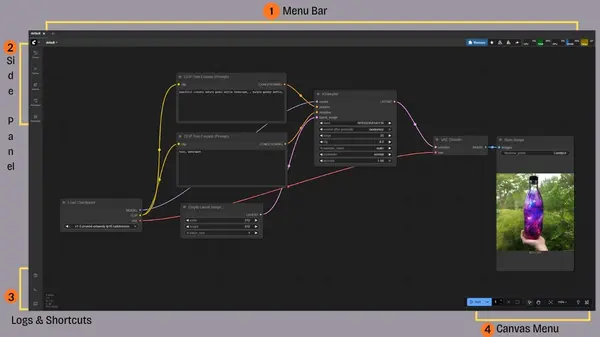
Here is a summary of the six main areas:
① Menu Bar
Top of the interface. Access file operations, workflow management, extensions, and settings.
② Left Side Panel
Queue, Nodes, Models, Workflows, and Templates — everything you need to build.
③ Canvas Area
The main workspace where you add, connect, and arrange nodes to build workflows.
④ Bottom Toolbar
Logs, Console, Shortcuts, and Settings — useful for debugging and preferences.
⑤ Run / Queue Controls
Run your workflow, manage the queue, and switch run modes (once, instant, on-change).
⑥ Canvas Controls
Navigation tools, minimap, hide-links toggle, and fit-view at the bottom right.
ComfyUI Menu Bar
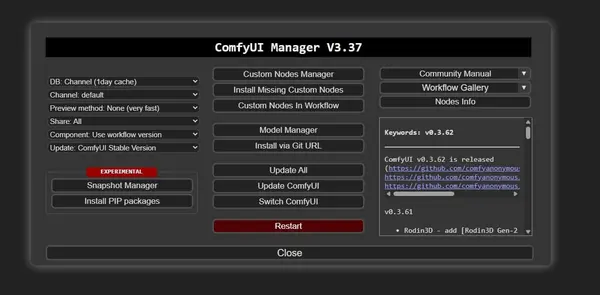
The menu bar runs across the top of the ComfyUI interface. It gives you quick access to workflow management, extensions, and global settings. In the new UI (v0.2.0+), the menu bar has been reorganised — the Manager button that was previously in the top toolbar is now accessible via the menu.
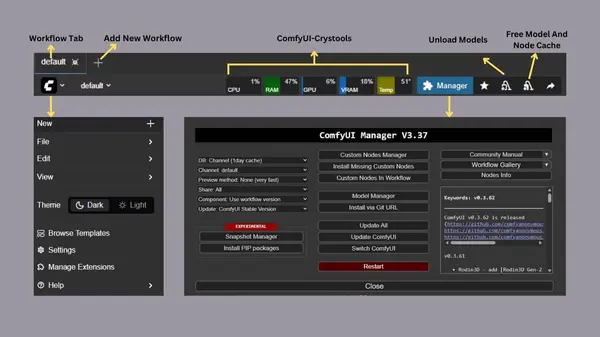
What's in the menu bar
- Manage Extensions (Manager): Install, update, and manage custom nodes. In v0.2.0+, access this via the main menu or the Plugin icon in the top bar — not the old top-left toolbar button.
- Unload Models: Free up GPU memory by unloading models currently loaded in VRAM — useful between different workflow types.
- Show Favorites: View your starred/favourite custom nodes in one place for quick access.
- Share: Share your current workflow with the ComfyUI community or export it.
- New Workflow (+ icon): Start a blank workflow in a new tab. The new UI supports multiple workflow tabs open at the same time, each with independent undo/redo history.
- Workflow Tabs: Switch between multiple open workflows. Each tab remembers its own state independently.
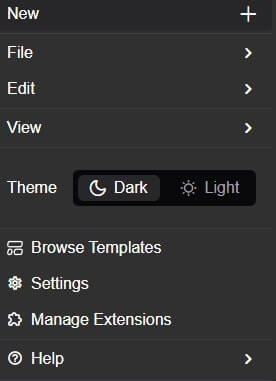
ComfyUI Icon Menu
Clicking the ComfyUI icon in the top bar opens a dropdown with additional options: create new workspaces, file operations, edit, view, theme switching, settings, and extension management.
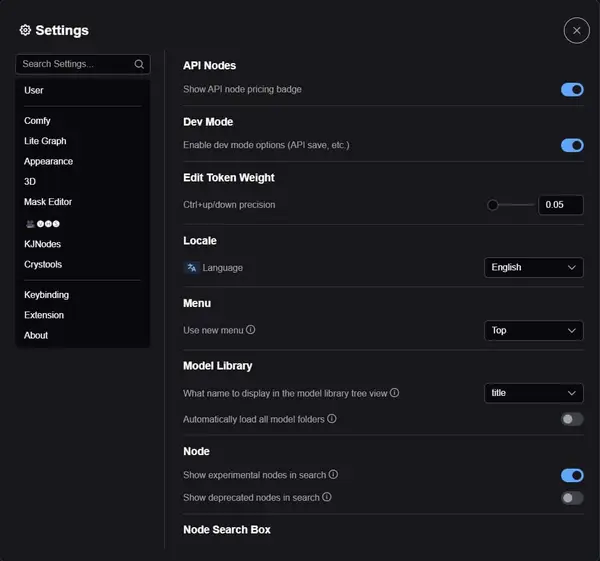
Settings
The Settings panel (gear icon, top-right or bottom toolbar) lets you change language, toggle developer mode, switch between new and old UI, adjust theme, and configure other preferences.
Manager location in the new UI
ComfyUI Side Panel
The left side panel is one of the most useful parts of the ComfyUI interface. It gives you direct access to your queue, nodes, models, saved workflows, and starter templates — all without leaving the canvas.
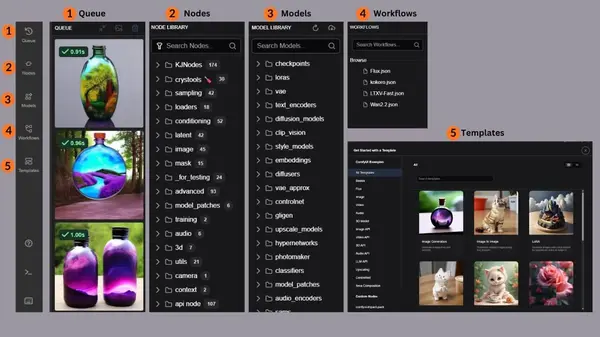
Side panel tabs explained
- Queue: Shows all currently pending and completed generation tasks. You can see what's running, what's queued, and clear completed items from here.
- Nodes (Node Library): Browse and search all available nodes — both ComfyUI core nodes and any installed custom nodes. Drag a node from the panel directly onto the canvas to add it.
- Models (Model Library): Displays all model files detected in your ComfyUI/models directory at startup. After downloading new models, press the
Rkey to refresh and see them here. - Workflows: Shows your locally saved workflows. Open, rename, duplicate, or delete saved workflows directly from this panel.
- Templates: Built-in ComfyUI workflow templates to get started quickly — covers images, videos, audio processing, upscaling, ControlNet, and more.
Bottom Toolbar: Logs, Console, Shortcuts & Settings
The bottom toolbar (bottom-left of the interface) is where you access debugging tools, keyboard shortcuts, and settings. It is especially useful for troubleshooting workflow errors.
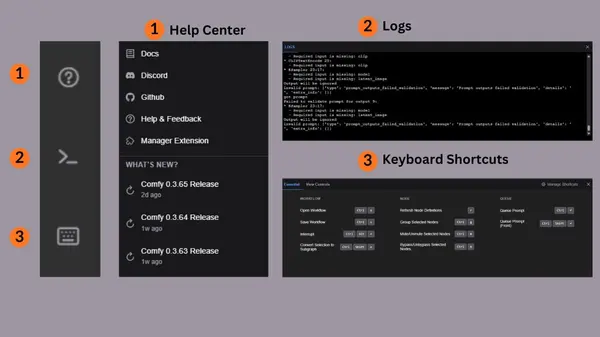
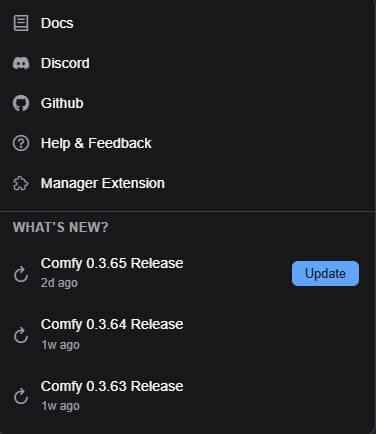
Docs and Releases (? icon)
Opens the official ComfyUI documentation and shows the latest release notes. Useful for checking what changed in a recent update.
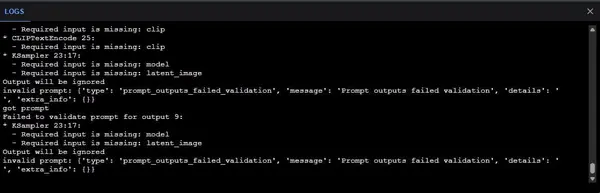
Logs / Console
The Logs panel shows real-time output from the ComfyUI server — model loading, generation progress, errors, and warnings. This is the first place to look when something goes wrong. Red entries indicate errors; yellow entries are warnings.
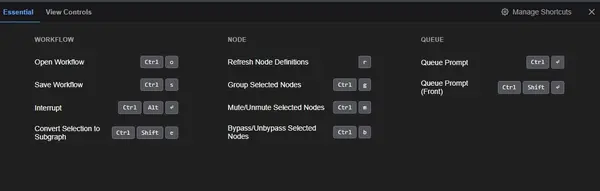
Keyboard Shortcuts
Opens a panel listing all available keyboard shortcuts. Learning the most common ones — like Ctrl+Enter to run, Space to pan, and R to refresh models — will significantly speed up your workflow.
Run Operations and Canvas Controls
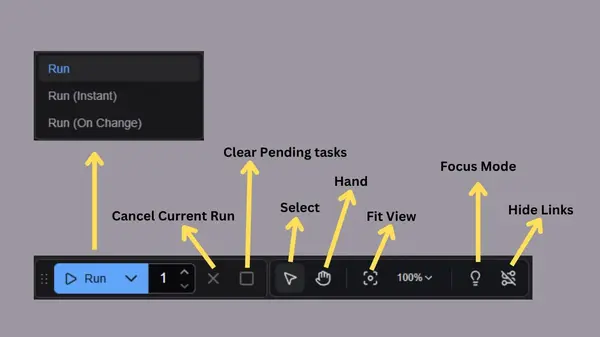
The run controls are in the top-right area of the interface (the "Right Control Area"). Canvas navigation tools are at the bottom-right of the workspace. Together they let you control workflow execution and navigate the canvas.
Run Workflow
The primary Run button starts your workflow. It queues one generation. There are also two additional run modes accessible from the dropdown next to the button:
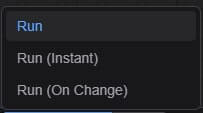
- Run Once: Queues a single generation and stops. The default mode.
- Instant Run: Continuously generates in a loop until you click Cancel. Useful for live previewing prompt or seed changes.
- Run On Change: Automatically re-runs the workflow whenever you change a node value. Great for fast iteration on small adjustments.
Cancel
Stops the current generation immediately and clears all pending items from the queue. Use this if you notice a mistake in your workflow and want to stop without waiting for the current run to finish.
Canvas Navigation Tools
- Hand Tool: Switch the cursor to pan mode, so clicking and dragging moves around the canvas instead of selecting nodes.
- Fit View: Resets the canvas zoom so all nodes in the current workflow are visible at once. Useful when you have a large workflow and lose track of where you are.
Focus Mode
Focus Mode hides the menu bar and side panel to give you the full screen for the workflow canvas. This is helpful when building complex workflows that need a lot of space.
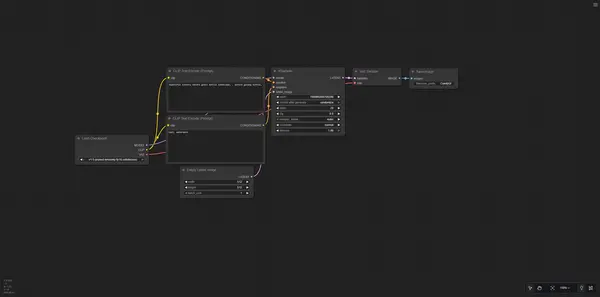
Hide Links
Hides the connection lines (wires) between nodes for a cleaner view. The connections still exist and the workflow still runs correctly — they are just visually hidden. Useful when the canvas becomes cluttered with many nodes.
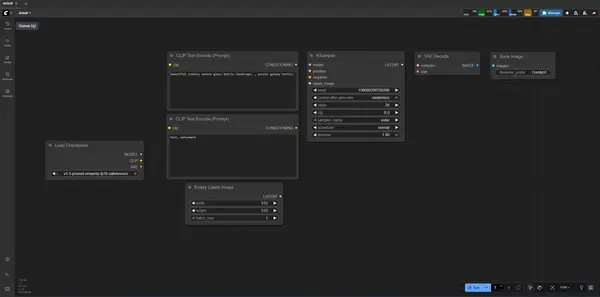
New Interface vs Old Interface
Since ComfyUI v0.2.0, the new interface is enabled by default. If you are following an older tutorial or prefer the classic layout, you can switch back. Here is a comparison of the two:
| Feature | New Interface (v0.2.0+) | Old Interface |
|---|---|---|
| Language support | English, Chinese, Russian, French, Japanese, Korean | English only |
| Manager location | Menu > Manage Extensions (top menu or plugin icon) | Top toolbar button |
| Side panel | Collapsible left panel with Queue, Nodes, Models, Workflows, Templates | Basic right-side panel |
| Workflow tabs | Multiple workflow tabs, undo/redo per tab | Single workflow at a time |
| Bottom toolbar | Logs, Console, Shortcuts, Settings | Minimal, no dedicated toolbar |
| Canvas controls | Minimap, hide links, navigation buttons | Basic navigation only |
| Switch back? | Settings > Comfy > Menu > Use New Menu: Disabled | — |
Frequently Asked Questions
Join the discussion
Sign in to leave a comment or reply
No comments yet
Be the first to share your thoughts!