
⚡ Quick Answer
Anima runs natively in ComfyUI once three files— a diffusion model, a Qwen text encoder, and a VAE — sit in their matching model folders and get loaded through a working Anima workflow. The whole thing takes about 10–15 minutes, needs at least 6-8GB of VRAM, and doesn't require installing a single custom node.
If you've spent any time with anime-style checkpoints in ComfyUI before, you already know the drill: download a checkpoint, hope your LoRAs are compatible, fight with CLIP's limited understanding of your prompt, repeat. Animais a genuinely different anime and illustration model — it's not built on Stable Diffusion XL at all — and it's become one of the more talked-about local models for anime-style art because of it.
This guide walks through installing Anima in ComfyUI using a specific, tested workflow: which files to download, exactly where each one goes, what every part of the workflow actually does, and how to write your first prompt. Hardware and versions used for this guide: a recent version of ComfyUI, tested on Windows with an RTX 4090.
What Is Anima, and Why Is It Different From Your Other Anime Models?
Anima is a 2-billion-parameter image generation model made by CircleStone Labs, built specifically for anime and illustration-style art. The important part isn't the parameter count — it's the architecture underneath it. Most anime checkpoints you've probably used before, like Illustrious, NoobAI, or WAI, are all fine-tunes of Stable Diffusion XL (SDXL). Anima is not. It's built on a much newer architecture from NVIDIA called Cosmos, and instead of the CLIP text encoder that SDXL models rely on, Anima uses a small language model (Qwen-3, at 0.6 billion parameters) to read your prompt.
In plain terms: a diffusion model is the part of the setup that actually turns noise into an image, step by step, guided by your prompt. A text encoderis a separate piece that reads your prompt first and turns it into something the diffusion model can understand. Because Anima's text encoder is a real language model rather than CLIP, it's noticeably better at understanding full sentences, spatial relationships ("the cat is behind the box," not just "cat, box"), and mixing plain English with the tag-style prompts anime models are known for.
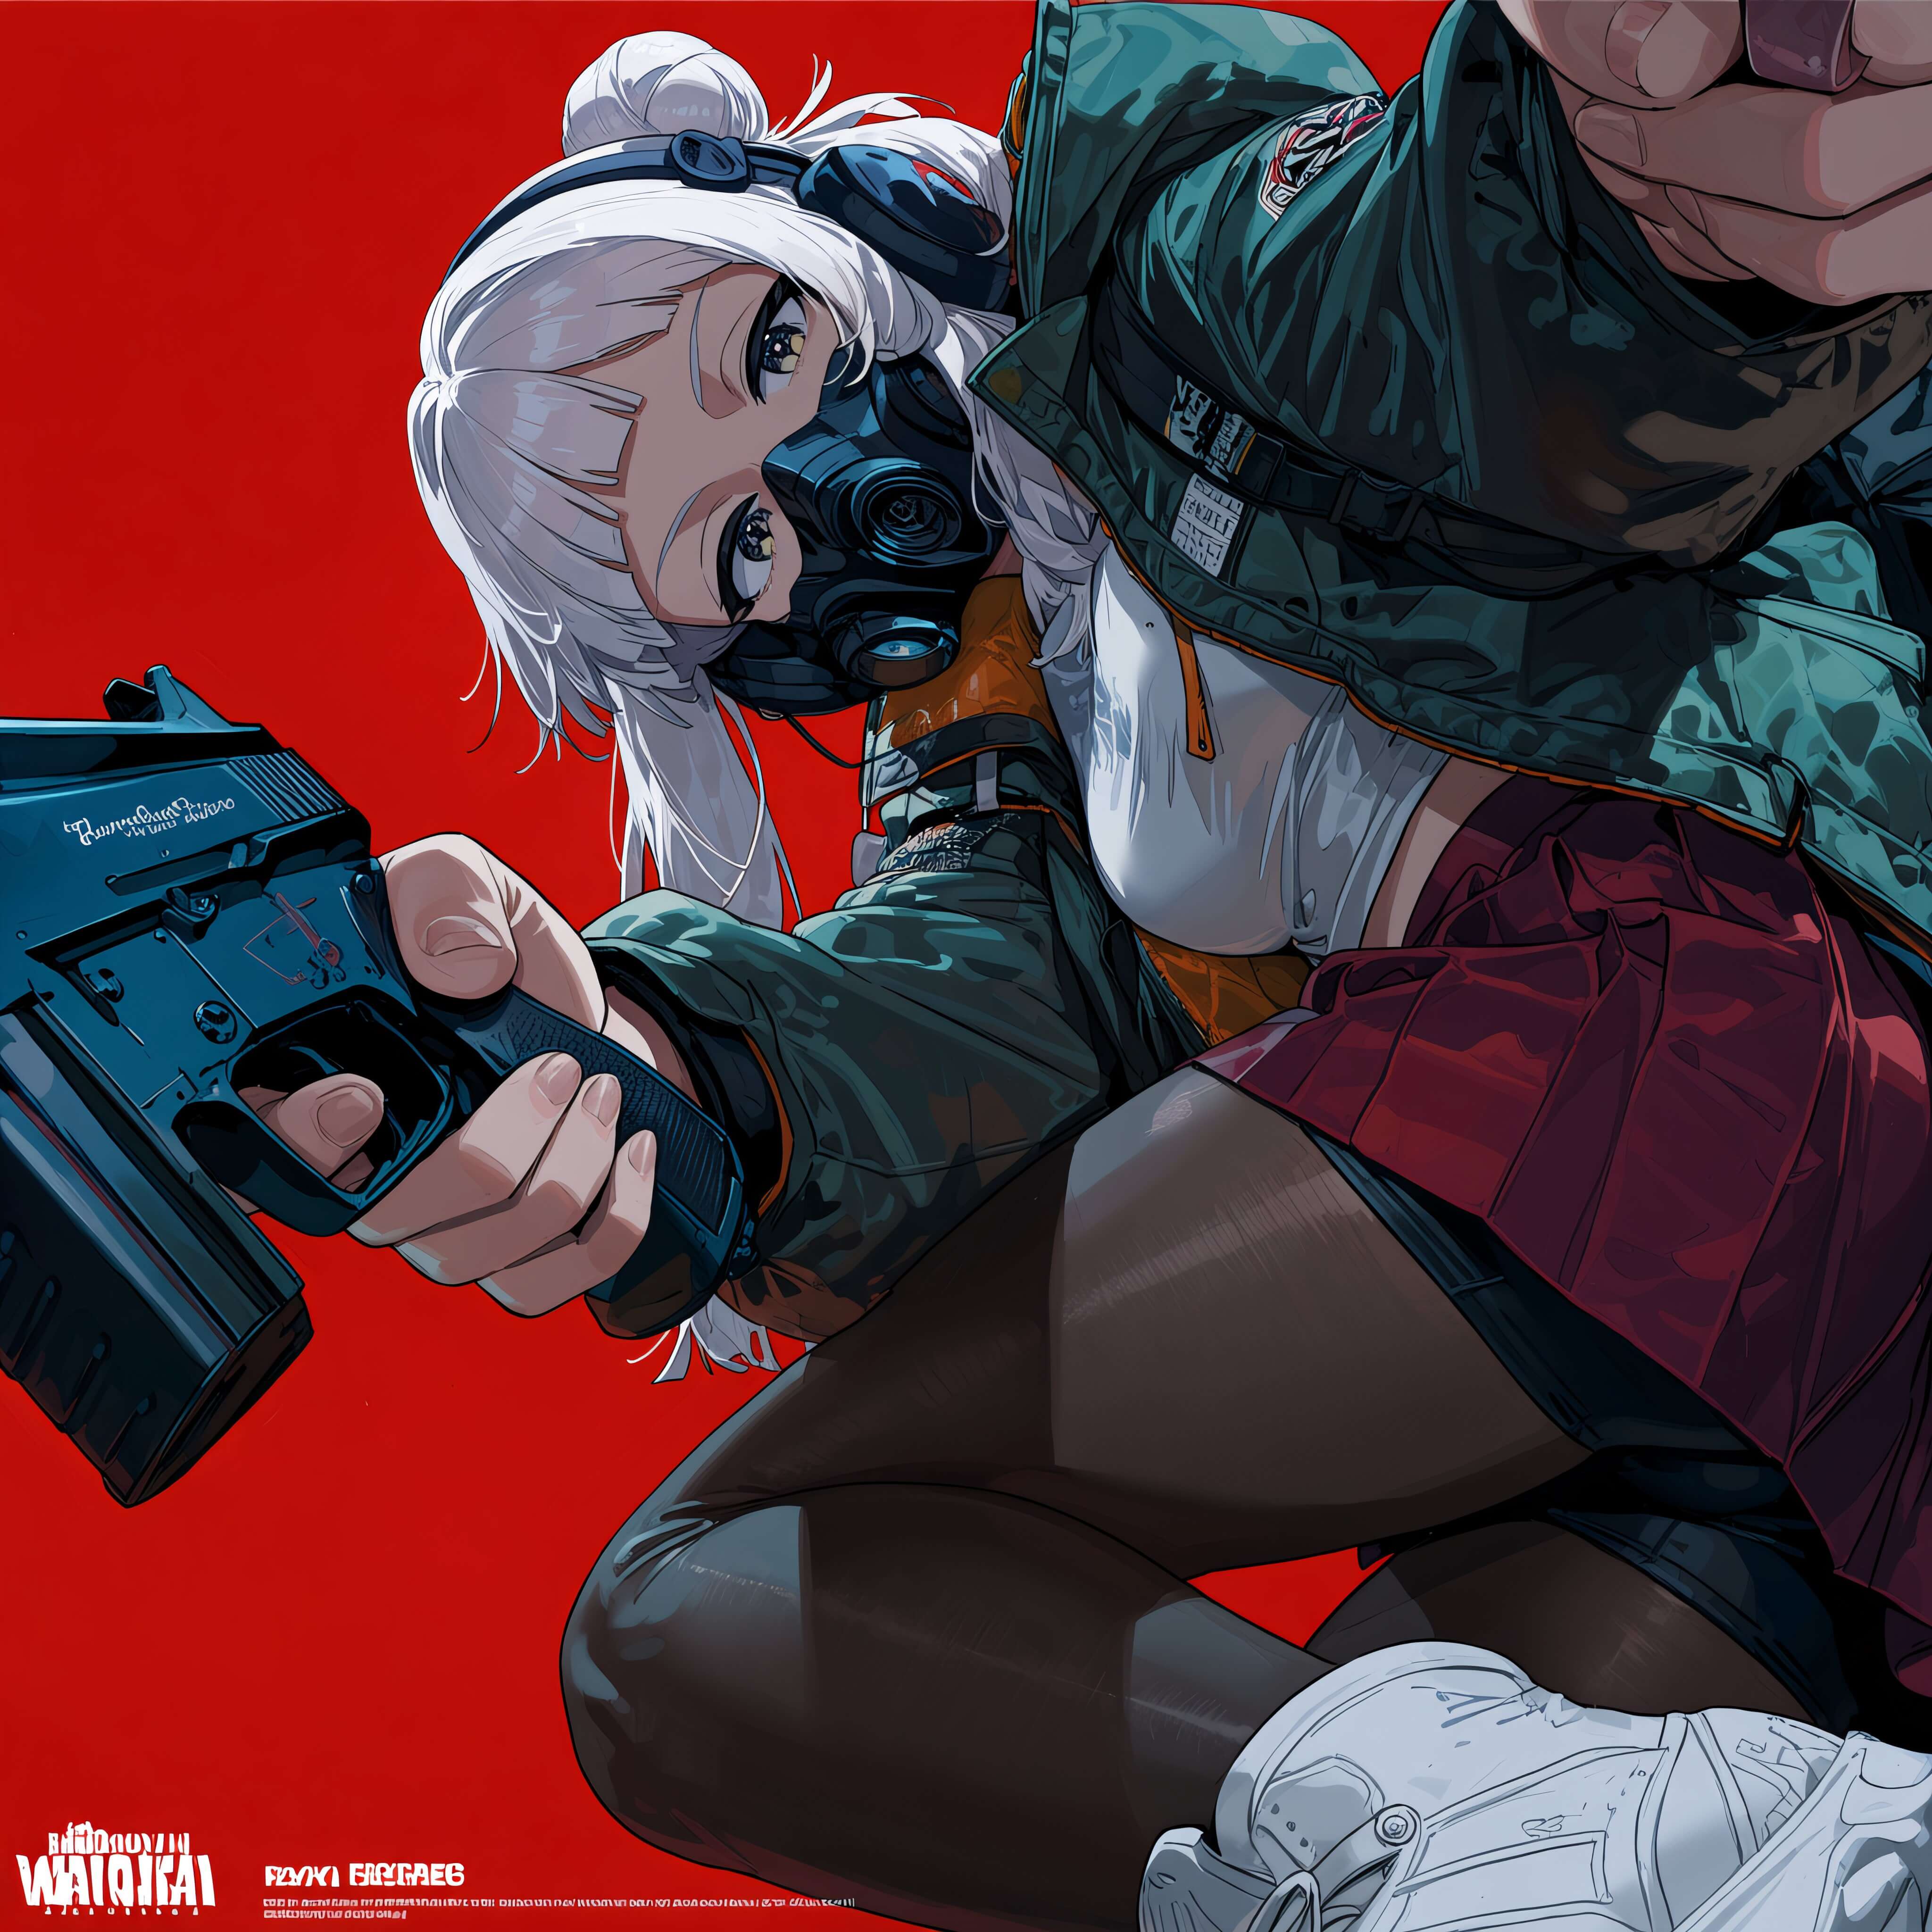
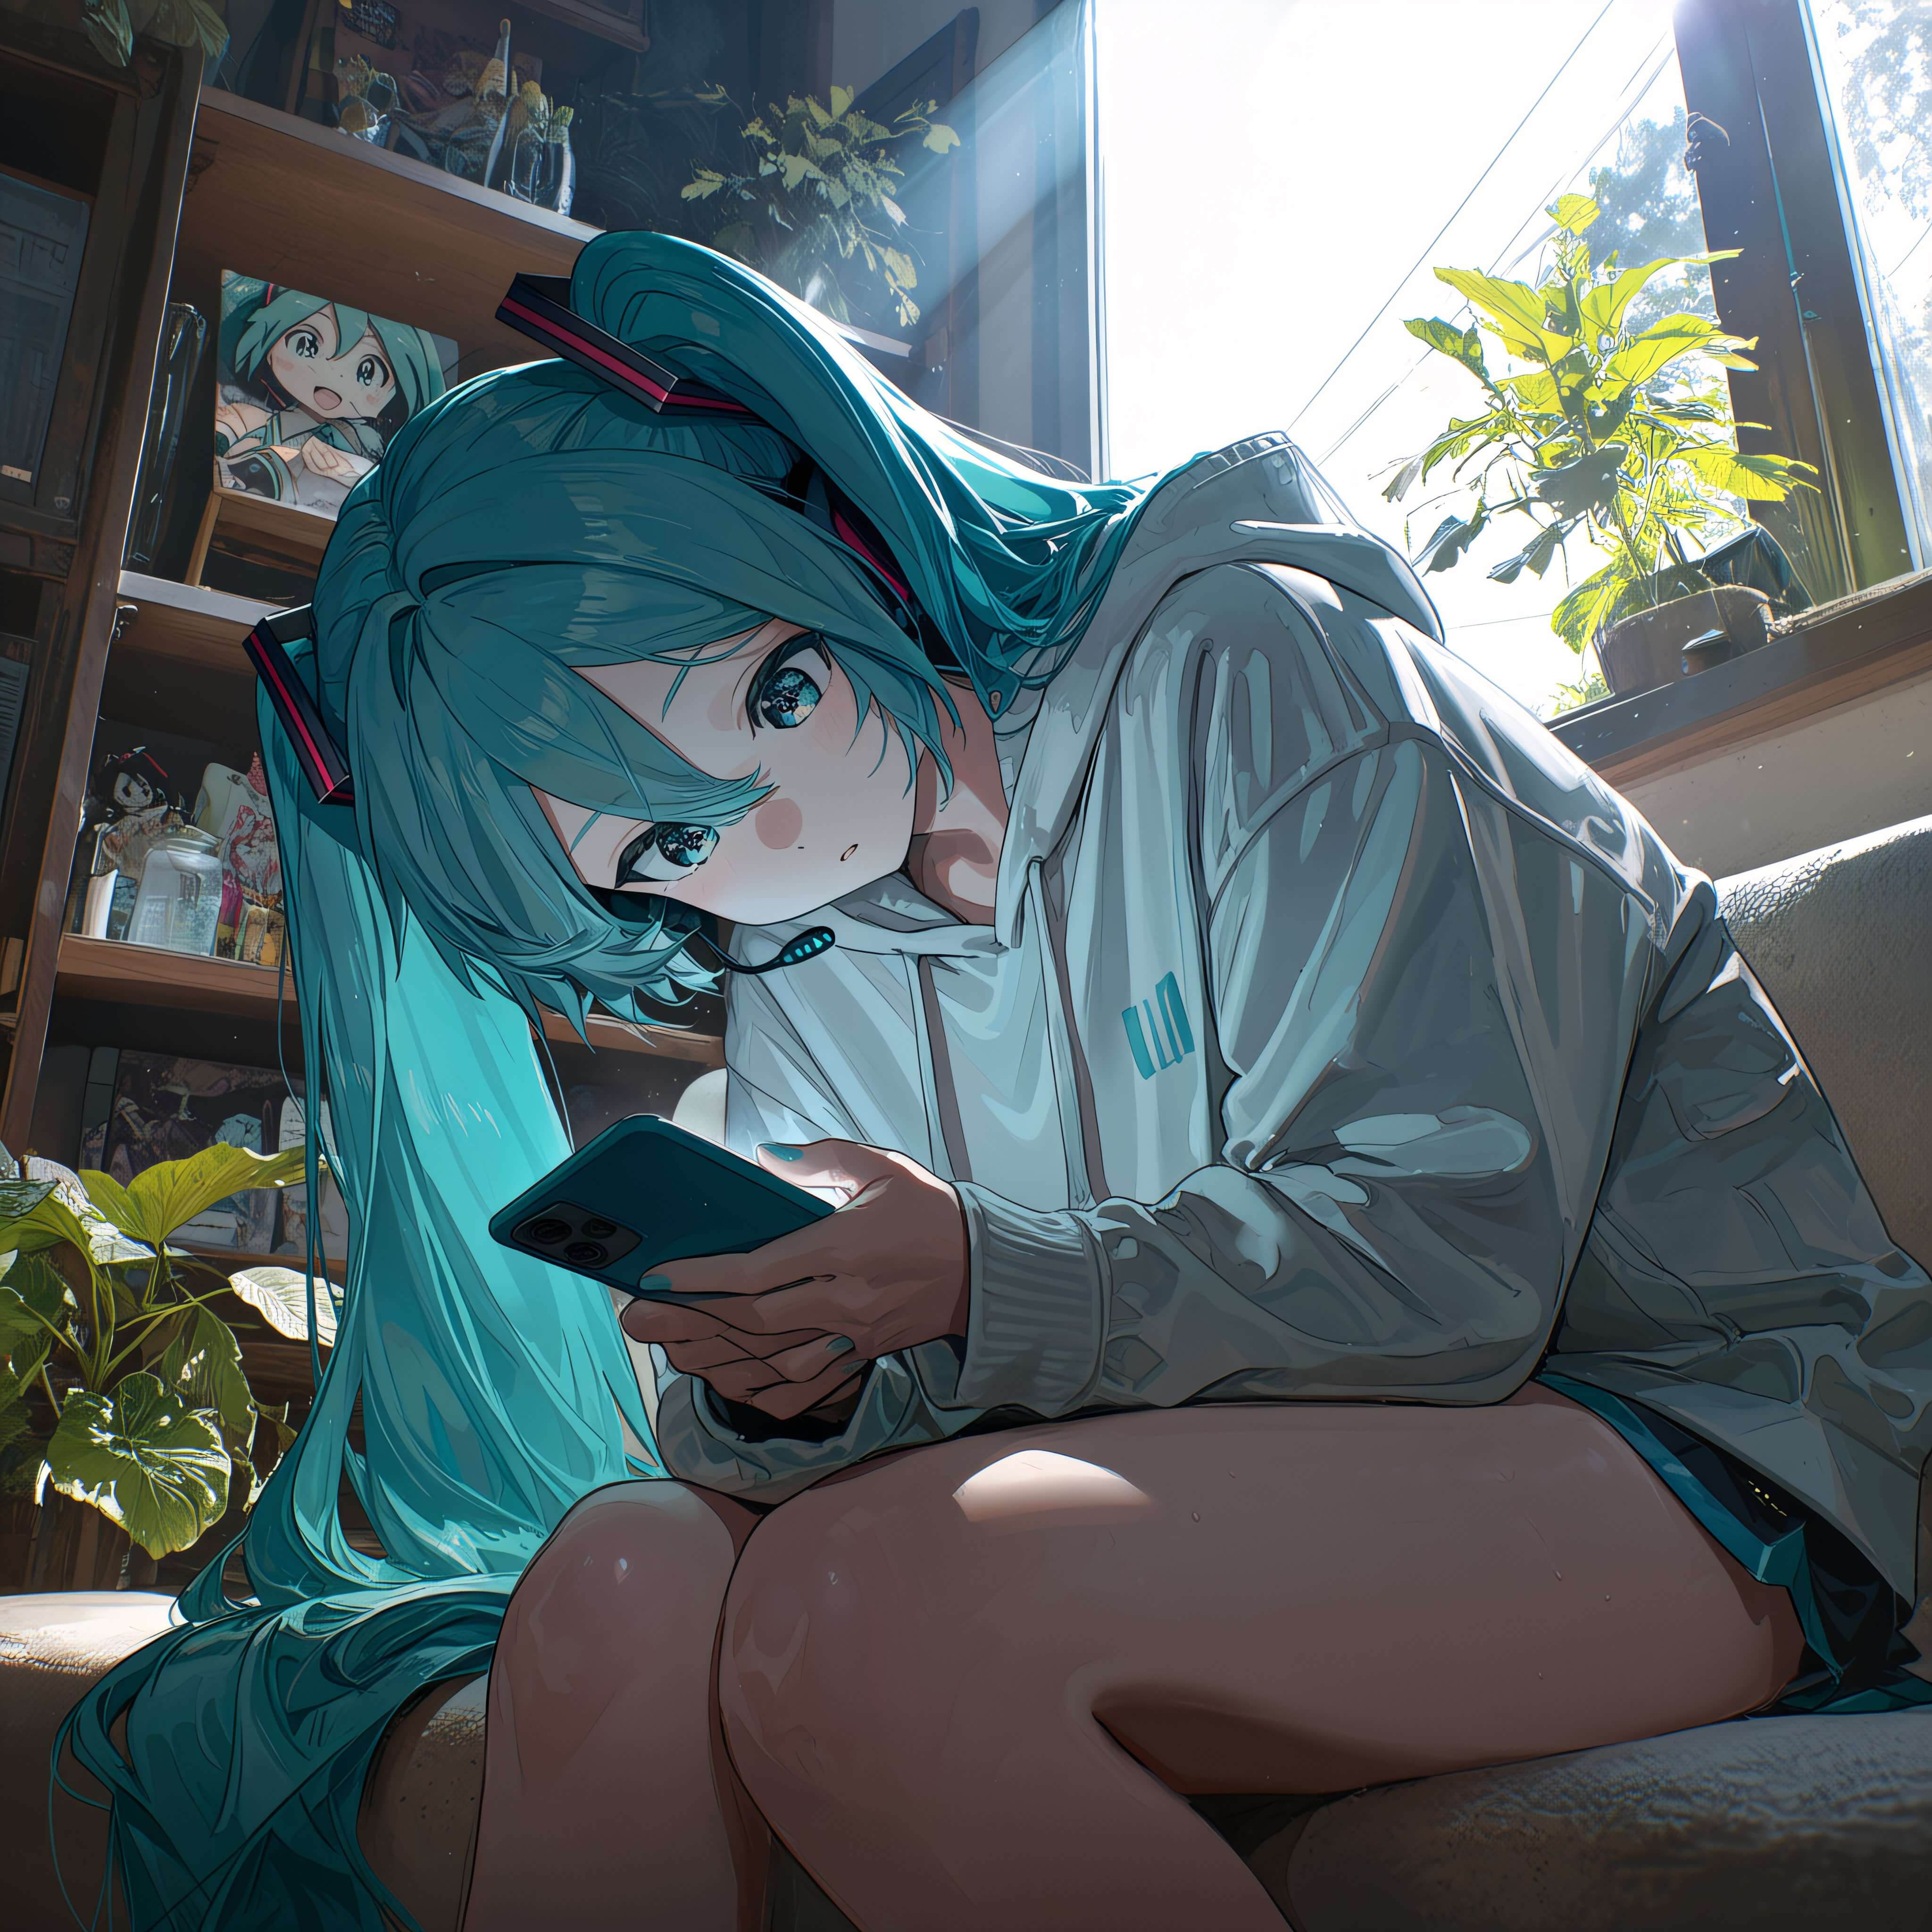
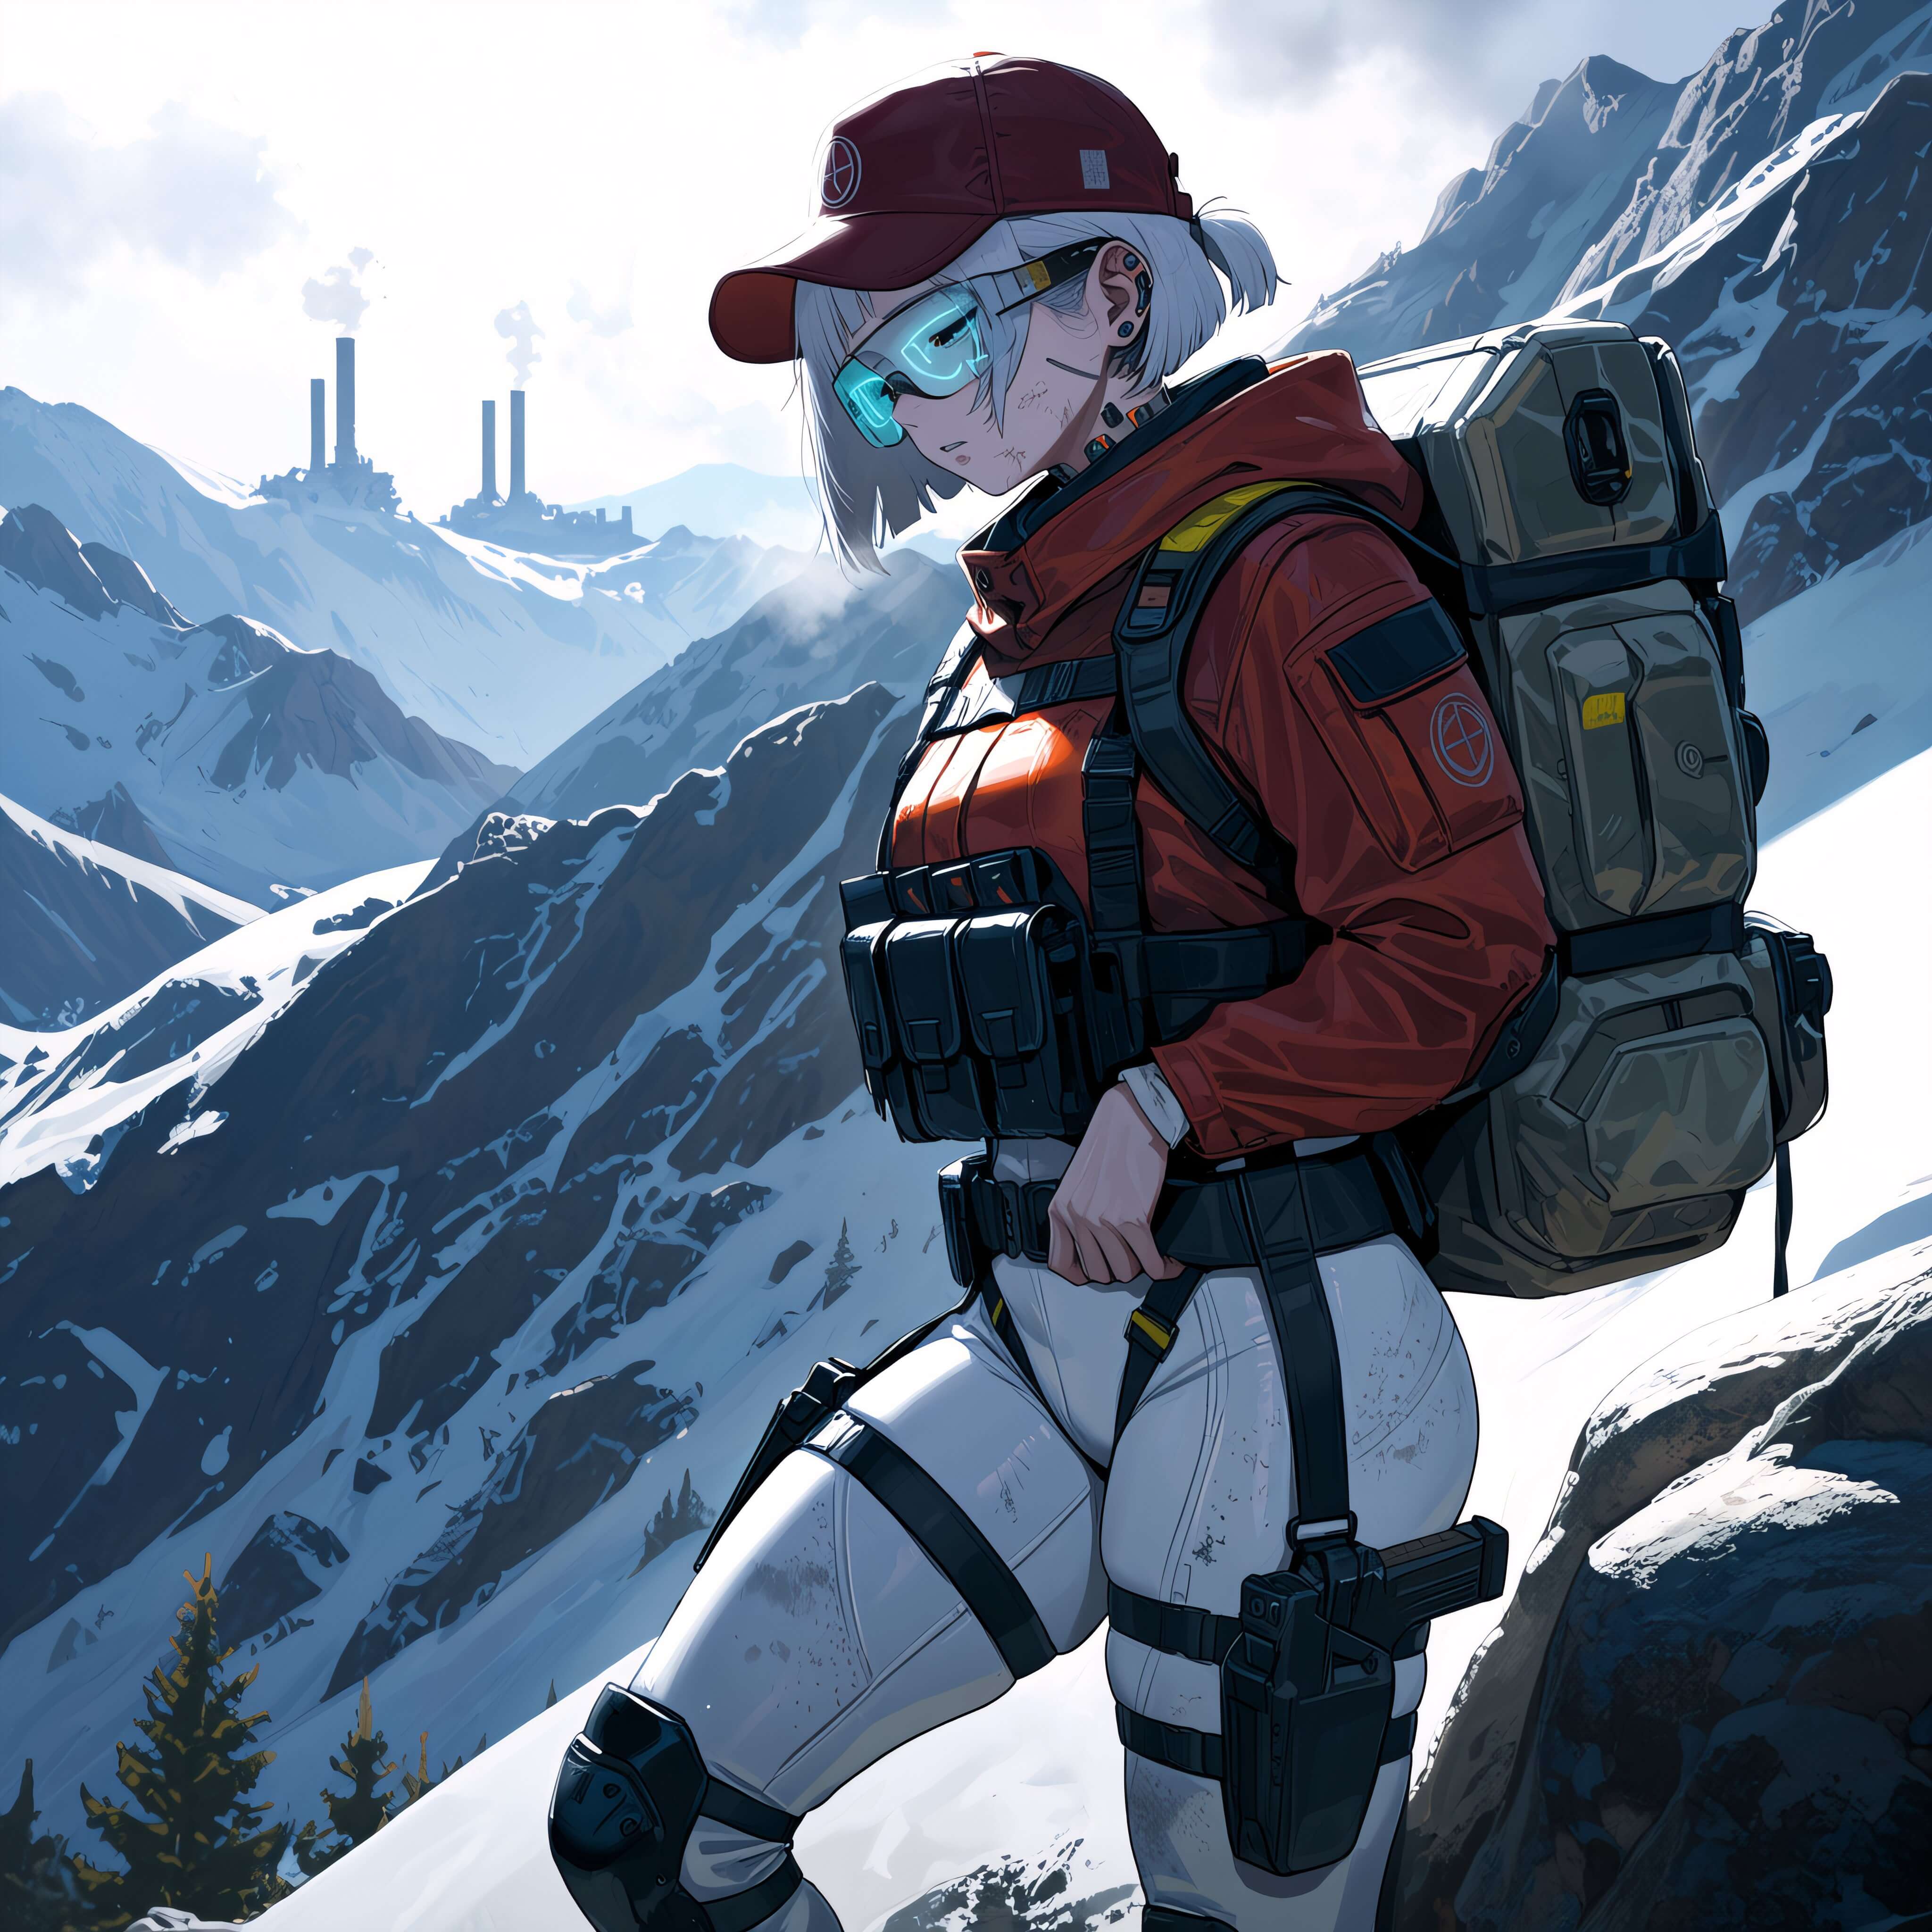
What You Need Before You Start
Unlike a lot of models you may have used before, Anima doesn't come as one single checkpoint file you drop in and go. It ships as separate pieces— the diffusion model, the text encoder, and the VAE each live in their own file, and this specific workflow adds one more optional file on top for upscaling. That sounds more complicated than it is — you're just downloading four files instead of one, and each one has an obvious home.
Which Diffusion Model Does This Guide Use?
This guide uses a community checkpoint called Fn-Moment Anima Turbo, hosted on Civitai. It's a fine-tune built on top of Anima's Turbo architecture, but merged specifically so it runs well at normal step counts — this is the "NoTurbo" part of its filename. In practice, that means you get results in Anima's signature style while using settings that are easy to reason about (30 steps, CFG 4) instead of Turbo-specific values like a CFG of 1.
View & Download on Civitai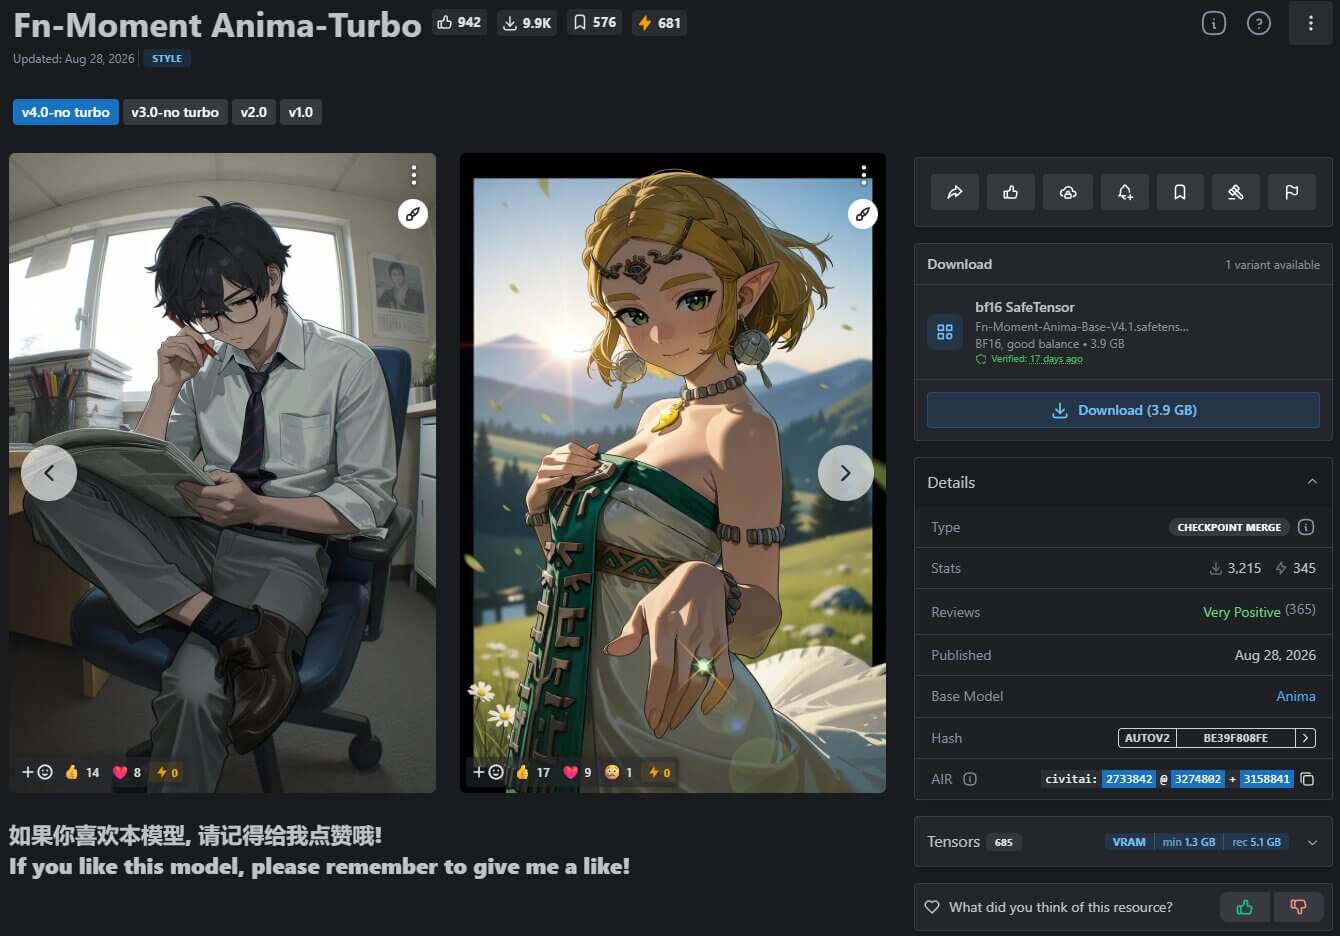
Text Encoder and VAE (Official Files)
These two files come straight from CircleStone Labs' official Hugging Face repository, regardless of which diffusion model you use above — every Anima-based checkpoint, official or community, relies on the same text encoder and VAE.
Upscale Model (Optional, But Included in This Workflow)
This workflow generates your image at a smaller size first, then runs it through an upscale model called 4x-AnimeSharp to enlarge and sharpen it. You can skip this file if you're fine with a smaller output, but it's a small, fast download and worth including.
| File | Size | What It Is | Goes In |
|---|---|---|---|
fnMomentAnimaTurbo_v40NoTurbo.safetensors | Check Civitai listing | The diffusion model itself — this is what actually draws the image | diffusion_models/ |
qwen_3_06b_base.safetensors | 1.19 GB | The text encoder — this is what reads and understands your prompt | text_encoders/ |
qwen_image_vae.safetensors | 254 MB | The VAE — this turns the model’s internal output into a real image | vae/ |
4x-AnimeSharp.pth | 67 MB | An optional upscale model that sharpens and enlarges your finished image | upscale_models/ |
Where Everything Goes
Each of the four files you just downloaded has one correct folder inside your ComfyUI installation. If a file ends up in the wrong folder, ComfyUI simply won't show it as an option later — it won't crash, it'll just look like the file isn't there.
If you've never opened your ComfyUI folder before and aren't sure why models are split into separate folders like this in the first place, our guide to checkpoints and models in ComfyUI covers that from the very beginning.
How to Actually Install Anima in ComfyUI
With all four files downloaded and sitting in the right folders, the rest of the setup is short. Here's the full sequence from a fresh ComfyUI install to your first generated image.
(anima-setup-comfyui-workflow.json)- Make sure ComfyUI itself is installed. If you haven't installed ComfyUI yet, grab the one-click installer from the official ComfyUI website and pick an install location you'll remember — that's where the
modelsfolder from the previous section will live. - Download the four model files above and place each one in its matching folder, exactly as shown in the folder structure above.
- Download the workflow file using the button above, then drag and drop it directly onto the open ComfyUI window in your browser. The full node graph will appear on your canvas.
- Check that every loader node points to the right file. Look at the UNETLoader, CLIPLoader, VAELoader, and UpscaleModelLoader nodes — each has a dropdown, and each dropdown should already show the filename you downloaded. If a dropdown is blank or shows a different filename, click it and select the correct file. A blank dropdown almost always means that file is sitting in the wrong folder.
- Write a prompt in both text boxes. The next section walks through exactly what to type here for your first image.
- Click the orange Queue Prompt button in the top-right corner. A progress bar appears below it, and your generated image will show up in the preview panel once it's done — usually well under a minute on a modern GPU.
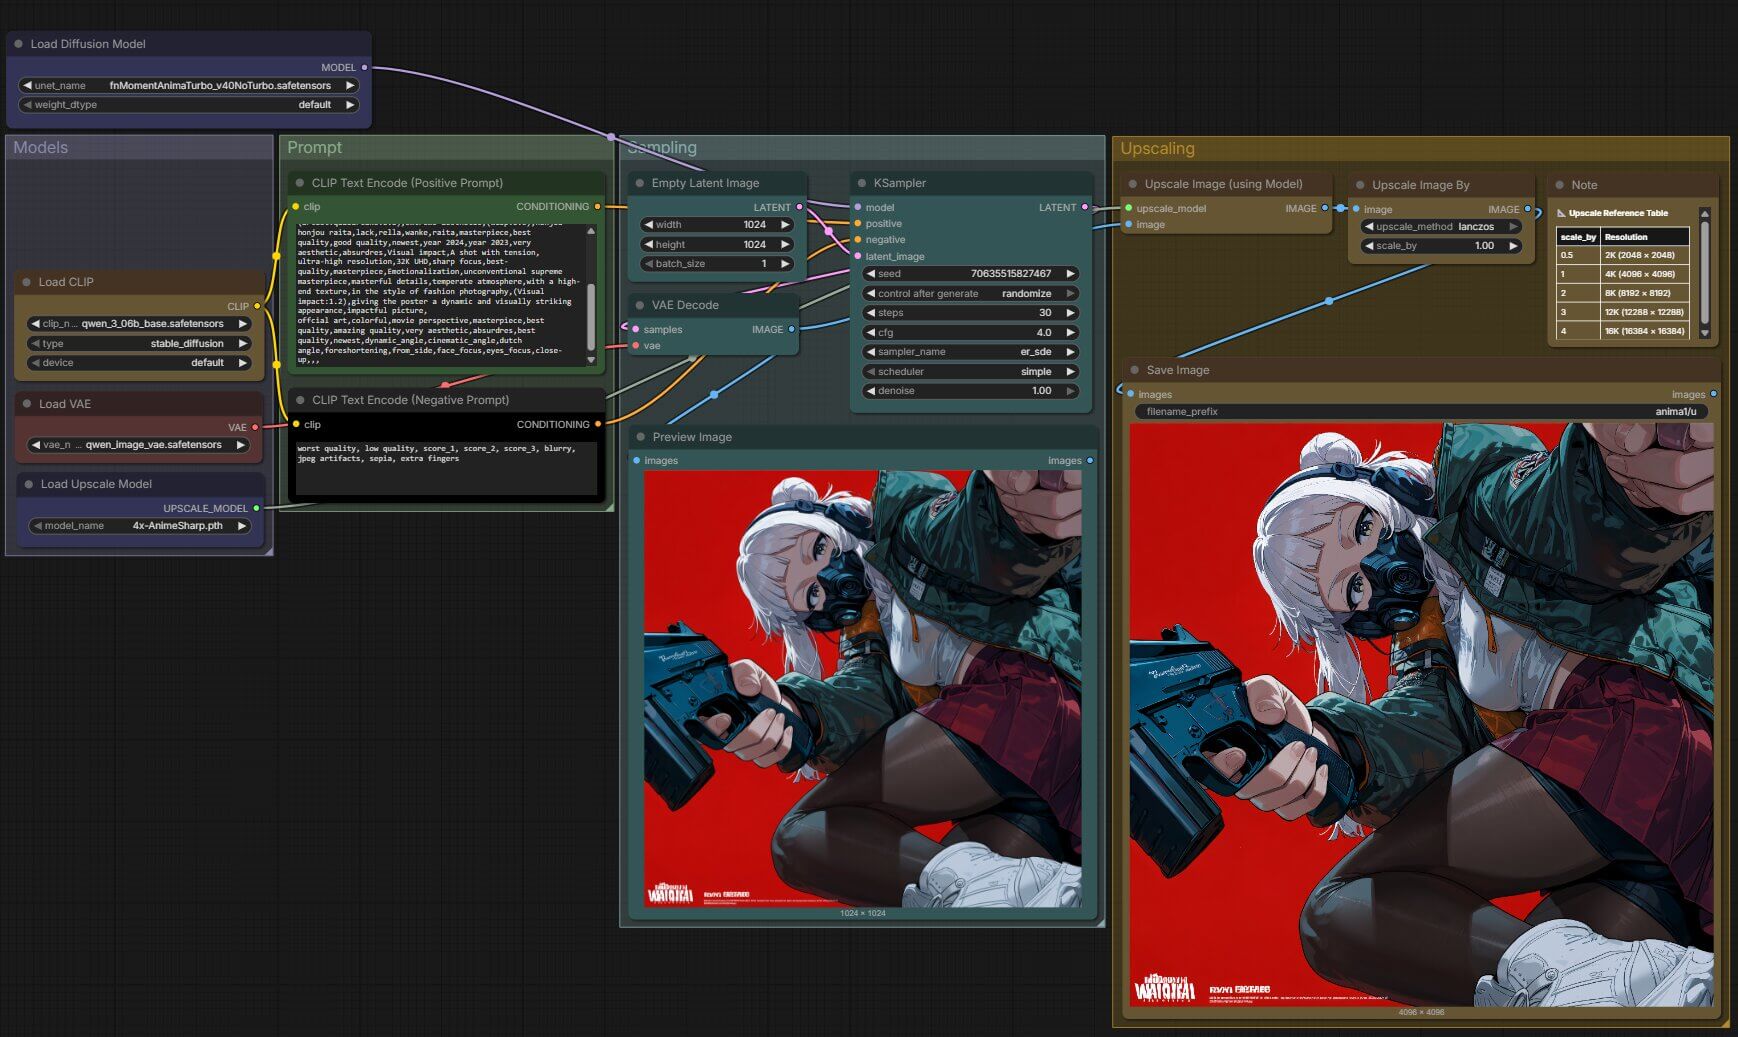
How This Workflow Actually Works
You don't need to understand every node to use this workflow, but knowing what each group is doing makes it much easier to troubleshoot later, and to eventually start changing things yourself. The workflow is organized into four labeled groups on the canvas: Models, Prompt, Sampling, and Upscaling.
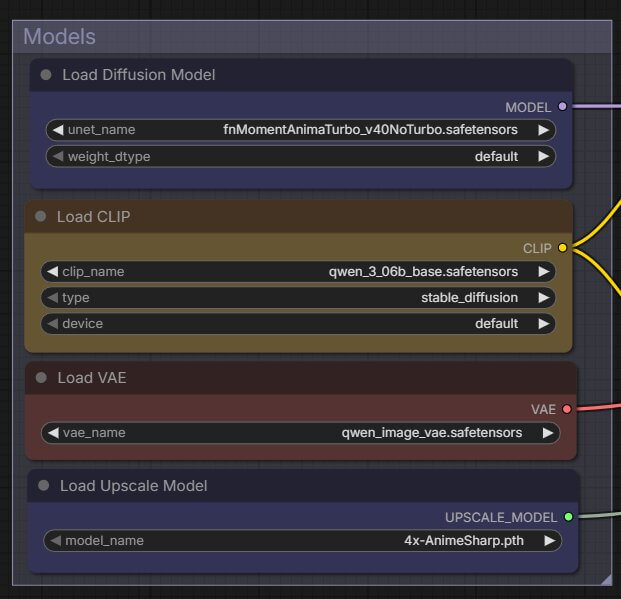
The Models Group
This is where your four downloaded files get loaded into the workflow: the UNETLoader node loads the diffusion model, the CLIPLoader node loads the text encoder, the VAELoader node loads the VAE, and the UpscaleModelLoader node loads the upscale model. Nothing downstream in the workflow can run until these four are all pointed at real files.
The Prompt Group
Two CLIP Text Encode boxes live here — one for your positive prompt (what you want to see) and one for your negative prompt (what you want the model to avoid). Both boxes read the text encoder from the Models group, turn your words into something the diffusion model can use, and pass that along to the Sampling group.
The Sampling Group
This is where the actual image generation happens. An Empty Latent Image node sets your starting canvas size (1024×1024 by default in this workflow), and the KSampler node takes your prompt, your negative prompt, and that blank canvas, then runs the diffusion process to produce a finished image over a set number of steps. We cover exactly what each KSampler setting does in the next section.
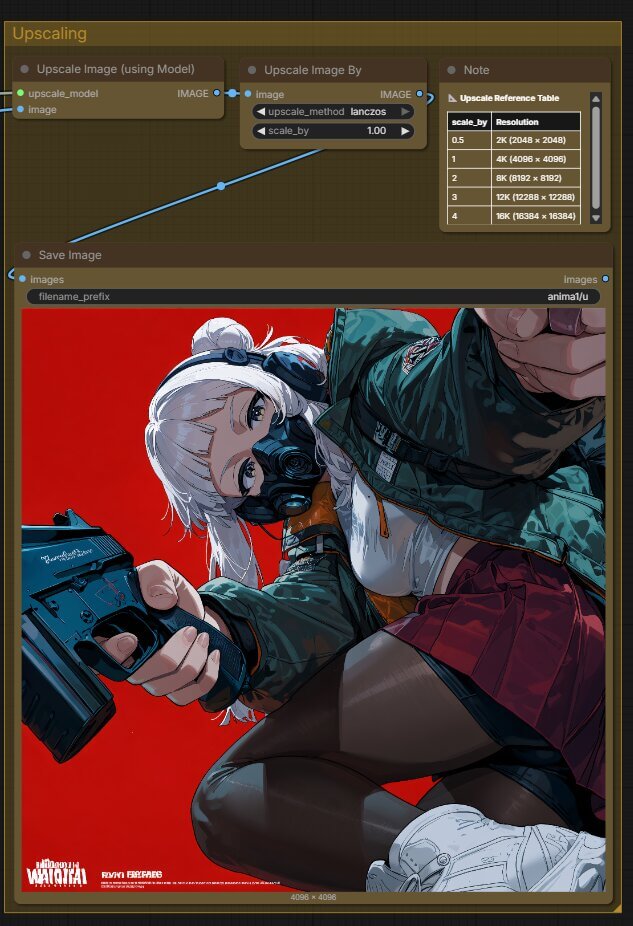
The Upscaling Group
Once KSampler finishes, the image gets decoded into something viewable and sent two places at once: straight to a preview panel so you can see the raw, un-upscaled result immediately, and through the upscale chain — the UpscaleModelLoader you set up earlier, followed by an Image Scale By node — before being saved to disk as the final file.
Writing Your First Prompt
Anima can read plain-English sentences thanks to its language-model text encoder, but it was also trained on the tag-based style anime models are known for — things like booru tags, if you've used SDXL anime checkpoints before. In practice, the best results usually come from mixing both: a handful of descriptive tags for the subject and pose, plus a short natural-language phrase or two for anything specific you want that tags alone struggle to describe.
Here's the example prompt built into this workflow, which is a good template to start from:
Positive Prompt
hatsune miku, masterpiece, very aesthetic, best quality, score_9, score_8, score_7, year 2025, photo background, mixed media, atmospheric perspective, scenery, thin hoodie, smartphone in hand, natural, hunched posture, innocent expression, sunbeam, half body, dutch angle
Negative Prompt
worst quality, low quality, score_1, score_2, score_3, blurry, jpeg artifacts, sepia, extra fingers
Breaking down what's actually happening in that prompt:
The subject comes first — "hatsune miku" is a character tag, telling the model who to draw before anything else. Quality tags come next — "masterpiece," "best quality," and the score_9 / score_8 / score_7 tags are all ways of nudging the model toward its highest-quality output range. These score tags come from how Anima was trained: images in its training data were graded, and using the higher score tags in your prompt asks for results closer to the top of that grading scale. Everything after that is descriptive — background, clothing, pose, expression, camera angle — written as a natural mix of short tags and plain phrases rather than a single fully-formed sentence.
The negative prompt works the same way in reverse: score_1 / score_2 / score_3 push away from the lowest-quality end of that same grading scale, and the rest ("blurry," "jpeg artifacts," "extra fingers") are common problems you're telling the model to avoid.
What Do the Settings in This Workflow Actually Do?
Every value in the KSampler node below is already set for you in the workflow file, and these are good defaults to leave alone until you've generated a handful of images and have a feel for what changing something does.
| Setting | Value Used in This Workflow |
|---|---|
| Steps | 30 |
| CFG | 4 |
| Sampler | er_sde |
| Scheduler | simple |
| Denoise | 1 |
| Resolution | 1024 × 1024 |
| Batch size | 1 |
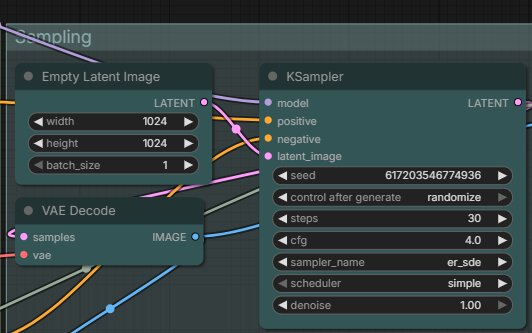
In plain terms: steps is how many times the model refines the image before calling it finished — more steps generally means a cleaner result, up to a point of diminishing returns. CFG controls how strictly the model follows your prompt versus how much creative freedom it takes — higher values follow your prompt more closely but can start to look distorted or over-saturated past a certain point, which is why this checkpoint's recommended value (4) is on the lower end compared to some other models. Sampler and scheduler both control the mathematical process behind each step; er_sde and simple are the combination this checkpoint was tested with, and a safe starting point before experimenting with alternatives. Denoise at 1 means the model is generating a completely new image rather than modifying an existing one.
How the Upscale Step Works
Your image is generated at 1024×1024, then the UpscaleModelLoader applies 4x-AnimeSharp's built-in 4x upscale (taking it to roughly 4096×4096), and the Image Scale By node's scale_by value adjusts that further. The workflow includes a built-in reference table for exactly what each value produces:
| scale_by | Final Resolution |
|---|---|
0.5 | 2K (2048 × 2048) |
1 | 4K (4096 × 4096) |
2 | 8K (8192 × 8192) |
3 | 12K (12288 × 12288) |
4 | 16K (16384 × 16384) |
scale_by of 1 (the default) already gets you a roughly 4K final image, which is more than enough for most uses. Going higher produces enormous files and takes noticeably longer to process for very little practical benefit unless you have a specific reason to need an 8K or larger image.Troubleshooting Common Anima Setup Errors
"This node type does not exist"
What causes it: Your ComfyUI installation is older than the node versions this workflow expects. Every node here ships with ComfyUI by default, so this almost always means ComfyUI itself just needs updating, not a missing custom node pack.
How to fix it: Open ComfyUI Manager (the icon in the top toolbar) and click Update ComfyUI, then fully restart ComfyUI afterward — node definitions only load on startup.
A model file doesn't show up in its loader dropdown
What causes it: The file is sitting in the wrong folder, or ComfyUI hasn't refreshed its list of available models since you added it.
How to fix it: Double-check the file is in the exact folder shown in the folder structure above — not a subfolder, not the parent models/ folder itself. Then either click the small refresh icon near the dropdown, or restart ComfyUI completely.
Output looks distorted, scorched, or oddly contrasty
What causes it: CFG set higher than this checkpoint is comfortable with. It's tuned around a CFG of 4, and pushing it much higher tends to overcook the image rather than improve prompt-following.
How to fix it: Bring CFG back down toward 4 before adjusting anything else. If the issue persists, double-check you're not accidentally loading a different diffusion model than the one this guide covers, since Turbo-style checkpoints in general are sensitive to CFG.
Frequently Asked Questions
What to Do Next
Now that Anima is running, it's worth learning how to prompt it properly.
The prompt basics above will get you started, but there's a lot more control available once you understand how Anima's tag and natural-language prompting really works together. For a structured path through the rest of ComfyUI, see the full roadmap.
Published: 2026-09-14 · Last updated: 2026-09-14 · Workflow structure verified against the exact node graph used for this guide.
Join the discussion
Sign in to leave a comment or reply
No comments yet
Be the first to share your thoughts!