What Is a Checkpoint in ComfyUI? Complete Beginner Guide
Everything you need to know about checkpoint models — what they are, which file type is safest, where to put them, and which free models to try first.
By Earngenix Team··12 min read
ComfyUI Checkpoint Models: What You Need to Know
Quick answer: A checkpoint model in ComfyUI is a single file that contains the complete AI "brain" for image generation — the diffusion model, text encoder, and image decoder all bundled together. Load a checkpoint, write a prompt, and ComfyUI generates an image. Change the checkpoint and you change the entire visual style of your output.
Pick the wrong checkpoint and even a well-written prompt will disappoint you. Pick the right one and ComfyUI produces exactly what you had in mind. This guide covers what checkpoint models are, how the two loading nodes differ, which file formats are safe, where to put your downloaded files, and which free models are worth starting with.
What Is a Checkpoint Model?
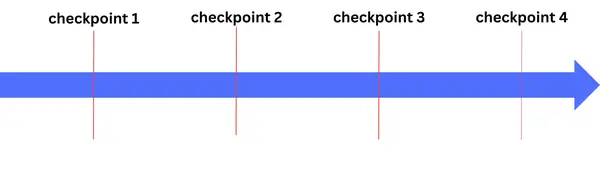
A checkpoint is a saved copy of an AI model at a specific point during its training. Think of it as a snapshot — everything the model learned is frozen in that file. Load the file, and ComfyUI uses that knowledge to generate images from your text prompts.
Here's what that looks like in practice: an AI trained to generate realistic portraits studies thousands of human faces — learning about lighting, skin tones, hair structure, and facial proportions. The developer saves the model's progress at different stages of training. Each saved version is a checkpoint. When training is complete (or good enough), they release that checkpoint for download.
Checkpoints are saved at intervals throughout training. The final released version is what you download from CivitAI or Hugging Face.
Saving checkpoints through training serves three purposes:
Progress is preserved — if training crashes, you restart from the last checkpoint instead of from scratch.
Developers can test different stages and release the version with the best results.
It prevents overtraining, where pushing the model too far actually makes outputs worse.
How to Use Checkpoint Models in ComfyUI
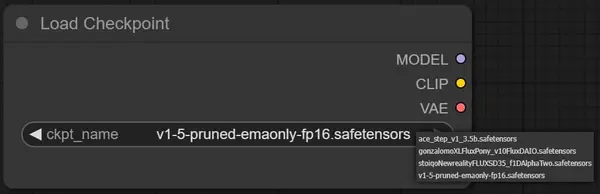
You load a checkpoint using the Load Checkpoint node. It's the first node in almost every ComfyUI workflow — connect it, pick your model from the dropdown, and it feeds the rest of your pipeline.
1
Add a "Load Checkpoint" node to your canvas.
Right-click the canvas and search for "Load Checkpoint". This is the starting point for the vast majority of ComfyUI workflows.
2
Select your model from the dropdown.
For example, select sdxl_base.safetensors for Stable Diffusion XL. The file must already be in your checkpoints folder — see the placement section below.
3
Connect the outputs and run your prompt.
Load Checkpoint has three outputs — MODEL, CLIP, and VAE. Connect these to your KSampler and text conditioning nodes to complete the workflow.
The Load Checkpoint node in ComfyUI — select your model from the dropdown and connect MODEL, CLIP, and VAE to the rest of your workflow.
💡 Tip: Each model has an ideal image resolution. SDXL models work best at 1024×1024 pixels, while SD 1.5 models are optimised for 512×512 pixels. Generating at the wrong resolution produces noticeably weaker results.
Checkpoint vs Diffusion Model in ComfyUI: What's the Difference?
"Checkpoint" and "diffusion model" get used interchangeably in most tutorials — but inside ComfyUI they mean two distinct things, and mixing them up is one of the most common beginner mistakes.
A checkpoint file is a complete AI package bundled into a single .safetensors file. It contains three components: the diffusion model (also called the UNet), the CLIP text encoder that reads your prompts, and the VAE decoder that turns the internal data into a visible image. Download one checkpoint file, load it with the Load Checkpoint node, and you have everything you need to generate.
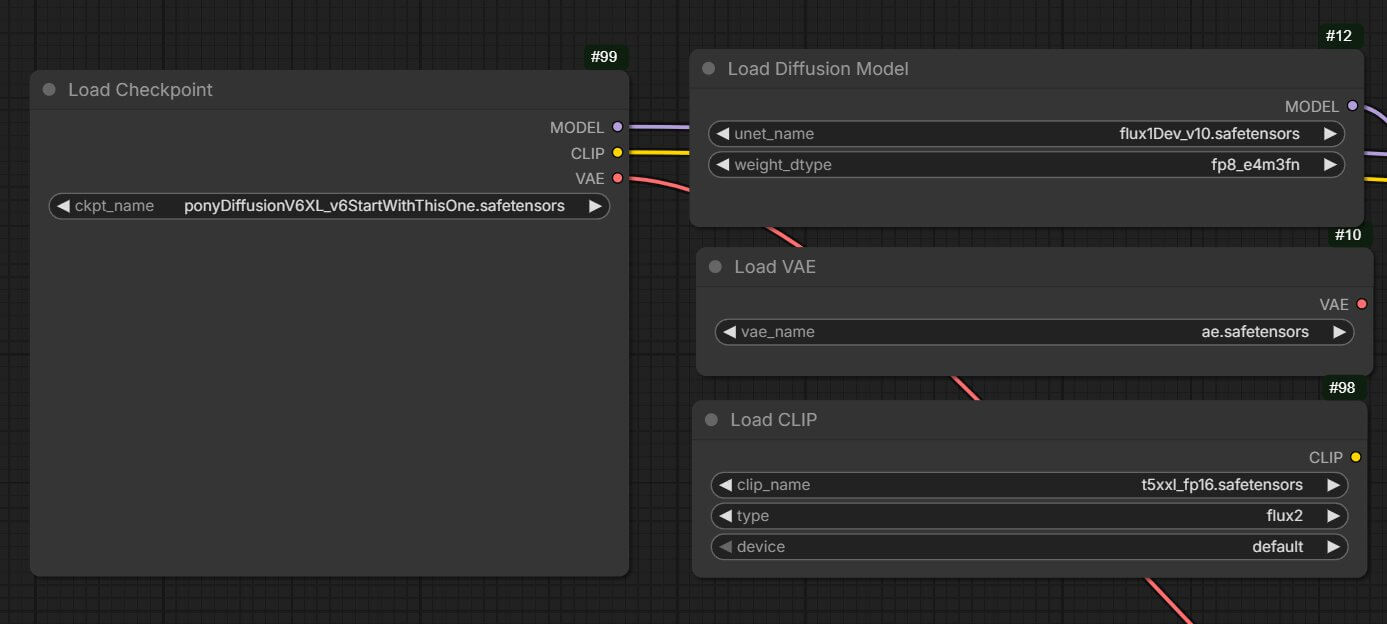
A diffusion model (or UNet) is just one of those three components. Some newer architectures — FLUX.1 being the primary example — package their components as separate files rather than one bundled checkpoint. That's why ComfyUI has two different loading nodes:
Load Checkpoint — loads MODEL + CLIP + VAE all at once from a single file. Use this for SD 1.5, SDXL, Juggernaut, Pony Diffusion, and most models on CivitAI.
Load Diffusion Model (UNet Loader) — loads only the UNet. You add separate nodes to load CLIP and VAE files. Used primarily for FLUX.1 and models that distribute components separately.
Load Checkpoint
Load Diffusion Model
What it loads
MODEL + CLIP + VAE — all in one
MODEL (UNet) only
File format
Single .safetensors or .ckpt file
UNet file + separate CLIP + VAE files
Best for
SD 1.5, SDXL, most CivitAI models
FLUX.1 and newer split-architecture models
Beginner-friendly
✓ Yes — one node handles everything
Needs extra CLIP + VAE loader nodes
Where to put files
models/checkpoints/
models/diffusion_models/
Left: Load Checkpoint loads everything from a single file. Right: Load Diffusion Model loads only the UNet — you need separate nodes for CLIP and VAE.
As a beginner, always start with Load Checkpoint. It handles MODEL, CLIP, and VAE in one node and works for the vast majority of models you'll find on CivitAI. If a workflow you downloaded uses Load Diffusion Model nodes instead, don't panic — the model's download page will tell you exactly which CLIP and VAE files to pair with it.
Types of Checkpoint Models
Not all checkpoint files are the same. When browsing CivitAI or Hugging Face you'll encounter three common variations:
✂️
Pruned Models
Unused training data has been stripped out to reduce file size. Quality is nearly identical to the original, but the file is significantly smaller. Good for saving disk space without losing output quality.
📊
EMA Models
Built by averaging model weights over the course of training for a smoother, more balanced result. Produces more consistent, reliable outputs with fewer random artefacts.
🎓
Pre-trained Models
Already trained on large image datasets — you start generating immediately without any additional setup. Nearly every model on CivitAI and Hugging Face is pre-trained and ready to use.
Checkpoint File Types: .ckpt vs .safetensors
When you download a checkpoint, it'll come in one of two formats. The difference matters — one is safe, one isn't.
⚠ .ckpt — Older Format
An older format that can contain hidden executable code. It works, but loading a .ckpt from an untrusted source is a genuine security risk — the file can run code on your machine at load time.
Only use .ckpt from sources you completely trust.
✓ .safetensors — Recommended
The modern standard. It can't contain executable code, loads faster than .ckpt, and is supported by all major platforms. When a model is available in both formats, always choose .safetensors.
This is what 95% of models on CivitAI now use.
⚠️ Warning: Never load files with a .pkl (pickle) extension — they can execute arbitrary code on your machine the moment they're loaded. Delete them.
How Different Checkpoint Models Affect Your Images
Each checkpoint produces a different visual style because each was trained on a different dataset. Use the same prompt and settings on two different models and you'll get completely different results. Here are the most commonly used checkpoints and what they produce:
FLUX — Cinematic and Detailed
Creates highly detailed, cinematic visuals with strong lighting and realism. Excellent for photorealistic scenes and editorial imagery.
Prompt: dark moody amateur Polaroid photo of a woman after a night out, shot with vintage instant film camera, direct on-camera flash, dim bar lighting, soft film grain and texture, imperfect handheld framing, subdued color palette with muted pinks and cyan shadows, cinematic underexposure, subtle light leak and vignette, reflective highlights from sequined outfit, candid expression...
QWEN — Clean and Balanced
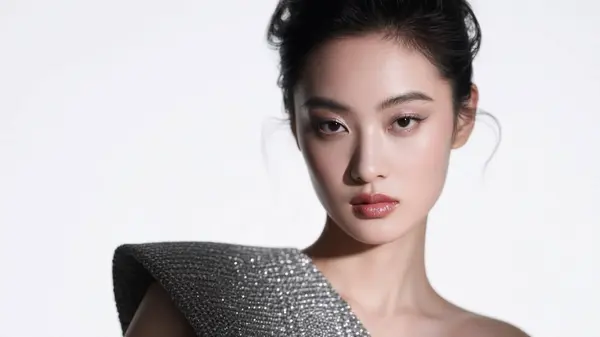
Delivers clean, balanced art with sharp textures and studio-quality lighting. Great for editorial and fashion imagery.
Prompt: A high-fashion editorial shot of a realistic young woman with flawless makeup and styled hair. The image emphasises ultra-sharp textures such as fabric weave on her avant-garde dress, the sparkle in her eyes, and the slight sheen on her lips. The lighting is studio quality...
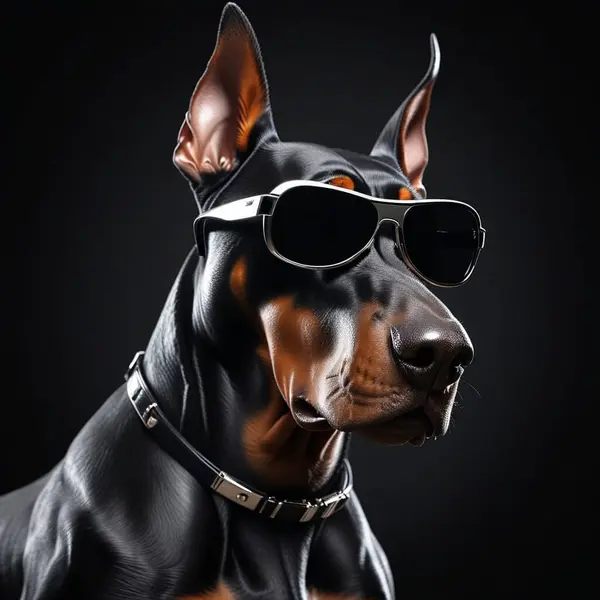
WAN2.2 — Vivid and Artistic
Focuses on vivid, stylised imagery with strong artistic flair. Works well for creative compositions and 3D CGI-inspired visuals.
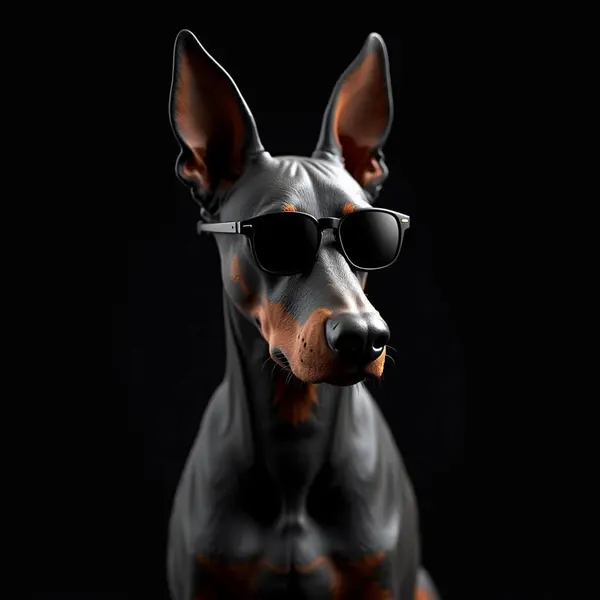
Prompt: (best quality, 8K, high resolution, masterpiece), ultra detailed, (3D CGI), black sunglasses, trendy, fashionable, silver and black stylised angry muscle doberman on a black background, countryside advertising, winning photo
Juggernaut — Realistic Photos and Strong Textures
One of the most popular SDXL models. Excellent for photorealistic results, detailed skin textures, and complex lighting scenarios.
Prompt: Bosch-style, a translucent cube traps eerie clouds, the starsscape warps, time distorts, surrealism reigns, stars, Glowing, sparkling
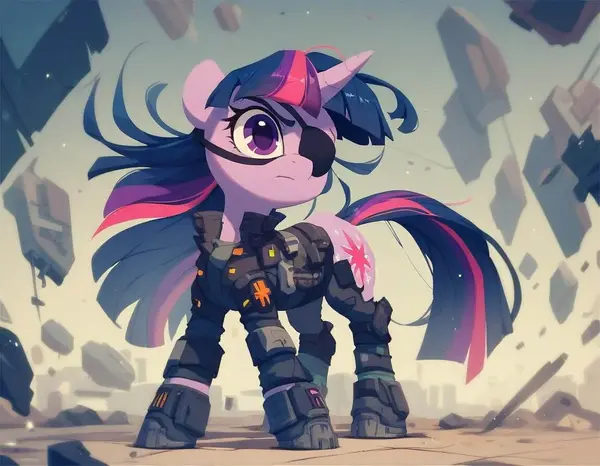
Pony Diffusion — Anime and Cartoon Styles
Trained specifically on anime and cartoon artwork. The go-to checkpoint for stylised character art and illustrated scenes.
Prompt: feral, future twilight sparkle, eyepatch
Turbo and Fast Models
Standard models typically need 20–30 sampling steps to generate a quality image. Turbo models cut that down to 1–4 steps — which makes them significantly faster and useful for quickly testing ideas before switching to a full model for your final output.
SDXL Turbo — 1–2 Steps
From Stability AI. Generates images in 1–2 steps. Very fast and practical for rapid concept testing, though results are softer than a full-step model.
Prompt: A woman with short hair is touching a metal fence and looking away thoughtfully, with the light casting shadows on her face, highlighting her serene expression.
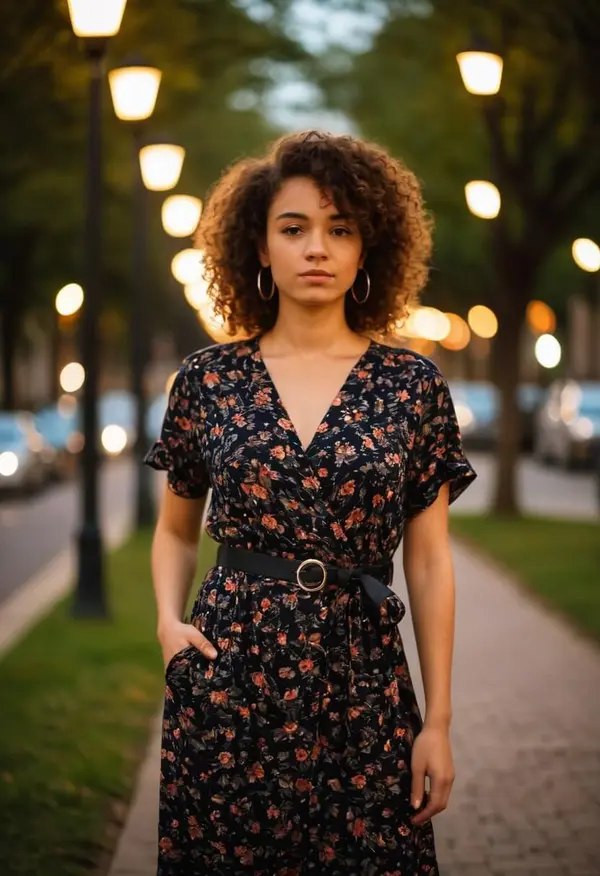
SDXL Lightning — 2–4 Steps
Generates in 2–4 steps. Faster than standard SDXL, and produces sharper, cleaner results than SDXL Turbo.
Prompt: Midshot, woman, dusk setting, outdoor, floral dress, black belt, standing, bokeh background, street lights, tree-lined pathway, medium shot, contemplative expression, curly hair, natural makeup, hoop earrings...
FLUX.1 Schnell — Fast and High Quality
Quick and high-quality. Produces smooth results in a few steps and handles both realistic and artistic styles well.
Prompt: Portrait of a woman in 80s fashion, wearing large earrings and bright makeup, soft-focus effect, warm tones, retro film feel, outdoor night setting with city lights blurred in the background.
💡 Tip: Use turbo models to test your prompt and composition quickly. Once you have a result you like, switch to a full model (FLUX Dev, Juggernaut XL) and run the same prompt for your final high-quality output.
Why Model Choice Matters
Each checkpoint "thinks" in the visual language it was trained on. A realistic-sounding prompt run through Pony Diffusion will produce an anime character, not a photograph — because Pony was trained on anime art, not real-world images. The prompt doesn't override the model's visual DNA.
Take this prompt: "a close-up portrait of a woman with soft studio lighting and natural skin tones." On Juggernaut it produces a photorealistic result. On Pony Diffusion the same words produce an anime-style illustration. Neither is wrong — they're just different tools for different outputs.
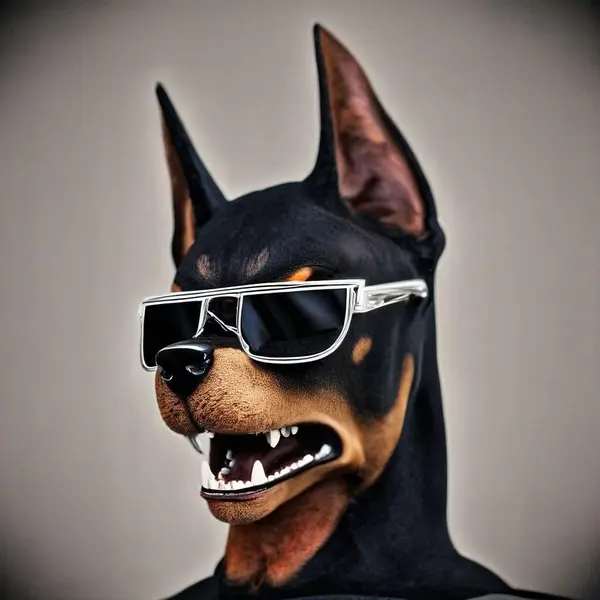
Same Prompt, Three Different Models
Prompt: "(best quality, 8K, high resolution, masterpiece), ultra detailed, (3D CGI), black sunglasses, trendy, fashionable, silver and black stylised angry muscle doberman on a black background, countryside advertising, winning photo"
JuggernautPony DiffusionFLUX
The rule: match your prompt style to the model. Realistic prompts → realistic models (FLUX, Juggernaut). Anime prompts → anime models (Pony Diffusion). Mixing them produces unpredictable results — which can be fun to experiment with, but don't expect a specific output.
Where to Find ComfyUI Checkpoint Models
Three platforms cover most of what you'll need. All three are free to browse and download from.
The most popular platform for AI image models. Thousands of free checkpoints with preview images, ratings, and user reviews. You can see exactly what a model produces before downloading it.
Sort by Most Downloaded or Highest Rated — these are proven to work well.
Filter by base model (SDXL, SD 1.5, FLUX) to find files compatible with your workflow.
Read the model description before downloading — it lists recommended settings and known limitations.
Where most official model releases live — FLUX, SDXL, QWEN, and others are published here first by their developers. More technical than CivitAI but essential for finding the original, unmodified model versions.
Official releases come directly from the model creators — no third-party modifications.
Detailed documentation about training data, usage rights, and model limitations.
A Chinese AI platform hosting a wide range of open-source models. Especially useful for new experimental models and AI tools developed in Asia that often appear here before anywhere else.
Good source for unique regional styles and model architectures.
New model releases often appear here before CivitAI or Hugging Face.
⚠️ Warning: Always prefer .safetensors. Use .ckpt only from sources you completely trust. Never load .pkl files under any circumstances.
Where to Place Checkpoint Files in ComfyUI
After downloading a checkpoint, move it to the correct folder inside your ComfyUI installation. The exact location depends on which node you're loading it with.
ComfyUI/
└── models/
├── checkpoints/ ← checkpoint .safetensors files go here
├── loras/
├── vae/
├── controlnet/
├── clip/
└── diffusion_models/ ← FLUX UNet files go here
For standard checkpoints (Load Checkpoint node)
Drop your .safetensors file into the checkpoints folder:
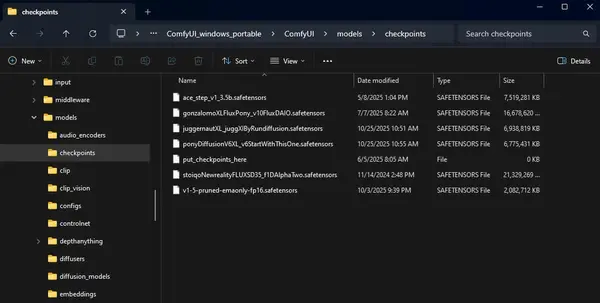
ComfyUI/models/checkpoints/
For FLUX and split-architecture models (Load Diffusion Model node)
FLUX.1 distributes its UNet, CLIP, and VAE as separate files. Place them in their respective subfolders:
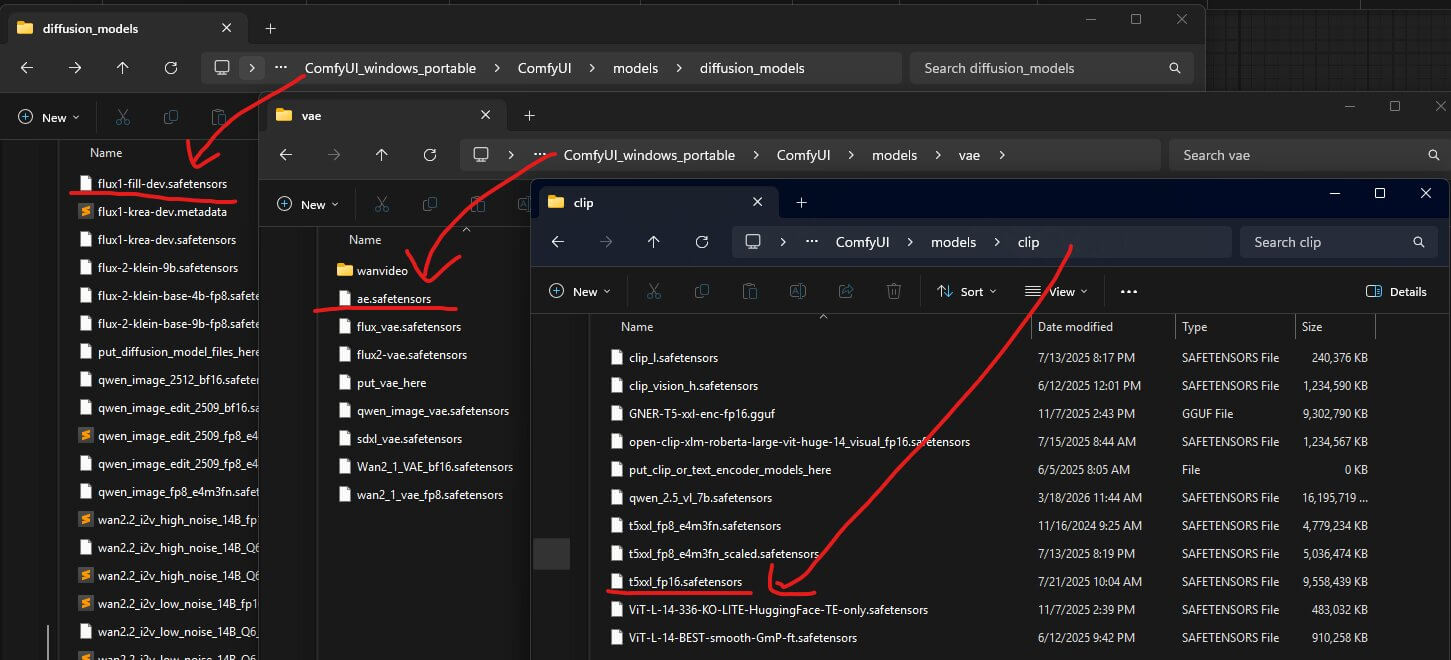
UNet file → ComfyUI/models/diffusion_models/
CLIP files → ComfyUI/models/clip/
VAE file → ComfyUI/models/vae/
The ComfyUI models folder — standard checkpoints go in /checkpoints/, FLUX UNet files go in /diffusion_models/.Your downloaded checkpoint files placed in ComfyUI/models/checkpoints/ — refresh your browser after adding new files.
💡 Tip: After placing a file, press F5 in your browser (or Ctrl+Shift+R) to refresh ComfyUI. Your new model will appear in the Load Checkpoint node dropdown straight away. No restart needed.
Start Generating
You now know what checkpoints are, how they differ from diffusion models, which file format is safe to download, and exactly where to put your files. The only thing left is to actually run one.
Head to CivitAI now and download Juggernaut XL — it's free, works with standard SDXL workflows, and produces strong realistic results out of the box. Drop it in ComfyUI/models/checkpoints/, hit refresh, and run your first prompt. Once you have one checkpoint working, the next step is LoRA models — they let you fine-tune style and character consistency without swapping your entire checkpoint.
Frequently Asked Questions
A checkpoint model is a single file containing a complete AI system — the diffusion model (UNet), CLIP text encoder, and VAE decoder all bundled together. You load it into the Load Checkpoint node to start generating images. Different checkpoints produce different visual styles.
A checkpoint file is a complete package that includes the diffusion model (UNet), CLIP text encoder, and VAE decoder all in one file. A diffusion model (or UNet) is just one component inside that package. In ComfyUI, Load Checkpoint loads the full package at once. Load Diffusion Model loads only the UNet, and you need separate nodes for CLIP and VAE alongside it.
Use Load Checkpoint for nearly all standard models — SD 1.5, SDXL, Juggernaut XL, Pony Diffusion, and most models you'll find on CivitAI. These come as a single bundled file. Use Load Diffusion Model (UNet Loader) for FLUX.1 and newer architectures that distribute their components as separate files. The model's download page will always tell you which node to use.
Standard checkpoint files (.safetensors) go in ComfyUI/models/checkpoints/. For FLUX and split-architecture models, the UNet file goes in ComfyUI/models/diffusion_models/, CLIP files in ComfyUI/models/clip/, and the VAE in ComfyUI/models/vae/. After placing any file, refresh your browser and it will appear in the relevant node dropdown.
.ckpt is an older format that can contain executable code — it works but poses a security risk if downloaded from an untrusted source. .safetensors is the modern standard: it loads faster, can't contain executable code, and is significantly safer. Always choose .safetensors when a model offers both options.
For realistic images, start with Juggernaut XL — it's an SDXL-based model with strong photorealistic output and is widely recommended for beginners. For anime or cartoon styles, Pony Diffusion is the most popular choice. For cinematic, high-detail results, FLUX.1 Dev produces excellent outputs. All three are available free on CivitAI.
Resolution depends on the model's training. SDXL models (Juggernaut, Pony Diffusion) are trained at 1024×1024 pixels. SD 1.5 models work best at 512×512 pixels. FLUX models handle a wider range but perform best at 1024×1024 or higher. Using the wrong resolution produces noticeably weaker results — always check the model page for its recommended settings.