

Why Use Upscaling in ComfyUI?
What upscaling does
Many AI models generate images at HD or SD sizes — for example 1920×1080 or 1280×720. They are not trained to produce clean 4K images. Upscaling lets you increase resolution while keeping or improving visible detail, using a dedicated upscaler model rather than simply stretching pixels.
When to use it
- You generated an image that looks good but is too small for your use case.
- You have a low-res video and want a cleaner, larger version.
- You want to recover dark or low-detail areas without changing the overall composition.
Image upscale examples


Video upscale example
Image Upscale Methods in ComfyUI
There are two main approaches covered in this guide: a basic upscaler for fast, simple results, and the SeedVR2 method — a popular, high-quality option that handles difficult images and dark areas better than simpler models.
SeedVR2 Image Upscale Workflow
SeedVR2 often gives better detail and more natural restoration of shadows and dark areas. It can outperform simpler upscalers on images with complex textures or faces.
Download SeedVR2 Image Upscale WorkflowSteps to run the SeedVR2 image workflow
Download the SeedVR2 workflow
Use the download button above to get the workflow JSON file.
Fix any red nodes
Red nodes indicate missing models or external nodes. See the guide on fixing red node issues in ComfyUI for a full walkthrough.
Install the required GitHub nodes
Install these two custom nodes via ComfyUI Manager: ComfyUI-SeedVR2_VideoUpscaler and ComfyUI-Inspire-Pack.
Load your image
Load your source image into the Load Image node in the workflow.
Choose a SeedVR2 model
Strong GPU (16GB+ VRAM): use 7B fp16. Limited VRAM: use 7B fp8 or the 3B model variant. The workflow will download the model automatically on the first run.
Run the workflow
Queue the workflow. The first run will download the selected model. Subsequent runs will be faster.
SeedVR2 upscale examples
Basic Image Upscaling in ComfyUI
The basic upscaler is the fastest way to get a larger image. It works well for 2–4x increases on images that don't require complex detail restoration.
Download Basic Upscale WorkflowStep 1 — Download and place the upscale model
Place your upscale model file in the correct ComfyUI folder:
ComfyUI/models/upscale_modelsDownload one of these recommended models and place it in the folder above:
- 4xNMKD-Siax (Civitai) — excellent all-round 4x upscaler.
- Z-Image 4x Upscaler by Helaman (Civitai) — good for photorealistic output.
Step 2 — Load the workflow and run
Load the workflow JSON in ComfyUI
Drag and drop the downloaded JSON file onto the ComfyUI canvas, or use Load → Import Workflow.
Put your image into the Load Image node
Click the Load Image node and select your source image.
Select your model and run
In the Load Upscale Model node, select the model file you placed in the upscale_models folder. Then queue the workflow.
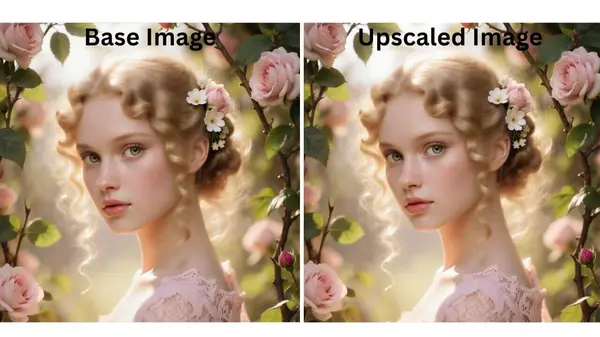
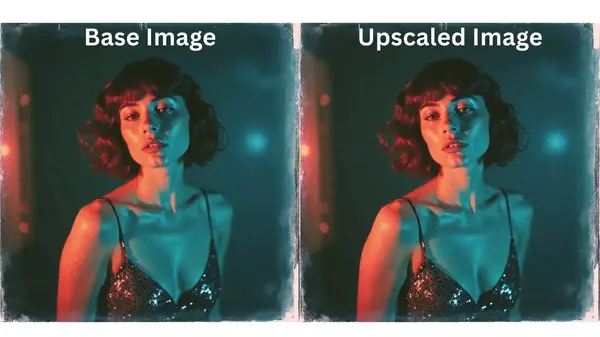
Basic upscale examples
Video Upscale Workflow (SeedVR2 Video Upscaler)
Video upscaling uses the same SeedVR2 model but processes frames or clips through the upscaler. The result is a higher-resolution video with improved detail across every frame.
Download SeedVR2 Video Upscale WorkflowHow to use video upscaling in ComfyUI
Download and load the SeedVR2 video workflow
Use the button above to download the workflow JSON, then load it in ComfyUI.
Load your video
Load your source video into the Load Video node in the workflow.
Select the SeedVR2 model and run
Choose your SeedVR2 model (3B for limited VRAM, 7B fp16 for best quality) and queue the workflow.
Video upscale example
Common mistakes with video upscaling
- Not checking input frame rate or aspect ratio before running — verify these first.
- Running a high-resolution model with too little GPU memory — use the 3B model or split the video into shorter clips.
- Upscaling a very long video in one pass — break it into 5–10 second clips to avoid VRAM errors and speed up the workflow.
Simple video upscale workflow
For a faster, less resource-intensive option, use the simple video upscale workflow below. This is a good starting point before moving to the full SeedVR2 workflow.
Download Simple Video Upscale WorkflowTips and Troubleshooting
The most common issues with upscaling in ComfyUI are red nodes, VRAM errors, and slow video processing. Here is how to fix each one.
Red nodes — missing model or external node
Fix: Check the ComfyUI console for specific error messages. Install the missing custom node via ComfyUI Manager, or point the node to the correct model file path. See the missing nodes guide linked in the related tutorials below.
Out of VRAM error during upscaling
Fix: Use the 3B model or a GGUF variant instead of 7B fp16. You can also reduce the batch size or enable image tiling to process the image in smaller sections.
Video upscaling is very slow or crashes
Fix: Break the video into shorter clips (5–10 seconds each) and upscale them separately. Export frames, inspect a few upscaled frames first to confirm quality, then encode the full video.
Upscaled image looks too soft or oversharpened
Fix: Different upscaler models have different strengths. Try NMKD-Siax for balanced output, or switch to SeedVR2 for images with complex detail. For SeedVR2, try reducing the model strength slider slightly.
Frequently Asked Questions
Join the discussion
Sign in to leave a comment or reply
No comments yet
Be the first to share your thoughts!