ComfyUI ControlNet: Precise Control Over AI Image Generation
If you have ever struggled to get AI-generated images to match a specific pose, composition, or layout using prompts alone, ControlNet is the solution. This guide walks you through every part of the ComfyUI ControlNet workflow — from setting up your first run to keeping characters consistent across multiple images — with free downloadable workflows included.
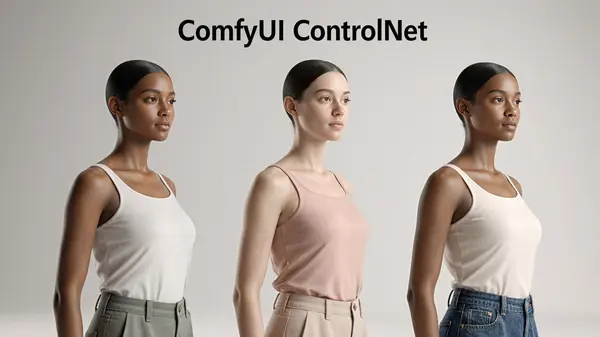
What Is ComfyUI ControlNet?
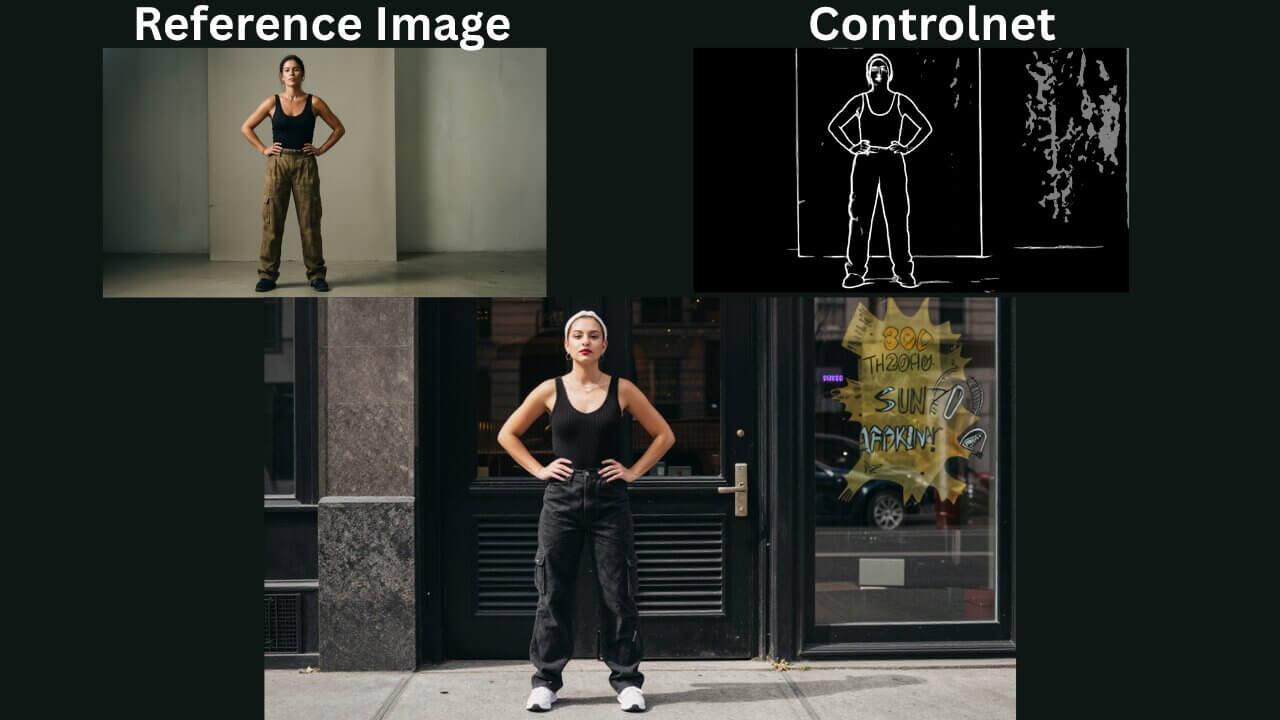
ComfyUI ControlNet lets you add precise structural control to AI image generation. You feed it reference images processed through ControlNet preprocessors — like OpenPose, Canny, or Depth maps — and the model follows those structural guides while generating new images based on your prompt.
Without ControlNet, prompts alone cannot reliably control composition, body pose, or scene layout. ControlNet solves this by extracting structural information from a reference image and using it as a second input alongside your text prompt.
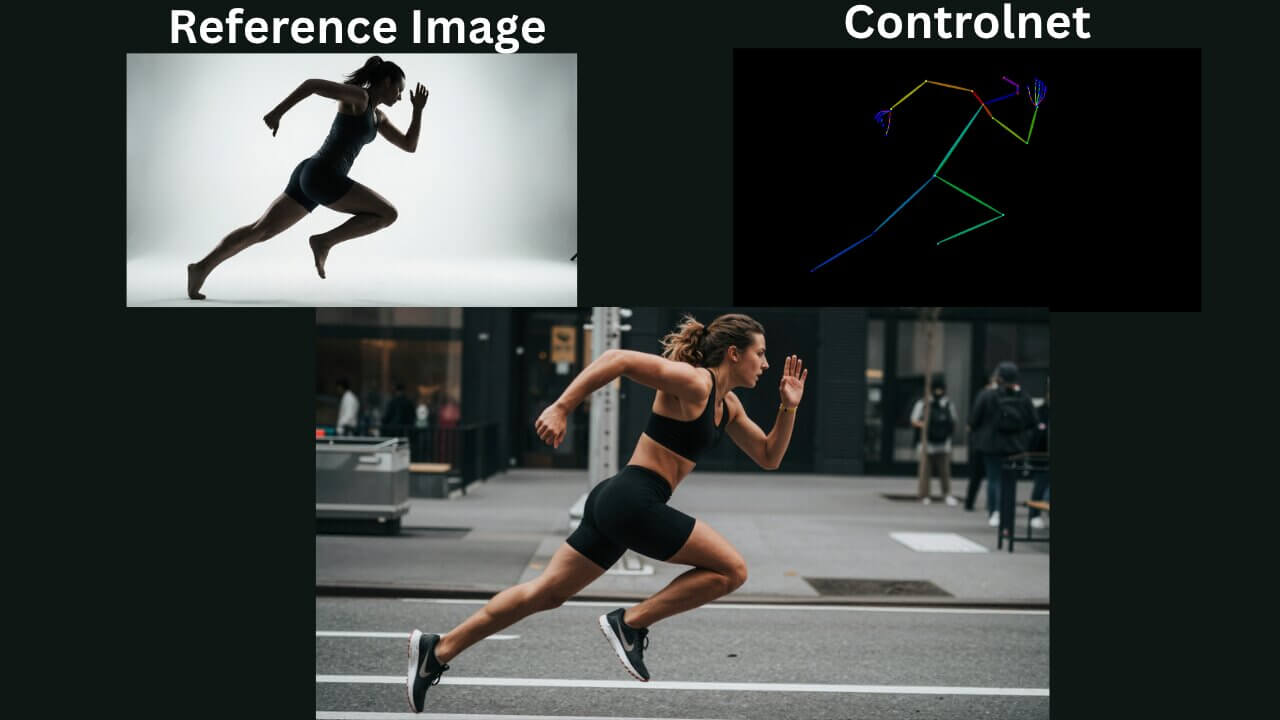
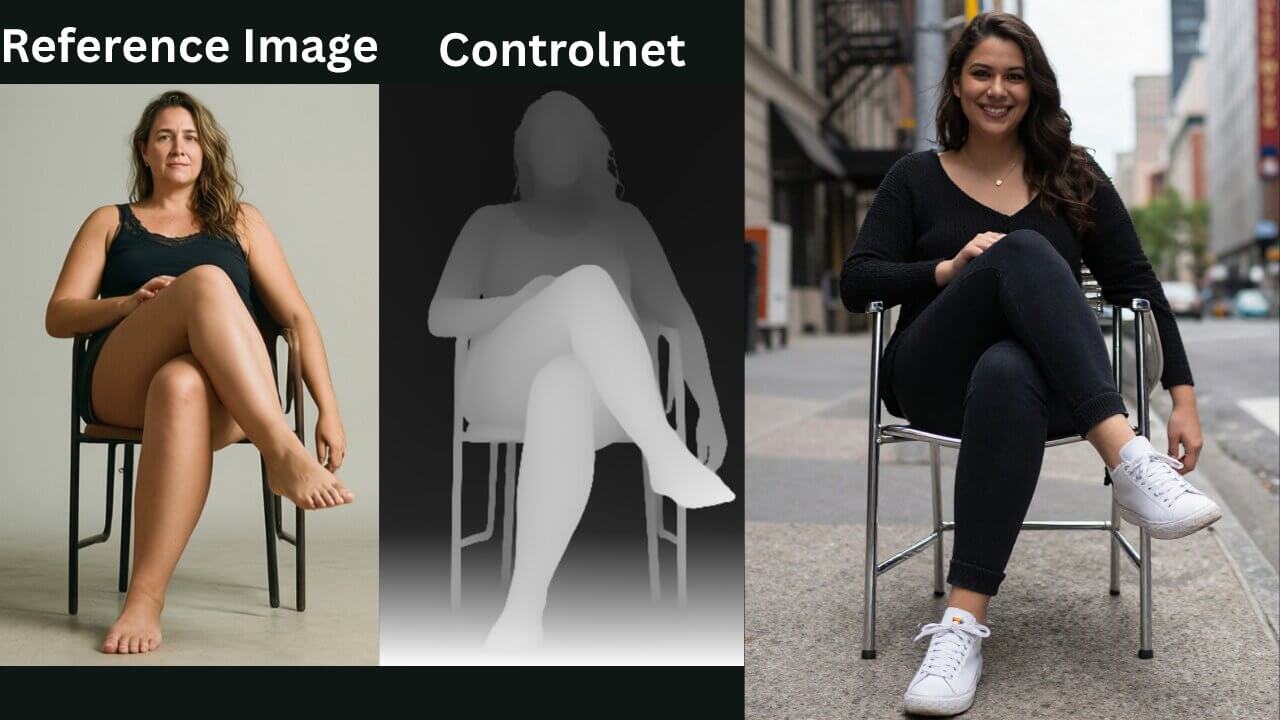
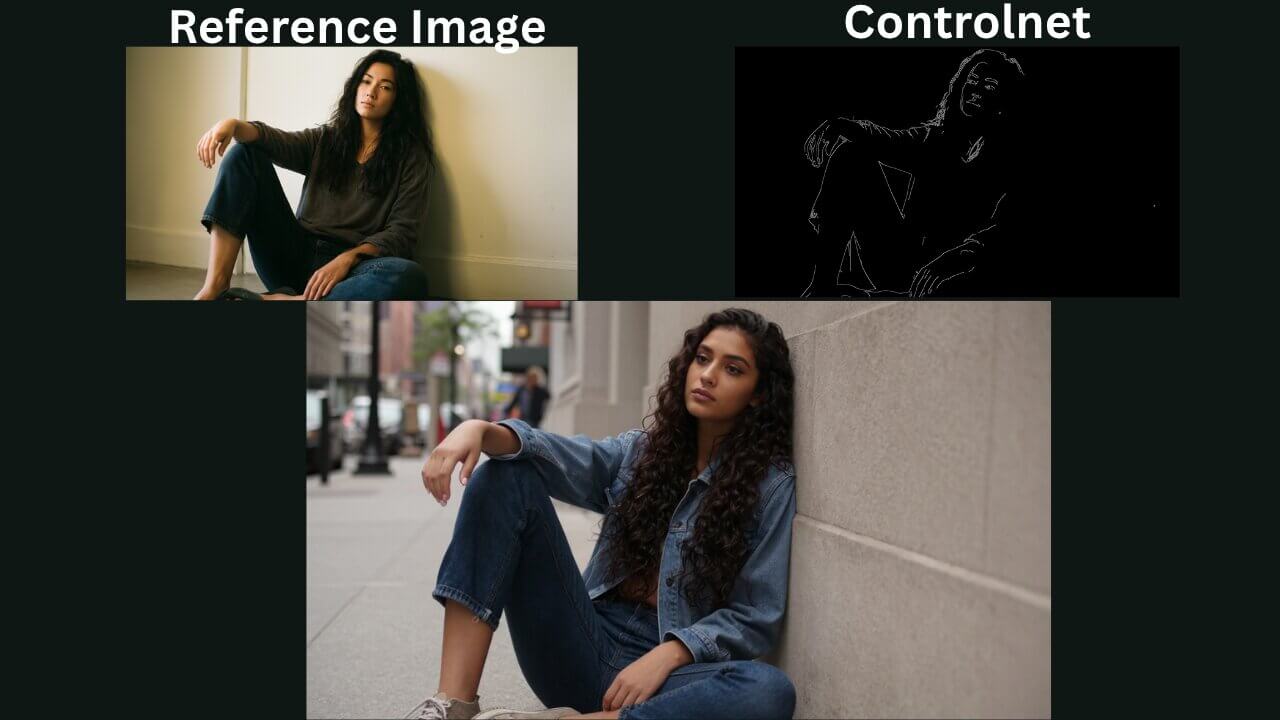
Here are examples of the main ControlNet preprocessor types:
How to Use ControlNet in ComfyUI
Basic Step-by-Step Workflow
Download the workflow below and open it in ComfyUI to follow along. If you see red nodes after importing, follow the missing nodes guide linked in Step 1.
Open the workflow in ComfyUI.
Import the downloaded workflow. If you see red nodes, use the missing nodes installation guide to fix them before continuing.
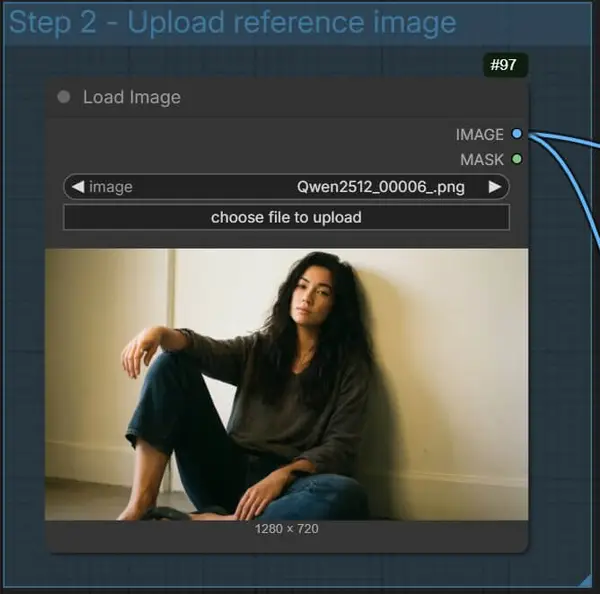
Upload your reference image.
Connect your reference image to the Load Image node. This is the image ControlNet will extract structural information from.
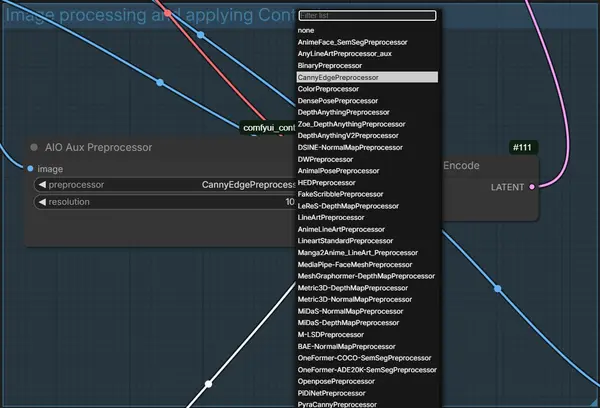
Select your preprocessor from the AIO Aux Preprocessors node.
The AIO Aux Preprocessors node gives you access to all preprocessors in one place — OpenPose, Canny, Depth, HED, Normal, and more. Choose the one that matches what you want to control.
Write your prompt.
Add your text prompt to the conditioning nodes. For best results with ControlNet, keep prompts focused and clear. ControlNet handles composition; your prompt handles style and content.
Click Run and review the output.
The output will follow the structural guide extracted from your reference image while applying your prompt for visual style. Click images to zoom in and inspect the result.
This workflow uses the Qwen Image Edit 2509 model. All required model links are included inside the workflow file.
Quick Troubleshooting During Setup
- Make sure the preprocessor matches the type of reference (OpenPose → pose map, Canny → edge map, Depth → depth map).
- Use the AIO Aux Preprocessors node to select and switch between control types in a single node.
- If the control map preview looks wrong, try a different preprocessor before running the full generation.
What Are Auxiliary (Aux) Preprocessors and Pose Controls?
Auxiliary preprocessors are small helper nodes that convert your reference image into a structured format ControlNet can use. Instead of feeding the raw reference image directly into ControlNet, the preprocessor first extracts the structural information — pose maps, edge maps, depth maps — and passes that clean data to the ControlNet model.
Common Aux Preprocessors
Practical Tips and Common Beginner Mistakes
- Use the correct preprocessor for the task. OpenPose is for people and body poses — it will not work well for controlling background shapes or architecture.
- Resize your reference image to match the model's expected input resolution before running the preprocessor. Use ComfyUI's resize nodes to avoid shape mismatch errors.
- Preview the control map output from the preprocessor before running the full generation. If the map looks wrong, the output will too.
- Lower the ControlNet strength slightly (0.8–0.9) if the output feels too rigid or loses creative detail. Higher strength means stricter adherence to the reference structure.
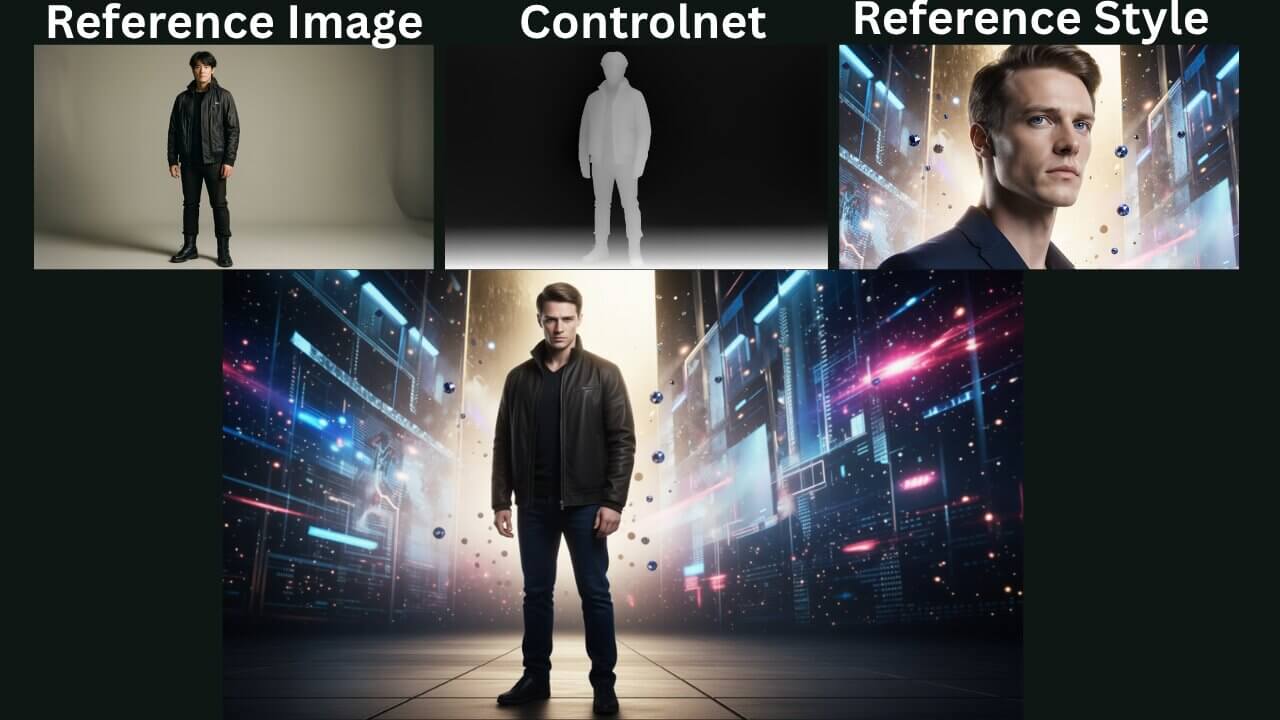
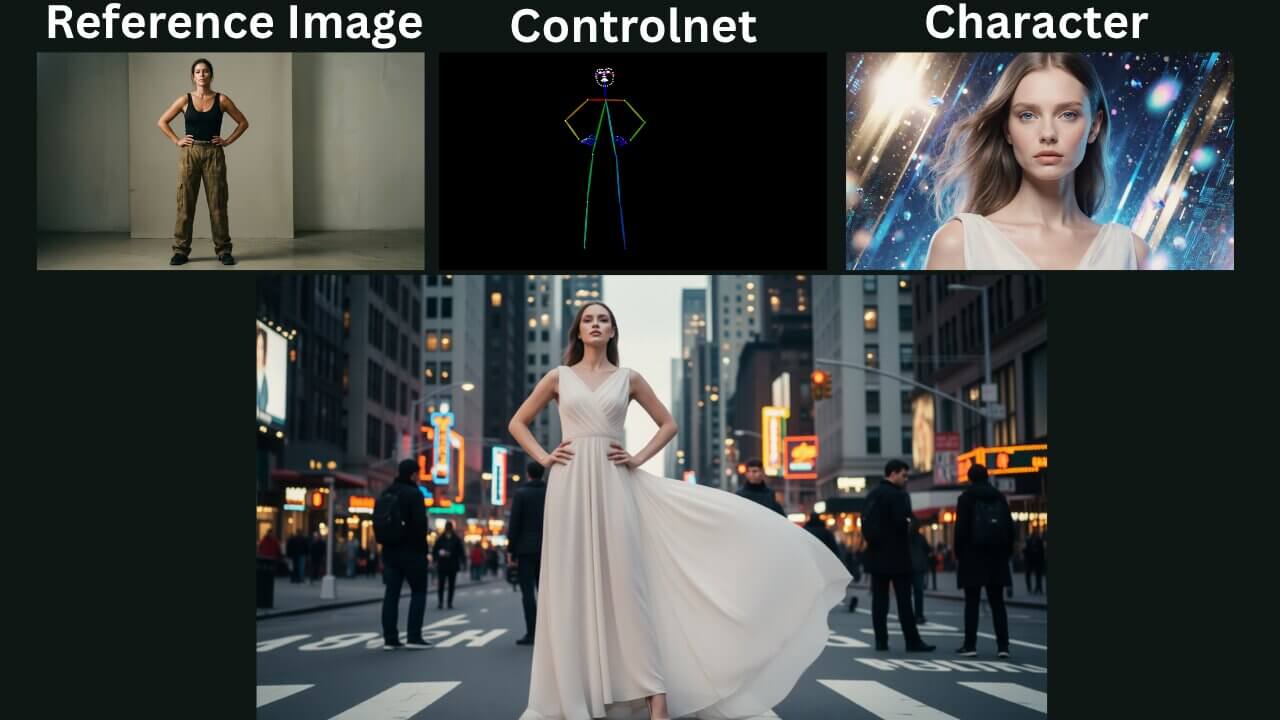
ControlNet with Reference Style and Consistent Characters
One of the most powerful uses of ComfyUI ControlNet is maintaining a consistent character across multiple images — same face, same style, different poses. This is done by combining a character reference image for visual identity with a separate pose reference for body control.
How to Keep a Character Consistent
To maintain a character's style and identity across images, use two separate reference inputs: one for the character's appearance and one for the pose you want them to adopt.
Example — Character + Pose Control:
Step-by-Step: Character + Pose Workflow
Upload your character reference image.
This is the image that defines your character's visual style and identity — face, clothing, and overall look.
Upload your pose control reference image.
This is the image the AIO Aux Preprocessors node will analyze to extract the body pose. It does not need to look like your character — only the structural pose is extracted from it.

Set the AIO Aux Preprocessors correctly.
Select the preprocessor that matches your pose reference (typically OpenPose for body poses or Depth for 3D spatial layout). Run the preprocessor to generate the control map.
Write your prompt and click Run.
Add your prompt describing the scene or style adjustments you want. The output will follow the pose from your control reference while maintaining the character's visual identity from the style reference.

Tips for Better Character Consistency
- Use the same model checkpoint for both the character reference run and the final generation for the most consistent results.
- If you need stricter face and identity consistency, add a face embedding or use a face detailer node as a post-processing step.
- The example workflows use the Qwen Image Edit 2509 image editing node, which handles reference images particularly well for stylistic consistency.
- Keep the ControlNet strength between 0.7 and 0.9 — too high and the output becomes over-constrained; too low and the pose reference is ignored.
Troubleshooting & Optimization
Common Errors and Fixes
Here are the most common ControlNet issues and how to fix them:
⚠ Red nodes after importing the workflow
Missing custom nodes. Follow the missing nodes installation guide or use ComfyUI Manager to install all required nodes automatically.
⚠ Wrong input shape errors
Add a Resize node before the preprocessor to ensure your reference image matches the expected input resolution for your model (SDXL: 1024×1024, SD 1.5: 512×512).
⚠ ControlNet model not found
Check that the ControlNet model file is placed in ComfyUI/models/controlnet/ and that the filename in the node settings matches exactly. Refresh or restart ComfyUI after adding files.
⚠ Output ignores the reference structure
Increase the ControlNet strength value (try 0.9–1.0). Also verify the preprocessor output actually looks like a valid control map — if the map is blank or incorrect, the generation will ignore it.
⚠ Output is too rigid and loses creative detail
Lower the ControlNet strength to 0.7–0.85. A lower strength gives the model more creative freedom while still following the general structure of your reference.
Frequently Asked Questions
Join the discussion
Sign in to leave a comment or reply
No comments yet
Be the first to share your thoughts!