
Introduction
Ever wanted to turn one image into many different camera angles while keeping everything else the same? With Qwen Multiangle and ComfyUI, you can do this for free — even as a beginner. One reference image in, up to 96 angle variations out.
What is Qwen Multiangle?
Qwen Multiangle is an open-source ComfyUI node that creates new images of the same scene or character from different camera angles. It takes your reference image and generates multiple views — side profiles, back shots, overhead angles, and more — while keeping the subject, details, and background consistent.
Single reference image
Just upload one image — Qwen Multiangle handles the rest.
Up to 96 angles
Generate front, back, sides, three-quarter views, and everything in between.
Consistent results
Character and environment details stay the same across every angle.
Examples: Generating Images from Multiple Angles
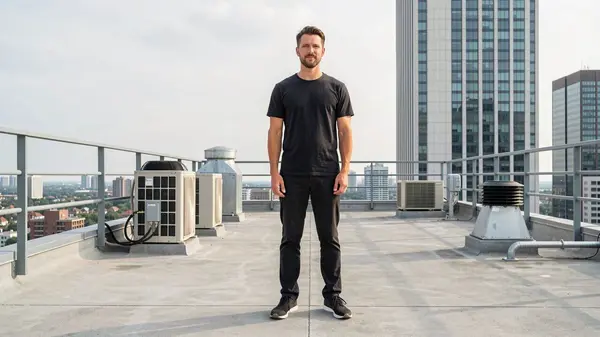
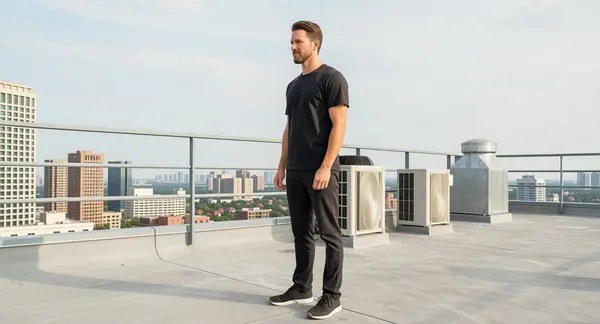
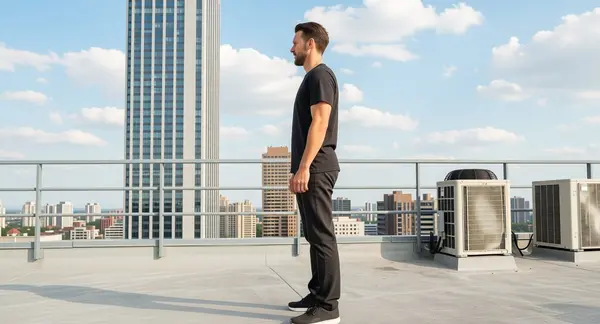
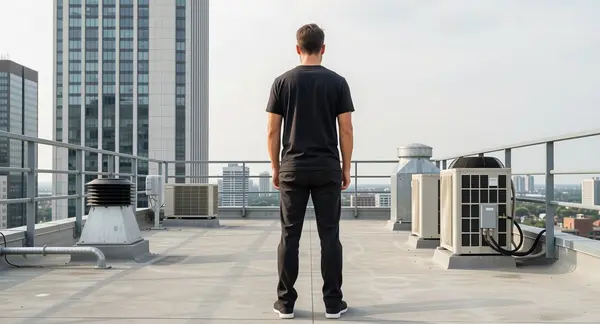
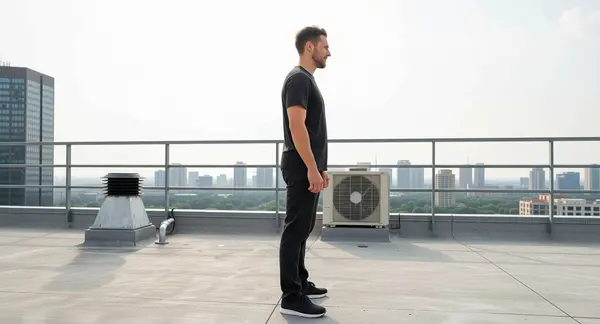
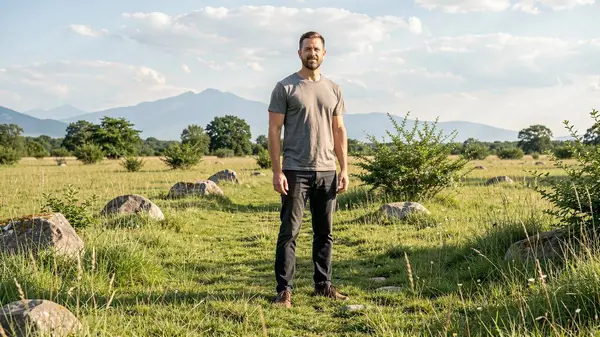
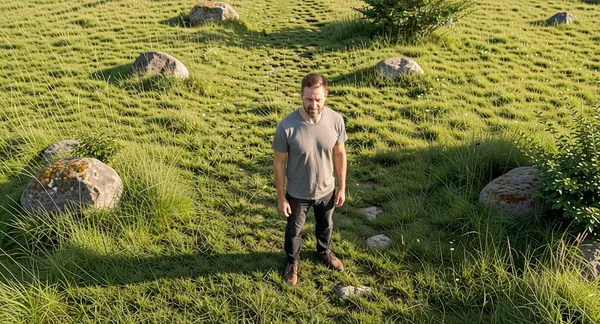
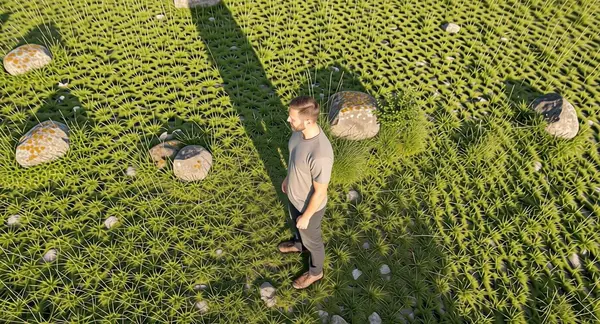
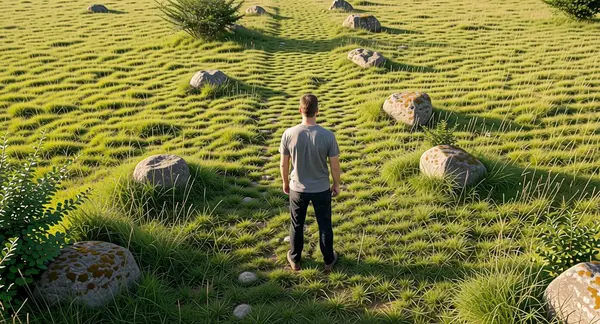
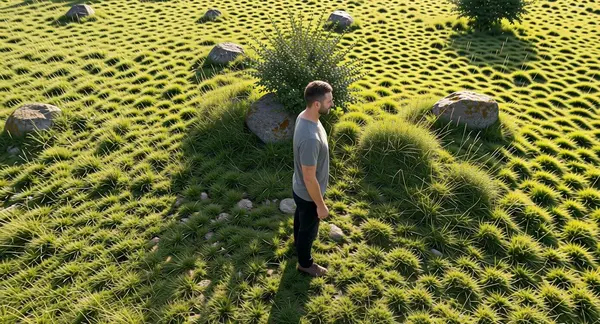
Here is what Qwen Multiangle produces from a single reference image. Each example below starts with one photo and generates four different camera-angle views while keeping the subject and environment identical.
Example 1 — Man Standing on a Rooftop
Reference Image
Generated Angles
Example 2 — Girl Character
Reference Image
Generated Angles
Setting Up Qwen Multiangle in ComfyUI
The setup takes just a few minutes and only needs to be done once. Two parts: update ComfyUI, then install the Qwen Multiangle node.
Update ComfyUI First
Open ComfyUI Manager
Click the Manager button at the top of the ComfyUI interface.
Switch to the latest ComfyUI version
Click "Switch ComfyUI" and select the latest stable version.
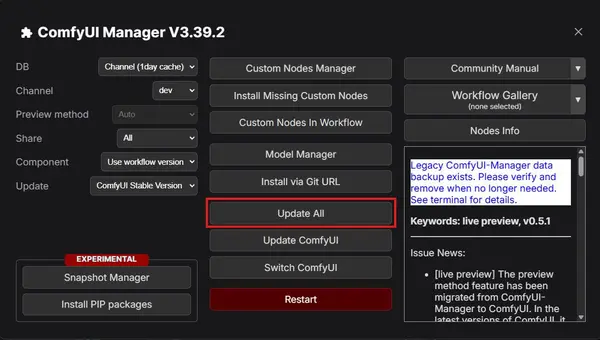
Click "Update All"
This updates all installed nodes to their latest versions, which prevents compatibility issues with the new node.
Install the Qwen Multiangle Node
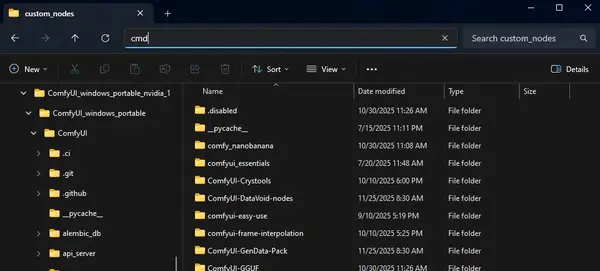
Navigate to the custom_nodes folder
Open your ComfyUI installation folder and go into the custom_nodes subfolder.
Open a terminal in that folder
On Windows: type cmd in the address bar and press Enter. On Mac: right-click and select "New Terminal at Folder".
Clone the Qwen Multiangle node repository
Run the command below in the terminal:
git clone https://github.com/jtydhr88/ComfyUI-qwenmultiangle.git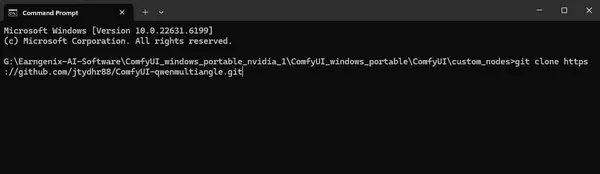
Restart ComfyUI
After cloning finishes, close and reopen ComfyUI. The Qwen Multiangle nodes will appear in the node search.
Download and Place the Required Models
Before you can run Qwen Multiangle, you need to download five model files and place each one in the correct folder inside your ComfyUI installation. The table below has direct download links and the exact destination folder for each file.
| Type | File | Folder | Download |
|---|---|---|---|
| Diffusion Model | qwen_image_edit_2511_bf16.safetensors | models/diffusion_models/ | ⬇ Get |
| Text Encoder | qwen_2.5_vl_7b_fp8_scaled.safetensors | models/text_encoders/ | ⬇ Get |
| LoRA — Multiangle | qwen-image-edit-2511-multiple-angles-lora.safetensors | models/loras/ | ⬇ Get |
| LoRA — Lightning (4-step) | Qwen-Image-Edit-2511-Lightning-4steps-V1.0-bf16.safetensors | models/loras/ | ⬇ Get |
| VAE | qwen_image_vae.safetensors | models/vae/ | ⬇ Get |
Folder Structure
Once all five files are downloaded, your ComfyUI models directory should look like this:
📂 ComfyUI/
└── 📂 models/
    ├── 📂 diffusion_models/
    │      └── qwen_image_edit_2511_bf16.safetensors
    ├── 📂 loras/
    │      ├── qwen-image-edit-2511-multiple-angles-lora.safetensors
    │      └── Qwen-Image-Edit-2511-Lightning-4steps-V1.0-bf16.safetensors
    ├── 📂 text_encoders/
    │      └── qwen_2.5_vl_7b_fp8_scaled.safetensors
    └── 📂 vae/
└── qwen_image_vae.safetensorsUsing the Qwen Multiangle Workflow
Download the ready-made workflow below, load it into ComfyUI, and you are ready to start generating multi-angle images.
Download and open the workflow
Download the JSON file above, then drag it into ComfyUI to load it automatically.
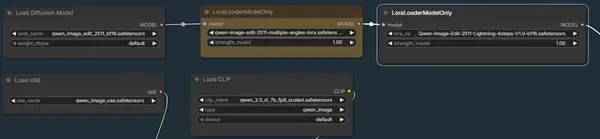
Select the correct models in the workflow
In the workflow, find each model node and select the files you downloaded. Match each node type to its corresponding file.
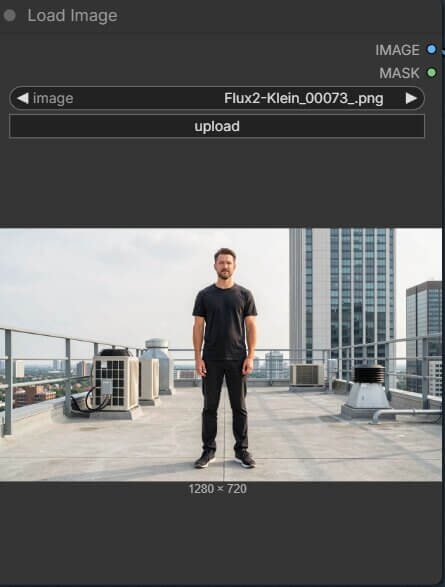
Add your reference image
In the Load Image node, click Choose File and upload the reference photo you want to generate angles from.
Set the camera angle in the Qwen Multiangle Camera node
Use the camera angle node to choose which view you want — front, back, side, three-quarter, and more. Watch the demo below to see how it works.
Click "Queue Prompt" to generate
ComfyUI will process your reference image through the Qwen Multiangle pipeline and output the new angle view. Run it multiple times with different angle settings for a full 360° set.
Tips and Troubleshooting
Images are not changing angles
Fix: Check the camera angle value in the Qwen Multiangle Camera node. An unchanged or incorrectly set angle will produce nearly identical outputs. Try a significantly different angle number.
Model errors when running the workflow
Fix: Make sure all five model files are in their correct folders (diffusion_models, text_encoders, loras, vae). The folder structure must match exactly. Refresh your browser after placing the files.
Missing node errors after loading the workflow
Fix: Restart ComfyUI after installing the node. If red errors still appear, go to Manager → "Install Missing Custom Nodes" to automatically install any additional dependencies.
Poor or inconsistent angle results
Fix: Use high-quality, well-lit reference images with a clear subject. Blurry or cluttered references produce inconsistent results. Portrait-style images with a plain or simple background work best.
Frequently Asked Questions
Join the discussion
Sign in to leave a comment or reply
No comments yet
Be the first to share your thoughts!