
ComfyUI Inpaint & Outpaint: What They Are and When to Use Them
Inpainting and outpainting give you precise, localized control over AI-generated images. Instead of regenerating an entire image to fix one detail or extend one side, you target exactly what needs to change. This guide covers what both techniques do, shows real before-and-after examples, and walks through the full setup and workflow steps for each.
What Is Inpaint in ComfyUI?
Inpainting fills or replaces parts of an existing image. You paint a mask over the area you want to change, write a prompt describing what should appear there, and AI regenerates only that masked region while leaving the rest of the image completely unchanged.
- Add a missing object to a scene
- Replace a detail — change a color, texture, or material
- Remove an unwanted element and fill in the background naturally
- Adjust furniture style, clothing, or small scene details
Inpaint Use Cases & Examples
Example 1 — Add a Missing Object
Adding a white ceramic mug to a desk scene where none existed.


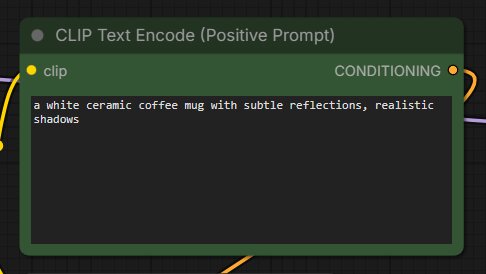
a white ceramic coffee mug with subtle reflections, realistic shadowsExample 2 — Replace a Detail
Changing a light wooden door to a dark brown door with a modern handle.
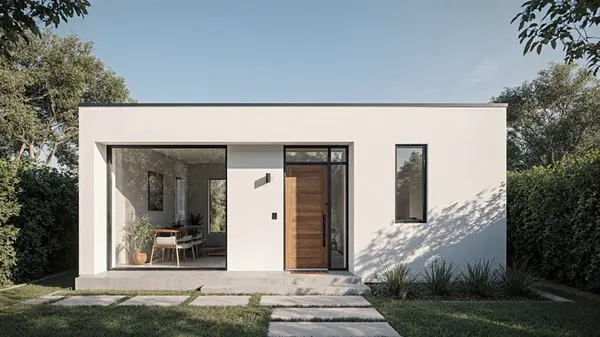
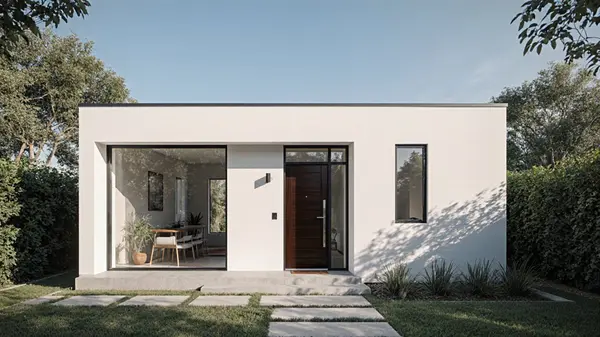
a dark brown wooden door with vertical panels and a modern metal handleExample 3 — Remove an Unwanted Object
Removing a red boat from a lake scene and filling in the water naturally.


clear lake water with gentle ripples, smooth natural surface,
no boats, no objects, no man-made elements,
continuous reflection of pine trees and mountains,
photorealistic, seamless blend with surrounding water
Example 4 — Change Furniture Style
Replacing a plain sofa with a dark green velvet sofa while keeping the rest of the room intact.
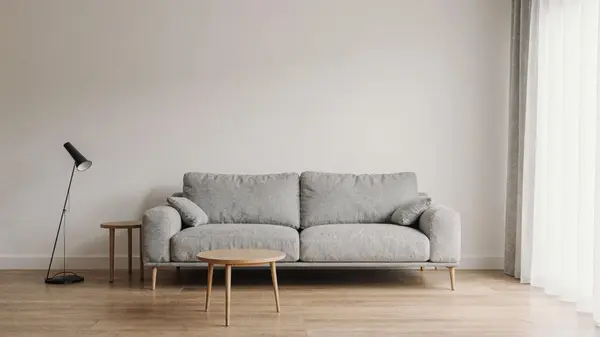
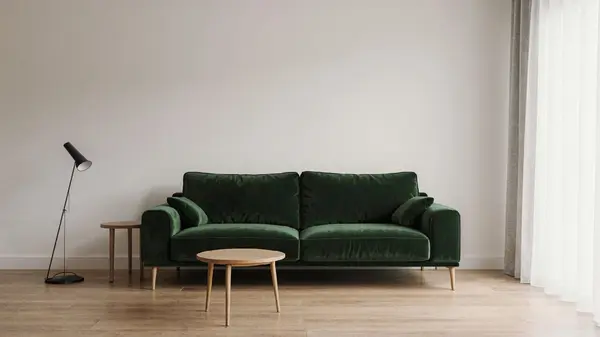
a dark green velvet sofa with plush cushions, realistic fabric textureInpaint Tips and Common Mistakes
- Mask only the area you want to change. A mask that is too large will alter more of the image than intended.
- Keep prompts short and specific. Name the object and describe its key visual properties — material, color, style.
- If the output looks wrong, try a smaller, more precise mask or change the random seed and regenerate.
- For object removal, describe the background that should replace the removed object — not just what is being removed.
How to Use Inpaint in ComfyUI
Step 1 — Download and Open the Workflow
Download the inpaint workflow JSON and open it in ComfyUI. If you see red nodes after importing, follow the steps below to fix them.
Step 2 — Fix Missing Nodes
If you see red nodes, open ComfyUI Manager and update ComfyUI first. This resolves most missing node issues automatically.
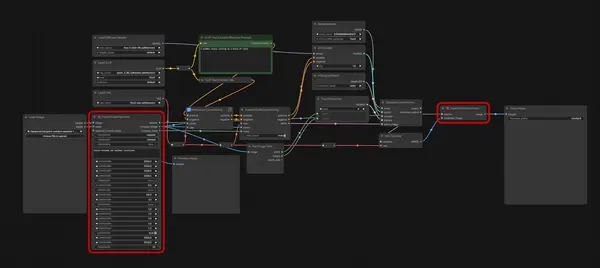
Fix the Inpaint Crop Red Node
If the Inpaint Crop node is still red after updating, you need to install it manually via the GitHub URL below.
Open ComfyUI Manager and click Install Missing Nodes for automatic installation.
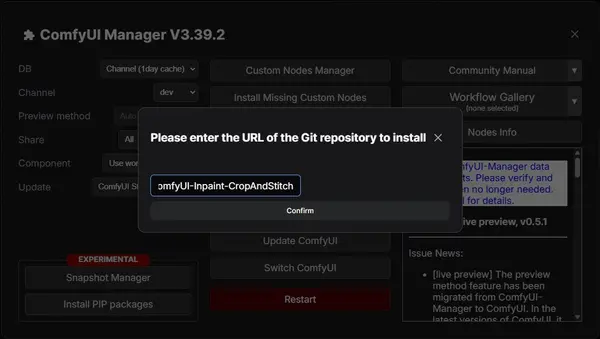
If the node is still red, click Install via Git URL in ComfyUI Manager.
Paste the GitHub URL above and click Install.
Restart ComfyUI. The red node should now be resolved.
Fix: Security Level Configuration Error
If clicking Install via Git URL produces the following error:
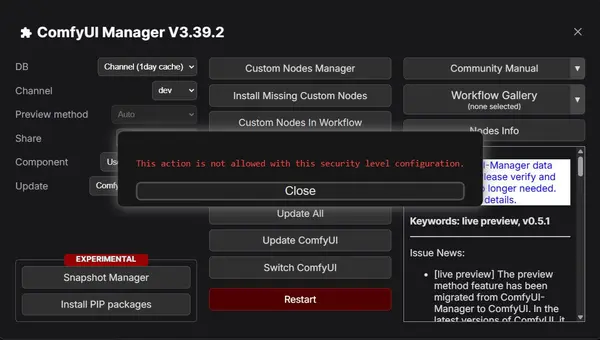
Open the Manager config file.
Navigate to ComfyUI_windows_portable\ComfyUI\user\__manager and open the file named config in Notepad.
Find the security_level line.
Look for the line that reads security_level = and change it to security_level = weak.
Save and restart ComfyUI.
Save the config file, restart ComfyUI, then return to Manager and install via Git URL again. Restart once more after installing.
security_level back to its original value in the config file for better security.Step 3 — Run an Inpaint Edit
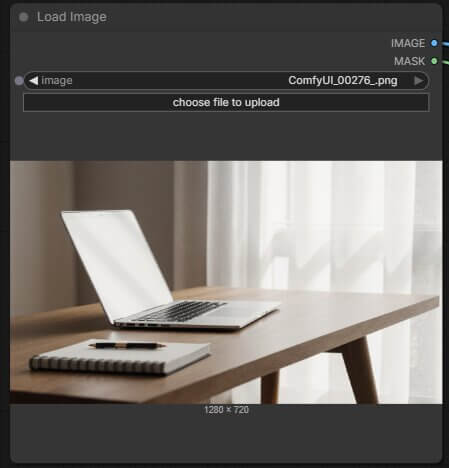
Load your image in the Load Image node.
Click the Load Image node and select the image you want to edit.
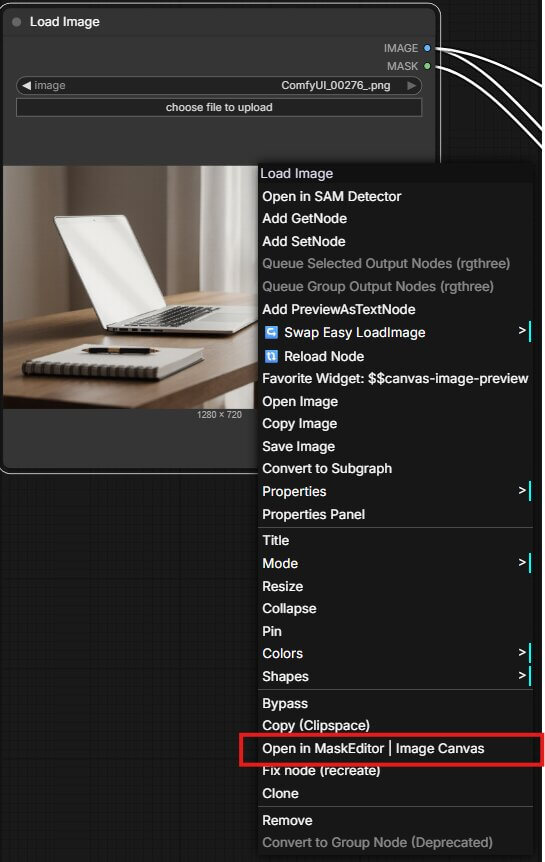
Open the Mask Editor.
Right-click the loaded image and choose "Open in mask editor | image canvas" to open the mask painting tool.
Paint your mask.
Use the brush to paint over the area you want to change. The white masked area is what the model will regenerate. Save the mask when done.
Add your prompt.
Write a clear, short prompt describing what should appear in the masked area. Be specific about the object, material, and style.
Click Run.
The output will show the masked area changed according to your prompt, while the rest of the image remains exactly as it was.
What Is Outpaint in ComfyUI?
Outpainting expands an image by generating new content beyond its original edges. You specify how many pixels to add to the left, right, top, bottom — or all sides at once — and the model fills in the new area based on your prompt and the visual context of the original image.
- Extend a landscape by adding more sky, trees, or terrain
- Add more room background around an architectural or interior shot
- Reveal objects or scene elements that were outside the original frame
- Expand a tight portrait crop to show more of the environment
Outpaint Use Cases & Examples
Example 1 — Extend a Landscape
Expanding a landscape image with additional trees and sky on the sides.
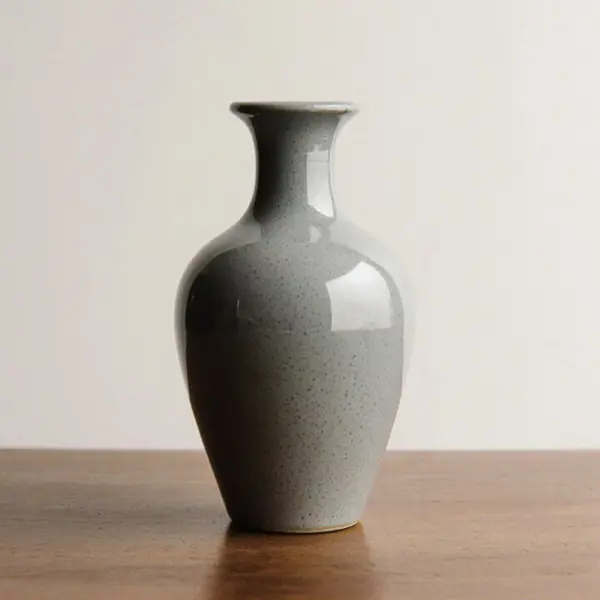
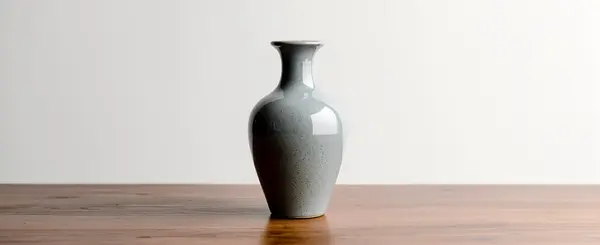
extend the landscape with trees and skyExample 2 — Add Room Background
Adding more of a room around a subject to provide wider scene context.
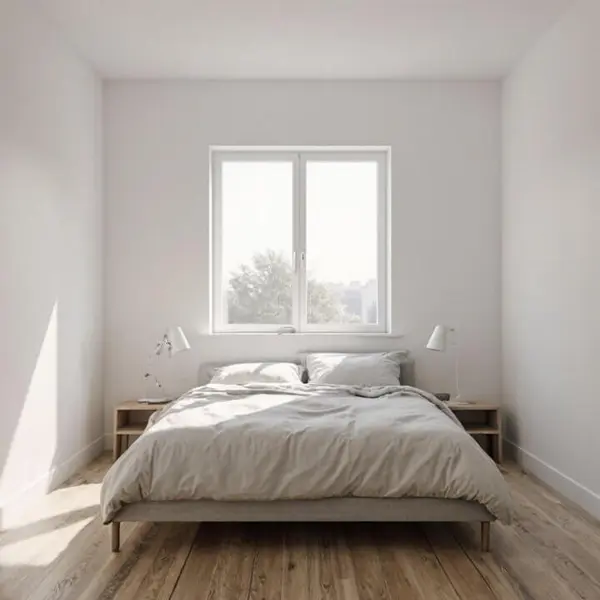
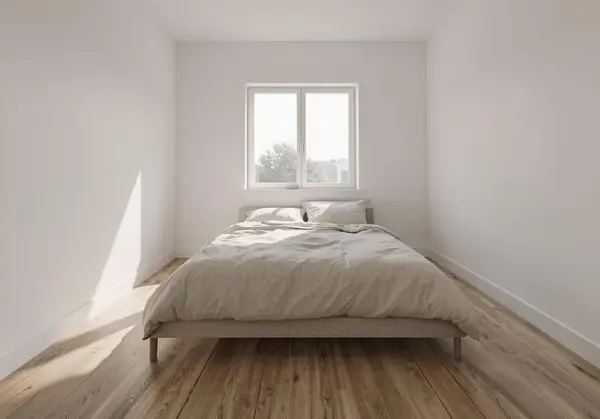
add more of the room in the backgroundExample 3 — Reveal Objects Outside the Frame
Expanding the canvas to reveal additional scene elements that were cropped out of the original.
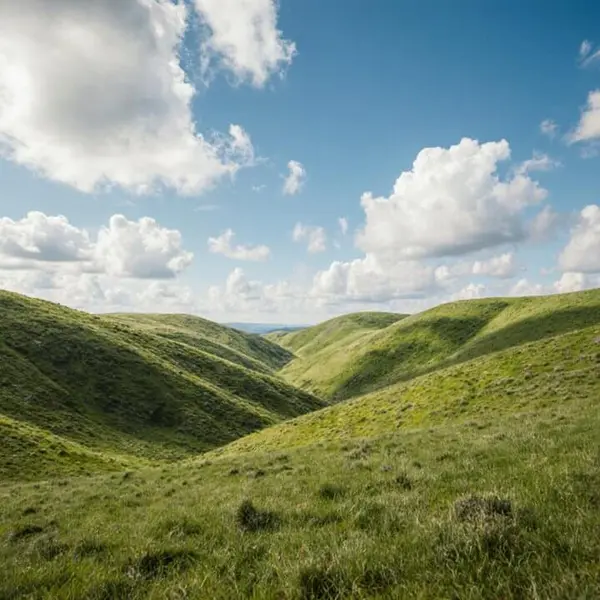
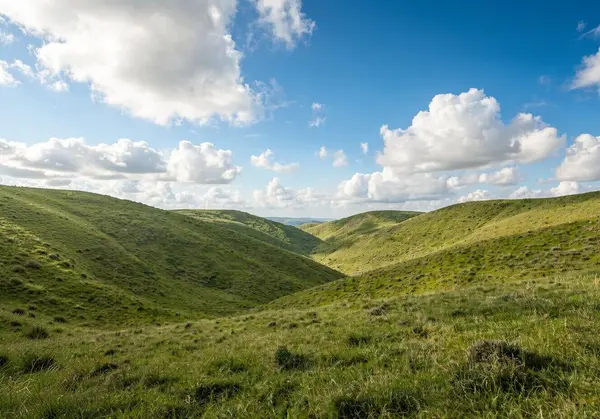
show more of the scene outside the frameExample 4 — Add Context to a Portrait
Expanding a close portrait to show the surrounding environment and give the subject more visual context.


expand the background for a natural contextOutpaint Tips and Common Mistakes
- Choose padding values that match your final output size. Adding too many pixels at once can make the extension look disconnected from the original.
- If the added area looks repetitive or generic, adjust your prompt to describe specific new elements — trees, furniture, architecture — instead of just "extend the scene".
- Try extending one side first to check how well the model matches the visual style, then extend the other sides.
- Outpaint works best when the original image has clear visual patterns the model can follow — strong textures, defined edges, and consistent lighting.
How to Use Outpaint in ComfyUI
Download the outpaint workflow JSON and open it in ComfyUI. The same model files used for inpaint are also used for outpaint — no additional downloads needed.
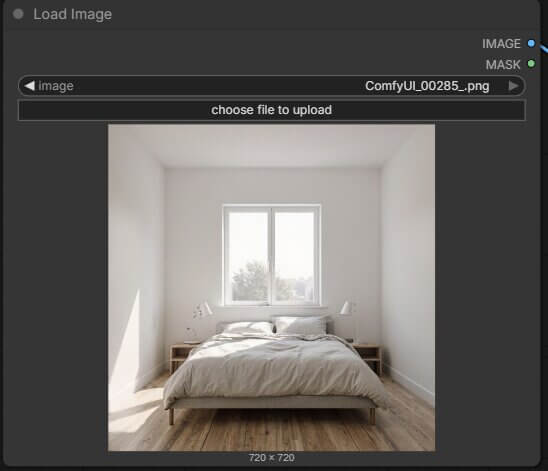
Load your image.
Click the Load Images node and select the image you want to expand.
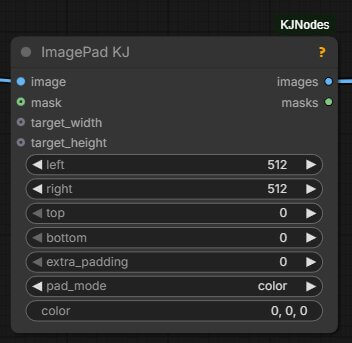
Set your padding values using the ImagesPad (Kj) node.
Enter the number of pixels to add on each side — left, right, top, and bottom can be set independently. For example, add 512 to the right side to extend the image rightward.
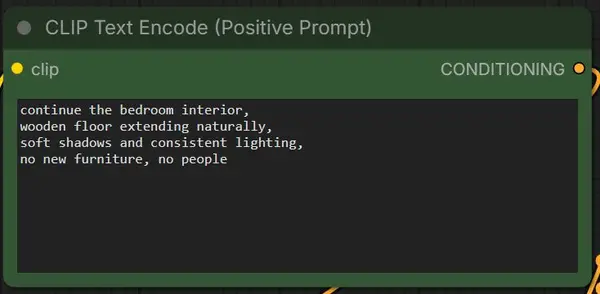
Add your prompt.
Write a prompt describing what should appear in the new expanded area. Mention specific elements that match the scene — not just generic descriptors.
Click Run and check the Save Images node.
The output image will be wider or taller depending on which sides you padded, with new content generated seamlessly from the original edges.
Model Download Links
Both the inpaint and outpaint workflows use the FLUX.2 Klein 9B model. Download all three files and place them in the correct folders inside your ComfyUI installation.
Folder structure:
📂 ComfyUI/
└── 📂 models/
    ├── 📂 diffusion_models/
    │      └── flux-2-klein-9b.safetensors
    ├── 📂 text_encoders/
    │      └── qwen_3_8b_fp8mixed.safetensors
    └── 📂 vae/
└── flux2-vae.safetensorsTroubleshooting
Quick Fixes
⚠ Red nodes after importing the workflow
Missing custom nodes or outdated ComfyUI. Open ComfyUI Manager, click Update ComfyUI, then Install Missing Nodes. For the Inpaint Crop node, see the manual install steps above using the ComfyUI-Inpaint-CropAndStitch GitHub URL.
⚠ Strange seams or visible edges after outpaint
Lower the padding amount and try extending one side at a time. Update the prompt to describe specific textures or elements that match the original image edge.
⚠ Mask not saving properly in the Mask Editor
Make sure to press Save inside the Mask Editor before closing. Confirm the mask node in the workflow displays the painted mask shape — if it appears blank, reopen and resave.
⚠ Inpainted area looks different in style from the rest of the image
Slightly reduce the inpaint strength or expand the mask slightly to include more surrounding context. A larger mask with feathered edges can help blend the edit more naturally.
Best Practices
- Use short, specific prompts. Avoid long or vague descriptions — describe the object or area with clear material, color, and style cues.
- Test at lower resolution first to iterate faster. Once happy with the edit, rerun at full resolution.
- For outpaint, always generate at the native resolution of the model (FLUX.2 Klein: 1024×1024 or larger for best quality).
Frequently Asked Questions
Join the discussion
Sign in to leave a comment or reply
No comments yet
Be the first to share your thoughts!