Earngenix Logo
Skip to main content

ComfyUI Workflow · Multi-Reference · 2026

FLUX.2 ComfyUI Workflow: Setup & Multi-Reference Guide

Unlock advanced AI image generation with FLUX.2 in ComfyUI. Use up to 10 reference images, generate photorealistic scenes, embed readable text, and maintain consistent characters. Free workflows included.

By Earngenix Team12 min read
FLUX.2 ComfyUI workflow overview — multi-reference image generation combining product shots, style references, and photorealistic output

FLUX.2 ComfyUI Workflow: Features, Setup, and Multi-Reference Generation

Quick answer: FLUX.2 is the latest generation model for ComfyUI, introducing multi-reference generation (up to 10 images per run), significantly sharper photorealism, readable text inside images, and better world-physics reasoning. This guide covers setup, required models, and how to use the multi-reference workflow.

FLUX.2 brings a major upgrade for AI image creators using ComfyUI. Whether you are producing brand visuals, character-consistent comics, product photography, or UI mockups with embedded text — FLUX.2 delivers better results with less iteration. This guide walks through the full setup and shows you how to unlock the most powerful feature: multi-reference generation.

What's New in FLUX.2 for ComfyUI?

FLUX.2 introduces four major improvements over previous FLUX models. Each one directly affects the quality and versatility of your generated images.


Multi-Reference Generation — Up to 10 Images

Use up to 10 reference images in a single workflow. Achieve consistent characters, product designs, or art styles across all outputs. Ideal for brand visualizations, comic series, and any project requiring visual consistency across multiple scenes.

FLUX.2 ComfyUI multi-reference generation — combining multiple reference images into one consistent AI-generated output

Enhanced Detail & Photorealism

FLUX.2 is engineered for sharper textures, more realistic lighting, and precision detail. Especially effective for photorealistic renders, product photography, architectural visualization, and any content where fine detail matters.

FLUX.2 ComfyUI photorealism output — showing sharp textures, realistic lighting, and detailed portrait photography generated by FLUX.2

Advanced Text Rendering

FLUX.2 generates clear, readable text directly inside images — something previous AI models struggled with. Ideal for UI mockups, infographics, social media posts with typography, concept art with labels, and any creative work that needs legible embedded text.

FLUX.2 ComfyUI text rendering output — showing a UI dashboard with clear readable text and typography generated directly by FLUX.2

Deeper World Knowledge

FLUX.2's improved understanding of real-world context, physics, and spatial reasoning produces more convincing scenes. Objects follow correct weight distribution, shadows appear where physics dictates, and spatial relationships between elements look natural.

FLUX.2 ComfyUI world knowledge output — photorealistic park scene with physically correct shadows, object placement, and natural spatial relationships

How to Set Up the FLUX.2 ComfyUI Workflow

Follow these four steps to get FLUX.2 running in ComfyUI. The workflow uses the SageAttention node for faster generation — you can install it or bypass it if needed.

Step 1 — Update ComfyUI to the Latest Version

FLUX.2 requires a recent ComfyUI version. Update before loading the workflow to avoid compatibility errors.

Run the ComfyUI update script.

Open ComfyUI_windows_portable/update/ and double-click update_comfyui to update the installation.
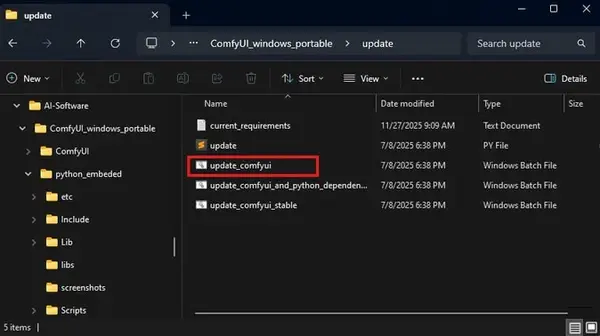
ComfyUI update folder — running the update_comfyui script to update ComfyUI to the latest version before installing FLUX.2
Run update_comfyui from the update folder to get the latest ComfyUI version.

Update all nodes via ComfyUI Manager.

After launching ComfyUI, open Manager and click "Update ComfyUI" and then "Update All" to update all installed custom nodes.
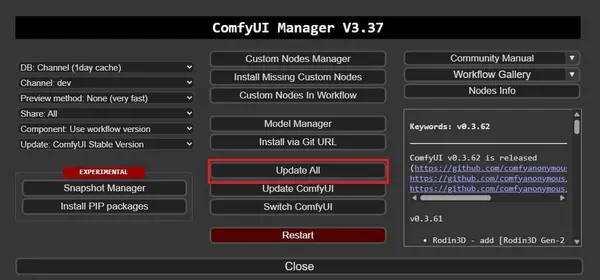
ComfyUI Manager showing the Update ComfyUI and Update All buttons for updating nodes before running FLUX.2 workflow
Use ComfyUI Manager to update all nodes after updating ComfyUI.
💡 Tip: If you have not installed ComfyUI Manager yet, do that first — it makes managing nodes and updates much easier. See the ComfyUI Manager installation guide.

Step 2 — Download the FLUX.2 Workflow

Download the ready-to-use FLUX.2 workflow JSON file. This is the standard single-generation workflow — the multi-reference workflow is available separately in the multi-reference section below.

Step 3 — Download Required FLUX.2 Models

Download the three required model files and place them in the correct ComfyUI model subfolders. All files are available on Hugging Face from the Comfy-Org repository.

models / diffusion_models

Place files in this folder structure:

📂 ComfyUI/ └── 📂 models/ ├── 📂 text_encoders/ │ ├── mistral_3_small_flux2_fp8.safetensors │ └── mistral_3_small_flux2_bf16.safetensors ├── 📂 diffusion_models/ │ └── flux2_dev_fp8mixed.safetensors └── 📂 vae/ └── flux2-vae.safetensors

Step 4 — Load the FLUX.2 Workflow and Run

Open ComfyUI and load the workflow.

Click Load in ComfyUI and select the flux2_comfyui_workflow.json file you downloaded.

Handle the SageAttention node.

This workflow uses the SageAttention node for faster generation. If you have it installed it will work automatically. If not, right-click the node and choose Bypass to skip it. See the SageAttention installation guide to install it.

Write your prompt and click Run.

Add your text prompt in the conditioning node and run the workflow. Output will appear in the Save Images node.

Example Run: Generating with FLUX.2

Here is an example showing how FLUX.2 handles world-physics reasoning — correctly placing shadows, weight distribution, and realistic light reflections.

Prompt used:

A bright, photorealistic park with a wooden bench under a tree. A backpack rests on the bench, straps falling naturally. A water bottle sits upright next to it, reflecting light realistically. Sunlight filters through leaves, creating soft patterned shadows on the ground. A bicycle leans against a tree with correct weight distribution and shadow placement

FLUX.2 ComfyUI example output — photorealistic park scene with backpack, bicycle, and dappled sunlight showing correct world physics and shadow placement
FLUX.2 output: the model correctly places shadows, handles object weight distribution, and generates realistic light filtering through leaves.

Using Multi-Reference Generation in FLUX.2

Multi-reference lets you provide up to 10 images as style or subject references in a single workflow run. The model combines visual elements from all references with your prompt to produce highly consistent outputs — ideal for product photography, character consistency, and brand work.

How to Use the Multi-Reference Workflow

Enable all reference image nodes.

Select the reference image nodes in ComfyUI. Press Ctrl + B or right-click and choose Bypass to toggle any disabled nodes. Make sure all reference nodes you want to use are active (not bypassed).
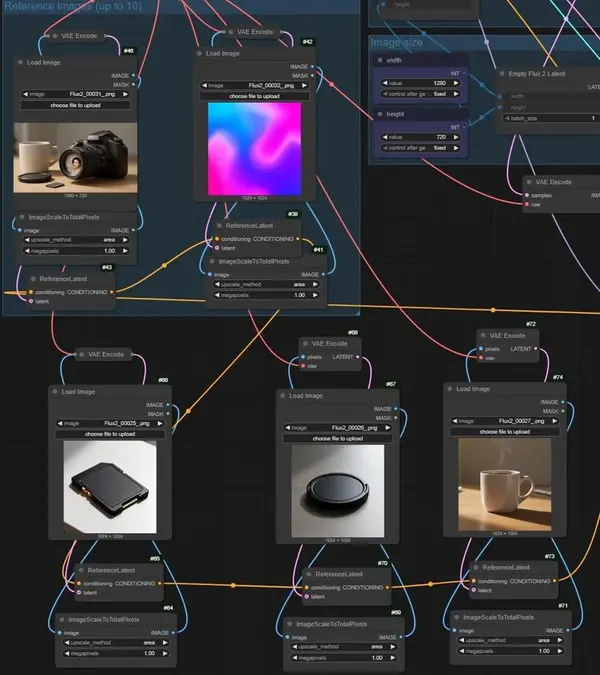
ComfyUI FLUX.2 multi-reference workflow — showing reference image nodes that need to be enabled before running the workflow
Enable all reference image nodes before running the multi-reference workflow.

Upload your reference images.

Add your reference photos to the designated Load Image nodes inside the workflow. You can use up to 10 reference images.

Adjust your prompt to match the references.

Write a prompt that describes how the references should be combined or what scene you want. Describing elements from the reference images in your prompt improves consistency.

Set output size and run.

Use 1024×1024 or larger for optimal quality. Click Run — the output will combine character, style, and detail from all your reference images.

Multi-Reference Example

Reference images used:

Reference image 1 for FLUX.2 multi-reference — product model image
Ref 1 — Model
Reference image 2 for FLUX.2 multi-reference — card design
Ref 2 — Card
Reference image 3 for FLUX.2 multi-reference — cover design
Ref 3 — Cover
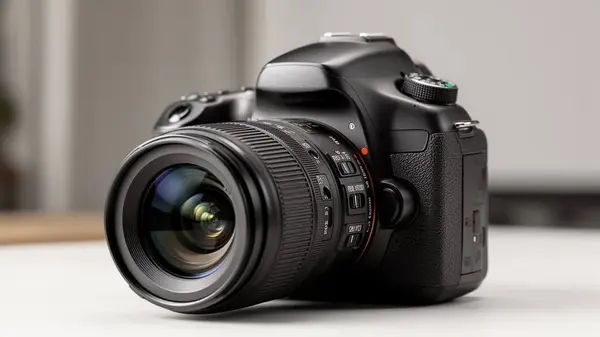
FLUX.2 multi-reference result — camera with combined neon elements from all three reference images
Multi-reference output
Additional reference image for FLUX.2 multi-reference workflow — product grid layout
Additional reference image for FLUX.2 multi-reference workflow — coffee cup product shot

Prompt used:

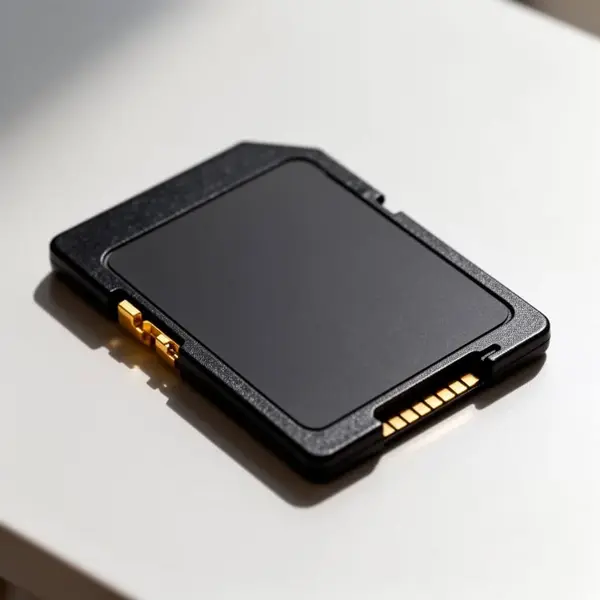
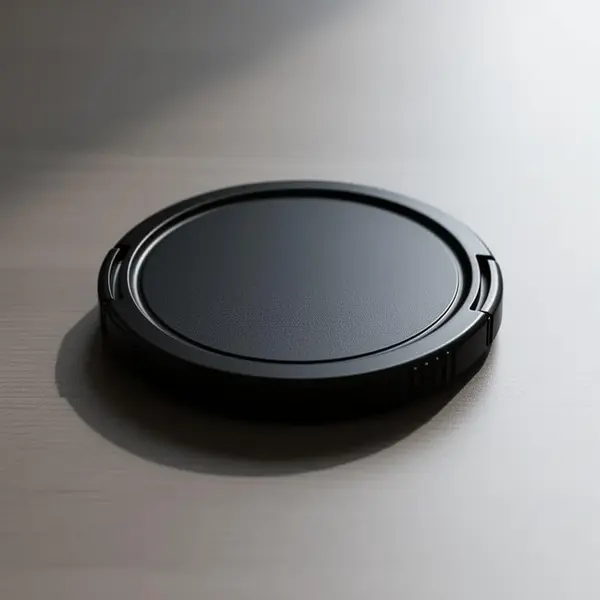
Add soft neon glow from the background onto the camera, girl image on the lens, and nearby objects. Let subtle reflections of electric blue, hot pink, and purple gently highlight the edges of the camera body, lens ring, memory card, lens cap, and coffee cup. Keep the glow soft and atmospheric, not overpowering, matching the neon gradient background while keeping all main details clear and realistic.
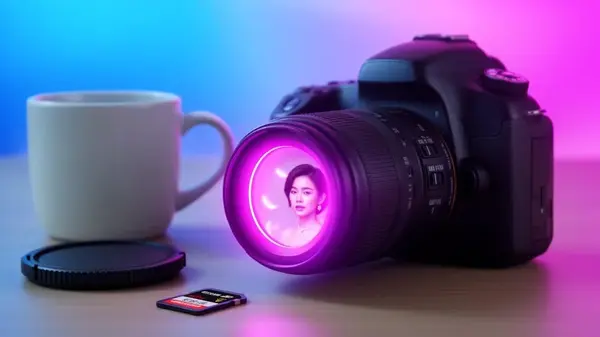
FLUX.2 ComfyUI multi-reference final output — camera product shot with neon glow, girl reflected in lens, coffee cup, all elements blended from multiple reference images
Final multi-reference output: FLUX.2 blends neon glow, character, and product elements from all reference images into one cohesive scene.

Tips & Troubleshooting

Use the recommended text encoder for fastest generation

The mistral_3_small_flux2_fp8.safetensors encoder is the fastest and most robust option. Use this unless you specifically need the bf16 version for quality comparisons.

Verify all model files are in the correct subfolders

Place the text encoder in text_encoders/, the diffusion model in diffusion_models/, and the VAE in vae/. Using the wrong folder is the most common setup error.

Keep ComfyUI and the workflow updated

FLUX.2 is actively developed. Run Update All in ComfyUI Manager regularly to get compatibility fixes and performance improvements.

For multi-reference: use consistent style references

Multi-reference blending works best when reference images share consistent lighting, color palette, or art style. Mixing very different styles can produce inconsistent results.

Blank output or errors on run

Double-check that all three model files are downloaded and correctly placed. Also verify all node connections in the workflow are intact — a disconnected node is often the cause of blank outputs.

⚠️ Note: This workflow uses the SageAttention node. If you see a red node error for SageAttention, either bypass the node (right-click → Bypass) or follow the SageAttention + Triton installation guide to install it for faster generation speeds.

Frequently Asked Questions

FLUX.2 introduces multi-reference image generation (up to 10 reference images per workflow), significantly improved photorealism and texture detail, advanced text rendering that produces clear readable typography directly in images, and deeper world knowledge for better spatial reasoning and object physics.

To set up FLUX.2 in ComfyUI: first update ComfyUI to the latest version, download the FLUX.2 workflow JSON file, download the required models (text encoder, diffusion model, and VAE) from Hugging Face and place them in the correct ComfyUI model folders, then load the workflow JSON in ComfyUI and run it.

The FLUX.2 ComfyUI workflow requires three model files: a text encoder (mistral_3_small_flux2_fp8.safetensors is recommended for speed), a diffusion model (flux2_dev_fp8mixed.safetensors), and a VAE (flux2-vae.safetensors). All are available on Hugging Face from the Comfy-Org repository.

Multi-reference generation in FLUX.2 lets you upload up to 10 reference images as style or subject guides. The model combines visual elements from all references with your text prompt to produce consistent outputs — ideal for brand work, character consistency, and product visualization. Use the dedicated multi-reference workflow JSON for this feature.

The FLUX.2 workflow uses the SageAttention node for faster generation speeds. SageAttention is optional — if you do not have it installed, you can bypass the node in the workflow. However, installing SageAttention is recommended for significantly faster inference, especially on RTX 30xx and 40xx GPUs.

Discussion

Join the discussion

Sign in to leave a comment or reply

💬

No comments yet

Be the first to share your thoughts!